Quartus® Prime Pro Edition User Guide: Platform Designer
A newer version of this document is available. Customers should click here to go to the newest version.
Visible to Intel only — GUID: led1425334042458
Ixiasoft
Visible to Intel only — GUID: led1425334042458
Ixiasoft
3.3.9. Add Signals and Interfaces in the Platform Designer Component Editor
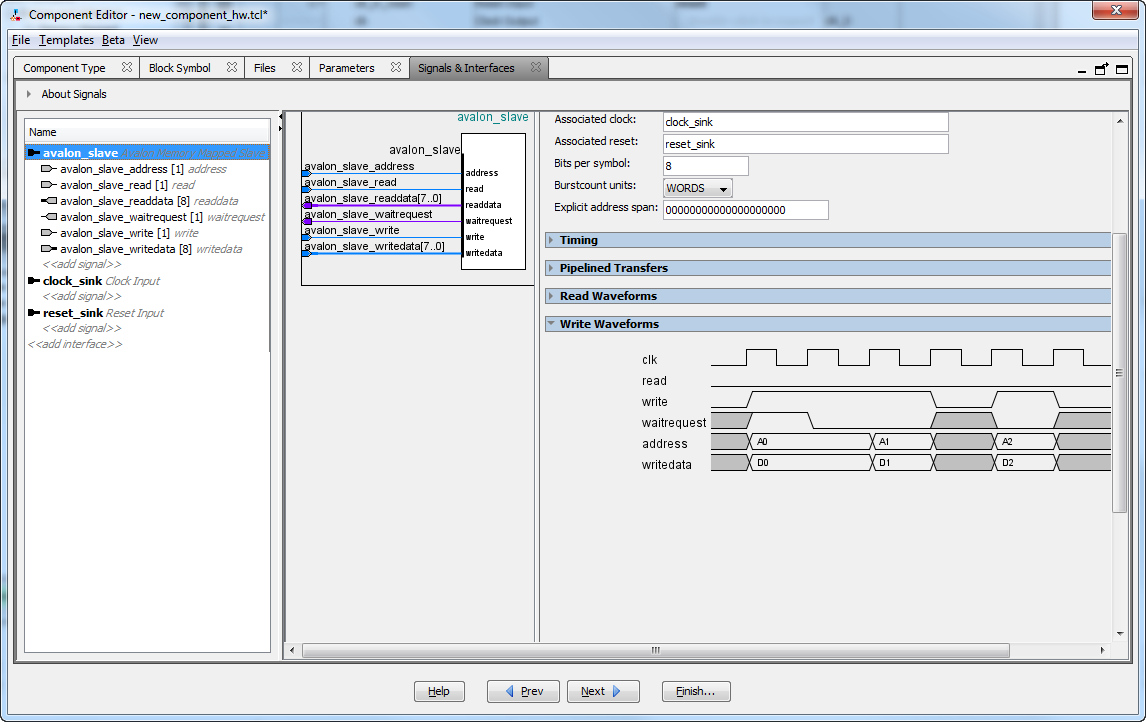
As you select interfaces and associated signals, you can customize the parameters. Messages appear as you add interfaces and signals to guide you when customizing the component. In the parameter editor, a block diagram displays for each interface. Some interfaces display waveforms to show the timing of the interface. If you update timing parameters, the waveforms update automatically.
- In Platform Designer, click New Component in the IP Catalog.
- In the Platform Designer Component Editor, click the Signals & Interfaces tab.
- To add an interface, click <<add interface>> in the left pane.
A drop-down list appears where you select the interface type.
- Select an interface from the drop-down list.
The selected interface appears in the parameter editor where you can specify its parameters.
- To add signals for the selected interface click <<add signal>> below the selected interface.
- To move signals between interfaces, select the signal, and then drag it to another interface.
- To rename a signal or interface, select the element, and then press F2.
- To remove a signal or interface, right-click the element, and then click Remove.
Alternatively, to remove an signal or interface, you can select the element, and then press Delete. When you remove an interface, Platform Designer also removes all of its associated signals.Figure 138. Platform Designer Signals & Interfaces tab
