Edge Insights for Autonomous Mobile Robots (EI for AMR) Developer Guide
Visible to Intel only — GUID: GUID-8A21CD76-D465-47AE-BDF0-31121DD92682
Visible to Intel only — GUID: GUID-8A21CD76-D465-47AE-BDF0-31121DD92682
Run the Edge Insights for Autonomous Mobile Robots Container in KVM Guest
Run the Sample Application
Check if your CPU supports hardware virtualization using the following command. Output greater than zero indicates support is present:
egrep -c '(vmx|svm)' /proc/cpuinfo
NOTE:If the output is not greater than zero, then reboot your server. Modify BIOS Settings > Security features > Enable Virtualization TechnologyCheck if Kernel-based Virtual Machine (KVM) acceleration can be used with the commands:
sudo apt install -y cpu-checker
kvm-ok
INFO: /dev/kvm exists
KVM acceleration can be used
Install KVM in Ubuntu* 20.04 using the following commands:
NOTE:- If the PAM configuration page is displayed when installing the following packages, click Yes.
If Configuring openssh-server page is displayed when installing the following packages, select keep the local version currently installed.
sudo apt update
sudo apt install -y qemu qemu-kvm libvirt-daemon libvirt-daemon-system libvirt-clients bridge-utils virt-manager virtinst openssh-server net-tools
sudo adduser $USER libvirt
sudo adduser $USER kvm


# Check if libvirtd is active
sudo systemctl status libvirtd


# If libvirtd is not active use
sudo systemctl enable --now libvirtd
Reboot the host:
sudo reboot -fn
After the reboot, verify that libvirtd is active.
sudo systemctl status libvirtd
# If libvirtd is not active use
sudo systemctl enable --now libvirtd
Create the KVM bridge:
Create a new bridge XML file:
vim br_kvm.xml
Add bridge details to br_kvm.xml:
<network>
   <name>br_kvm</name>
   <forward mode='nat'>
     <nat>
       <port start='1024' end='65535'/>
     </nat>
   </forward>
   <bridge name='br10' stp='on' delay='0'/>
   <ip address='192.168.124.1' netmask='255.255.255.0'>
     <dhcp>
       <range start='192.168.124.50' end='192.168.124.200'/>
     </dhcp>
   </ip>
 </network>
Define and start br_kvm network using the following commands:
sudo virsh net-define br_kvm.xml
sudo virsh net-start br_kvm
sudo virsh net-autostart br_kvm


# Check if autostart is enabled for br_kvm
sudo virsh net-list --all


Name      State      Autostart   Persistent
 br_kvm      active     yes         yes
 default   active     yes         yes


# Confirm bridge creation and IP address
ip addr show dev br10
13: br10: <BROADCAST,MULTICAST,UP,LOWER_UP> mtu 1500 qdisc noqueue state UP group default qlen 1000
    link/ether 52:54:00:21:ff:4f brd ff:ff:ff:ff:ff:ff
    inet 192.168.124.1/24 brd 192.168.124.255 scope global br10
       valid_lft forever preferred_lft forever
Create KVM with Ubuntu 20.04.
Download the Ubuntu 20.04 desktop .iso image from <releases.ubuntu.com/20.04/>.
Open virt-manager. Click on File > New VM > Select Local install media (ISO image or CDROM). Choose the .iso file downloaded and choose the operating system to be installed.
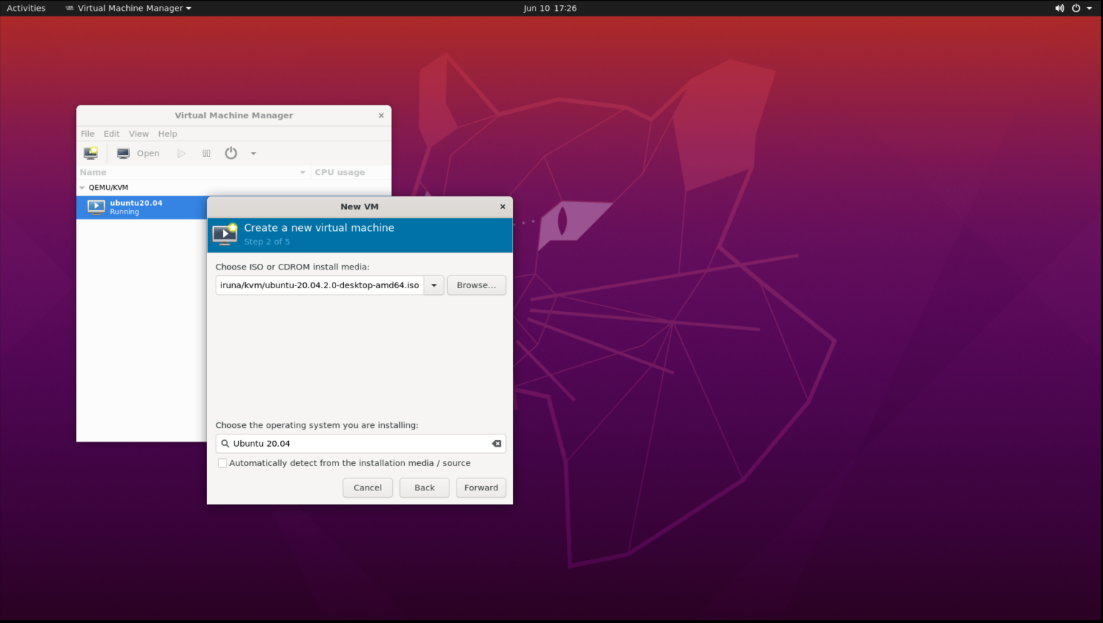
Select the CPUs and Memory. For example: Memory: 4096, CPUs: 2
Add minimum 100 GB for the virtual machine storage.
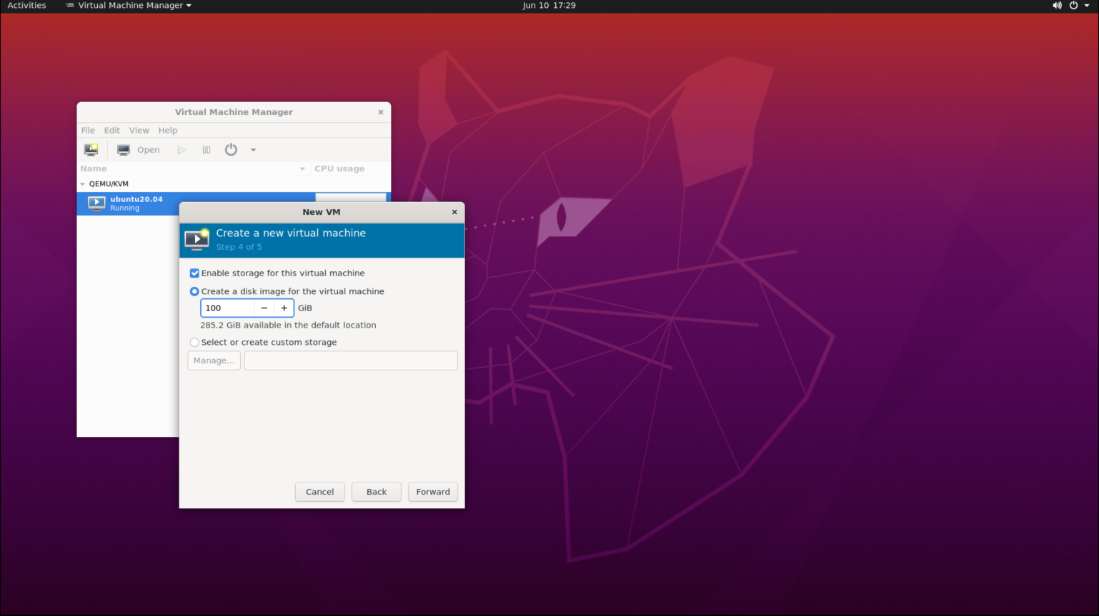
Select the Virtual Network created above for Network Preferences.
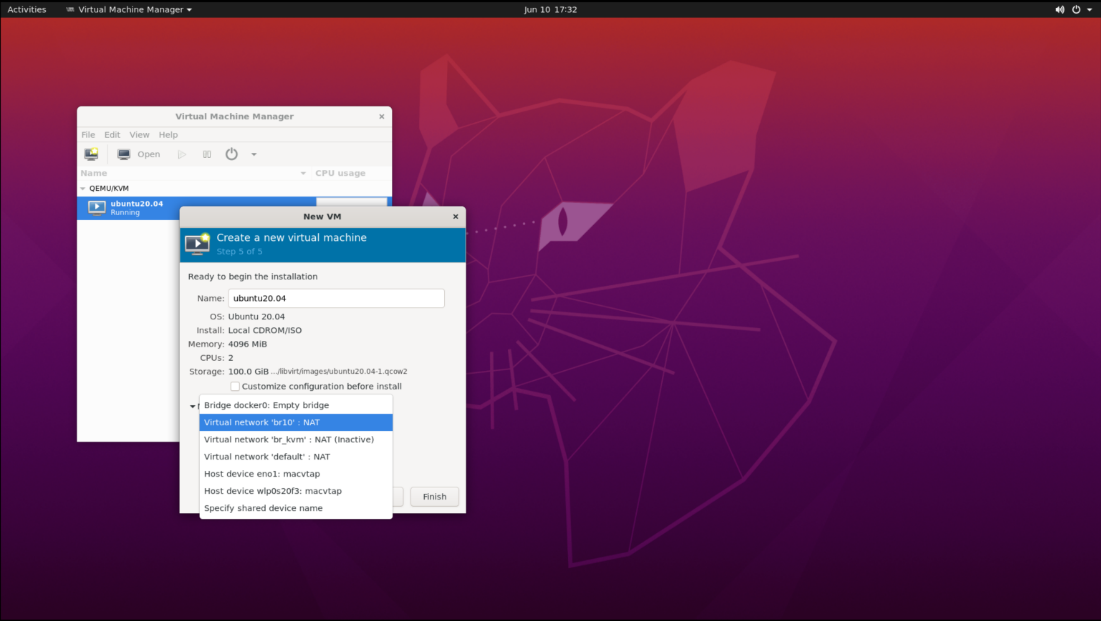
Click Finish and start the Ubuntu 20.04 installation.
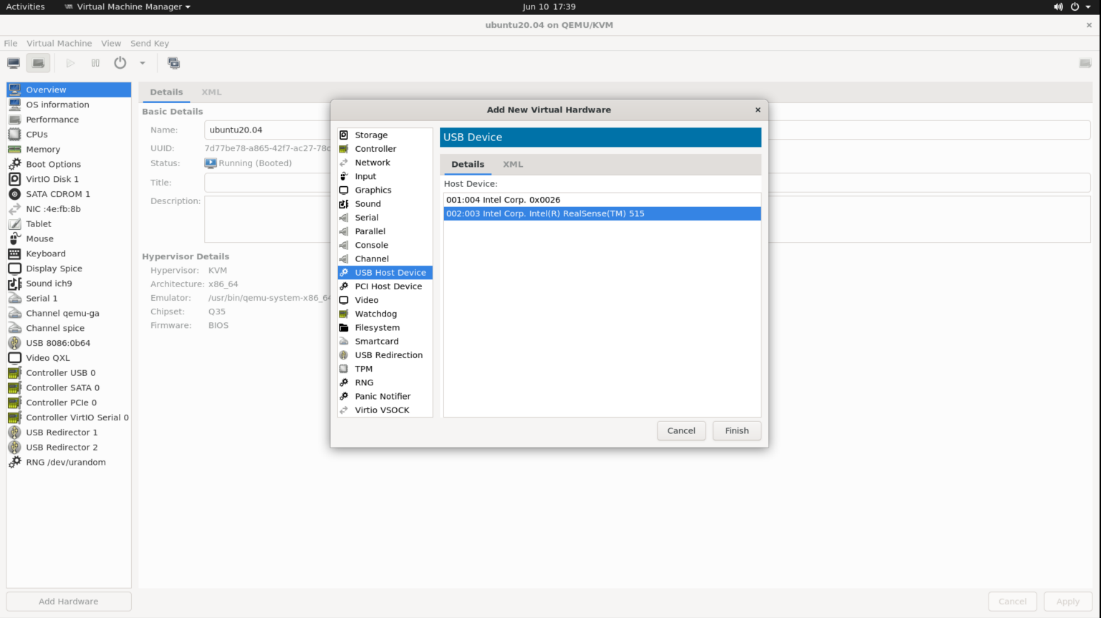
After Ubuntu Installation, add the Intel® RealSense™ camera to the VM by clicking on Show virtual hardware details in Virt Manager > Add Hardware > Select USB Host Device and Select the RealSense Camera.
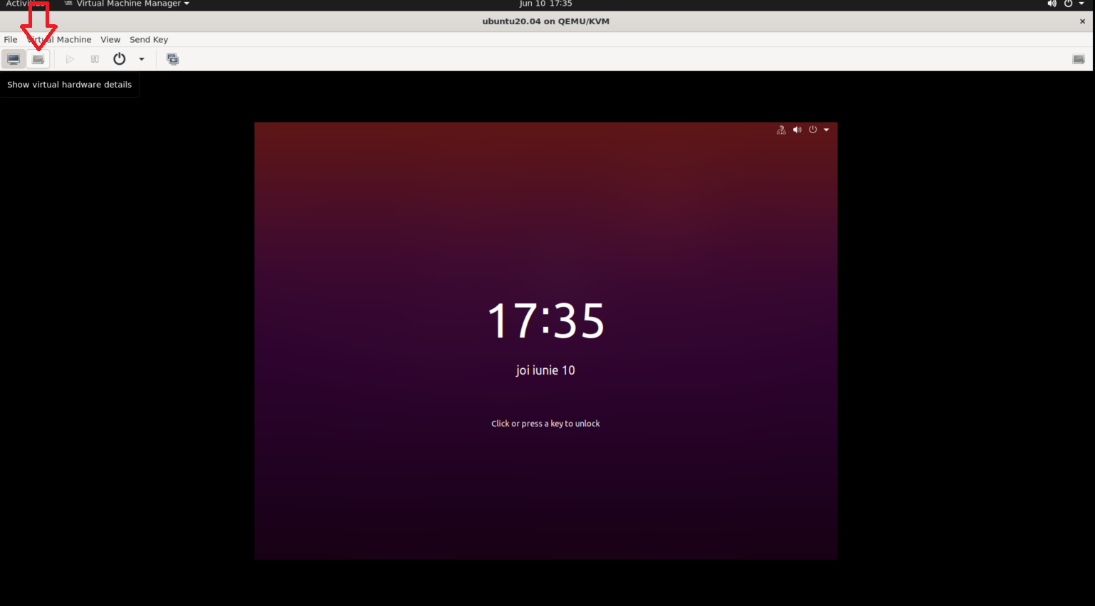
Install Edge Insights for Autonomous Mobile Robots using the steps in Get Started Guide for Robots.
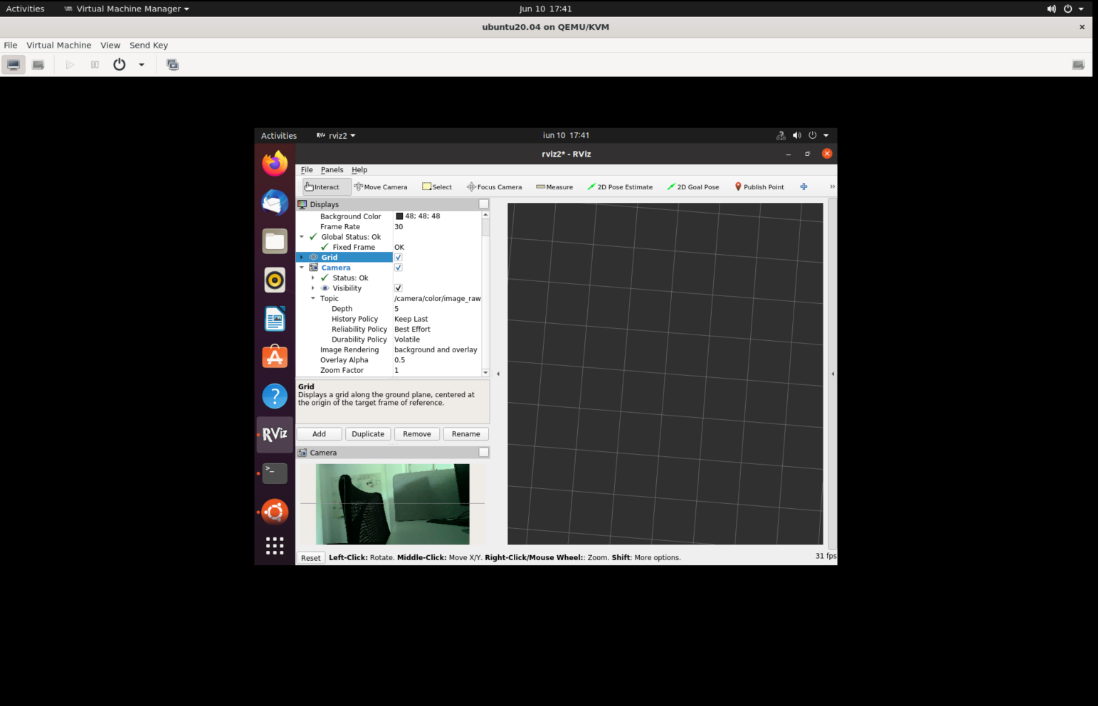
NOTE:If your system is behind a proxy, you must configure the proxy settings.Run the Intel® RealSense™ ROS 2 sample application inside the Docker container using the steps from Run an Intel® RealSense™ ROS 2 Sample Application in Docker* Container.
Troubleshooting
If the following error is encountered:
Error connecting to graphical console:
Error opening Spice console, SpiceClientGtk missing
Install gir1.2-spiceclientgtk-3.0 with the command:
sudo apt-get install -y gir1.2-spiceclientgtk-3.0
For general robot issues, go to: Troubleshooting for Robot Tutorials.