Edge Insights for Autonomous Mobile Robots (EI for AMR) Developer Guide
Launch Cartographer with 2D LIDAR
This tutorial demonstrates how Cartographer can work with different types of 2D LIDAR including:
Slamtec* RPLIDAR A3 2D LIDAR
Connect a Slamtec* RPLIDAR A3 2D LIDAR to your system.
Add a new udev rule.
Create a new file:
sudo nano /etc/udev/rules.d/rplidar.rules
Add these lines:
# set the udev rule, make the device_port be fixed by rplidar
#
KERNEL=="ttyUSB*", ATTRS{idVendor}=="10c4", ATTRS{idProduct}=="ea60", MODE:="0777", SYMLINK+="rplidar"
Reload the rules:
sudo udevadm control --reload-rules
sudo udevadm trigger
Run the Sample Application.
Go to the AMR_containers folder:
cd <edge_insights_for_amr_path>/Edge_Insights_for_Autonomous_Mobile_Robots_<version>/AMR_containers
Prepare the docker_compose environment:
source 01_docker_sdk_env/docker_compose/05_tutorials/config/docker_compose.source
Start the Docker* container for the Slamtec* RPLIDAR:
CHOOSE_USER=eiforamr docker-compose -f 01_docker_sdk_env/docker_compose/01_amr/amr-sdk.all.yml run rplidar bash
Start the Slamtec* RPLIDAR ROS2 node:
export ROS_DOMAIN_ID=33
ros2 launch rplidar_ros2 view_rplidar_a3_launch.py &
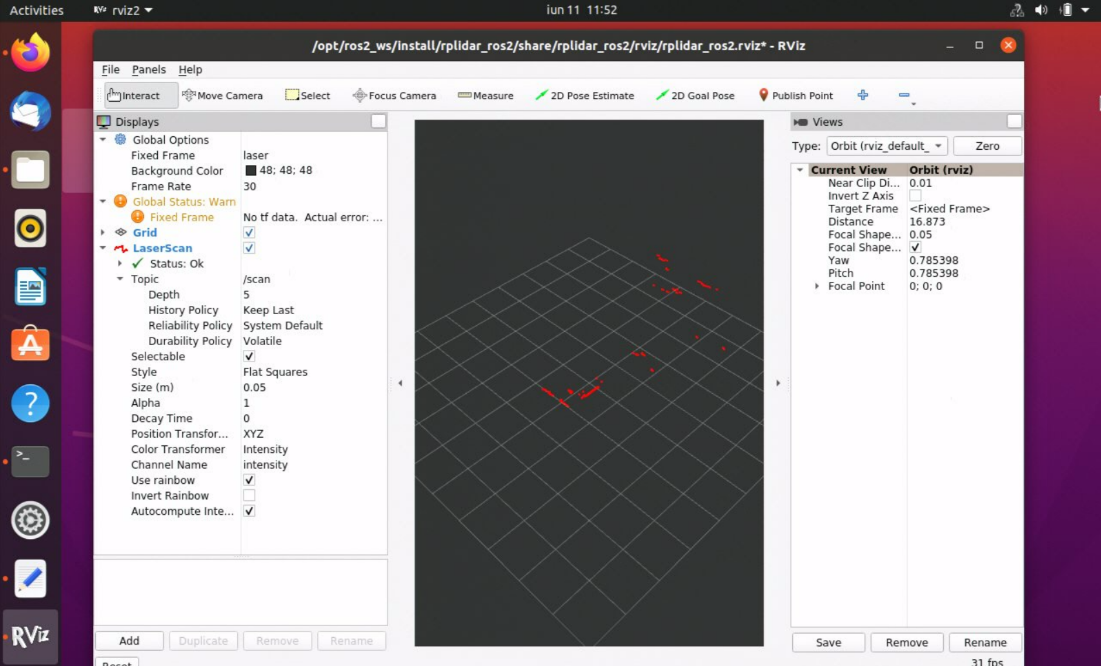 NOTE:Use a random number that is unique to your network for the ROS_DOMAIN_ID. This will ensure you share the correct topics between Docker images.
Start the Cartographer Docker container and start the Cartographer node.
Open a new terminal on the same system:
cd <edge_insights_for_amr_path>/Edge_Insights_for_Autonomous_Mobile_Robots_<version>/AMR_containers
Prepare the environment:
source 01_docker_sdk_env/docker_compose/05_tutorials/config/docker_compose.source
Open the Cartographer Docker image:
CHOOSE_USER=eiforamr docker-compose -f 01_docker_sdk_env/docker_compose/01_amr/amr-sdk.all.yml run cartographer bash
Open the Cartographer Docker node:
export ROS_DOMAIN_ID=33
source /ros_entrypoint.sh
ros2 run cartographer_ros cartographer_node -configuration_directory /opt/ros/foxy/share/cartographer/configuration_files/ -configuration_basename rplidar_a3.lua
NOTE:Use the same number for ROS_DOMAIN_ID as the one used for the LIDAR container. This will allow the two Docker images to share ros2 topics.
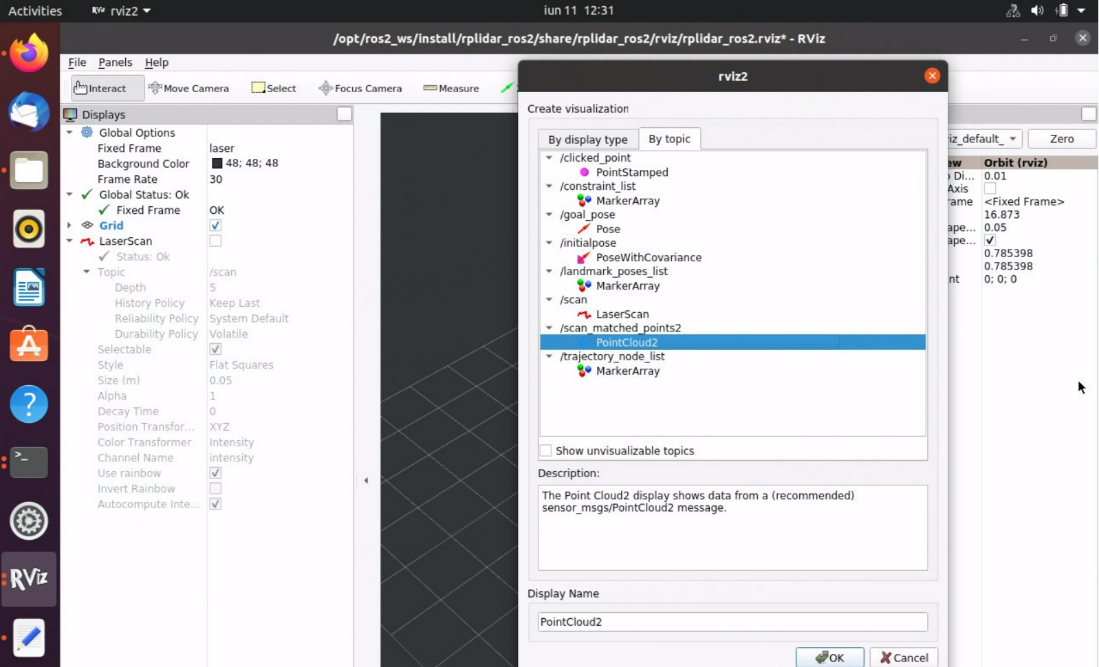
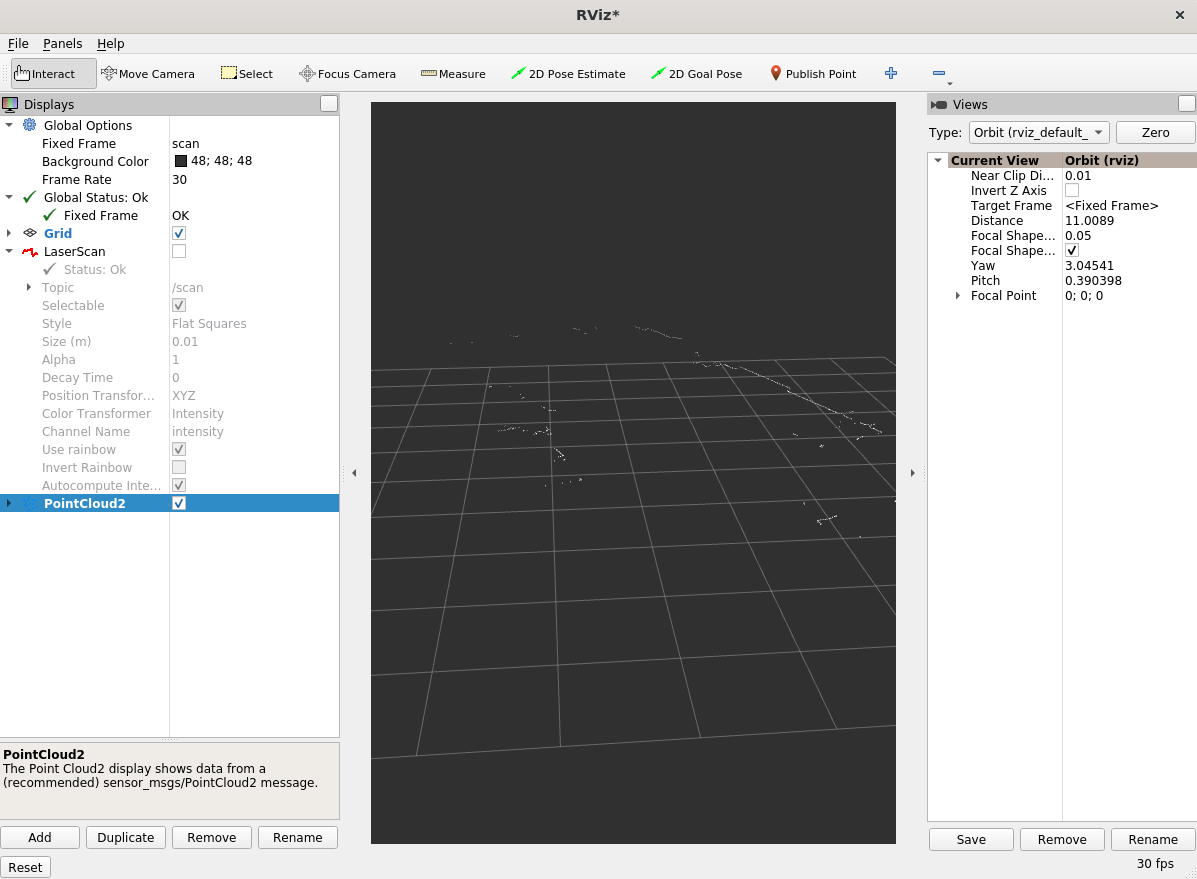
Go to rviz2 that is already open and uncheck LaserScan on the left side.
Click Add in lower left corner, click By topic and add PointCloud2 from the /scan_matched_points2 topic.
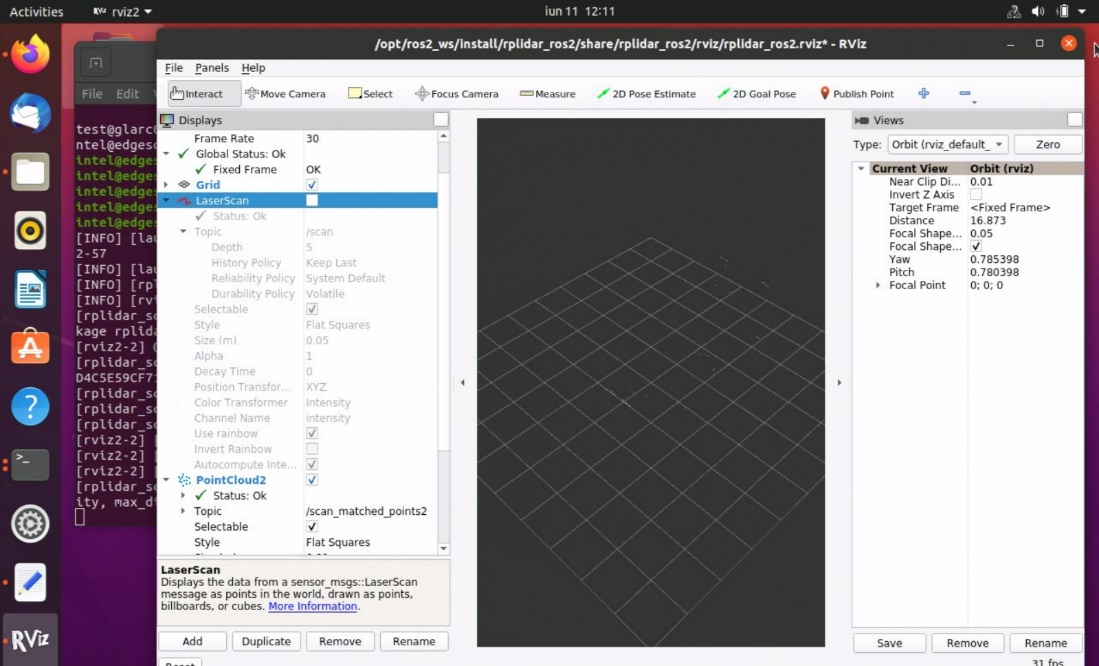
The rviz2 window will look similar to the screenshot below.
Sick NanoScan3 Safety LIDAR
Connect a Sick NanoScan3 2D LIDAR to your system.
Hardware setup and configuration can be found on the Sick website.
Get the Sick NanoScan3 IP and the host’s IP.
This information can be found when configuring the Sick NanoScan using the Safety Designer, in the Networking chapter.
Run the Sample Application.
Go to the AMR_containers folder:
cd <edge_insights_for_amr_path>/Edge_Insights_for_Autonomous_Mobile_Robots_<version>/AMR_containers
Prepare the docker_compose environment:
source 01_docker_sdk_env/docker_compose/05_tutorials/config/docker_compose.source
Start the Docker* container for the Sick NanoScan3:
CHOOSE_USER=eiforamr docker-compose -f 01_docker_sdk_env/docker_compose/01_amr/amr-sdk.all.yml run sick-nanoscan bash
Add the Sick NanoScan3 IP and host IP in the configuration file:
sudo vim /opt/ros/foxy/share/sick_safetyscanners2/launch/sick_safetyscanners2_launch.py
Put the Sick NanoScan3 IP in the sensor_ip parameter and the host’s IP in the host_ip parameter.
Start the Sick NanoScan3 ROS2 node:
export ROS_DOMAIN_ID=33
ros2 launch sick_safetyscanners2 sick_safetyscanners2_launch.py &
rviz2 &
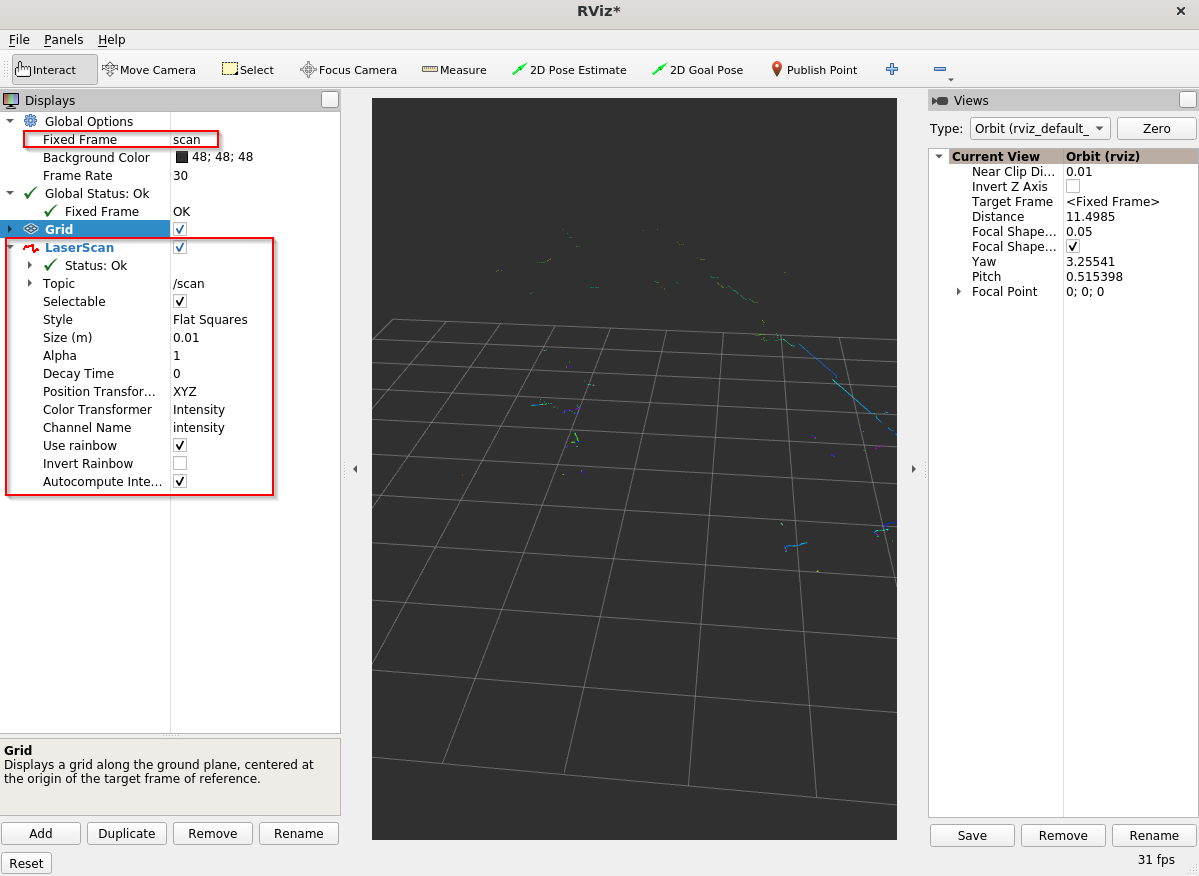
In rviz2, add the LaserScan topic (Add> By Topic> scan/LaserScan) and change Fixed Frame to scan:
Start the Cartographer Docker container and start the Cartographer node.
Open a new terminal on the same system:
cd <edge_insights_for_amr_path>/Edge_Insights_for_Autonomous_Mobile_Robots_<version>/AMR_containers
Prepare the environment:
source 01_docker_sdk_env/docker_compose/05_tutorials/config/docker_compose.source
Open the Cartographer Docker image:
CHOOSE_USER=eiforamr docker-compose -f 01_docker_sdk_env/docker_compose/01_amr/amr-sdk.all.yml run cartographer bash
Open the Cartographer Docker node:
export ROS_DOMAIN_ID=33
source /ros_entrypoint.sh
ros2 run cartographer_ros cartographer_node -configuration_directory /opt/ros/foxy/share/cartographer/configuration_files/ -configuration_basename sick_nanoscan.lua
NOTE:Use the same number for ROS_DOMAIN_ID as the one used for the LIDAR container. This will allow the two Docker images to share ros2 topics.
Go to rviz2 that is already open and uncheck LaserScan on the left side.
Click Add in lower left corner, click By topic and add PointCloud2 from the /scan_matched_points2 topic.

The rviz2 window will look similar to the screenshot below.
Troubleshooting
For general robot issues, go to: Troubleshooting for Robot Tutorials.