Visible to Intel only — GUID: tjn1588094310476
Ixiasoft
1. About this Document
2. System Requirements
3. Hardware Installation
4. Installing the OPAE Software
5. Identify the Intel® MAX® 10 BMC Version
6. Intel XL710 Driver Installation and Firmware Update
7. Updating the Retimer Firmware
8. OPAE Tools
9. Sample Test: Native Loopback
10. Configuring Ethernet Interfaces
11. Testing Network Loopback Using Data Plane Development Kit (DPDK)
12. Graceful Shutdown
13. Single Event Upset (SEU)
14. Document Revision History for Intel Acceleration Stack User Guide: Intel® FPGA PAC N3000-N/2
A. Troubleshooting
B. fpgabist Sample Output
Visible to Intel only — GUID: tjn1588094310476
Ixiasoft
3. Hardware Installation
To operate the Intel® FPGA PAC N3000-N/2 in your server, you must have the following:
- PCI Express* Gen3x16 slot with physical space for a full height half length PCIe* form factor board
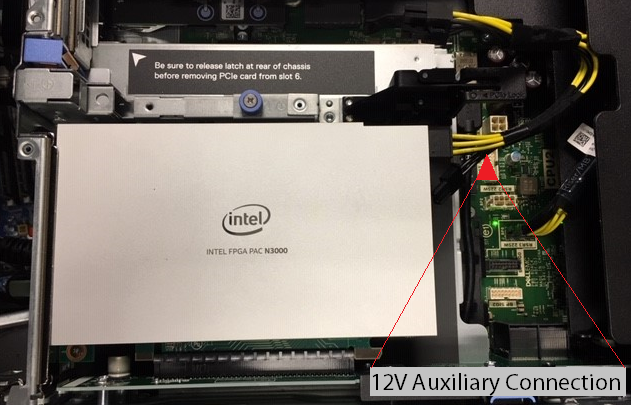
- Auxiliary 12 V 6-pin power connector
- Server that provides sufficient airflow for a given air inlet temperature
Note: The Intel® FPGA PAC N3000-N/2 cannot operate without the 6-pin auxiliary power connector. Internal board circuitry prevents operation without the auxiliary power source and PCIe* connector power source.
Note: If the Intel® FPGA PAC N3000-N/2 is not integrated into a server closed loop fan control system, you must set the fan speed to 100%. The fan speed (100%) setting must be applied to avoid overheating when the server turns on. When the BMC detects that the card has overheated, it powers down major circuitry of the card to prevent damage.
Figure 2. Typical Intel® FPGA PAC N3000-N/2 Installation in a Server

