Visible to Intel only — GUID: jdj1522170592047
Ixiasoft
2.1. Step 1: Getting Started
2.2. Step 2: Preparing the Base Revision
2.3. Step 3: Preparing the Implementation Revisions for Debug
2.4. Step 4: Tapping Signals in the Implementation Persona
2.5. Step 5: Configuring Data Acquisition
2.6. Step 6: Setting Trigger Conditions
2.7. Step 7: Generating Programming Files
2.8. Step 8: Programming the Board
2.9. Step 9: Performing Data Acquisition
Visible to Intel only — GUID: jdj1522170592047
Ixiasoft
2.4. Step 4: Tapping Signals in the Implementation Persona
To add signals from the implementation persona to the Signal Tap logic analyzer:
- Set blinking_led_slow as the current revision in the Intel® Quartus® Prime GUI.
- Open the stp_slow.stp file.
- Double-click the Setup tab to open the Node Finder.
- Set the following search fields, and then click Search
Field Value Named * Filter Signal Tap: pre-synthesis Look in top|u_blinking_led Figure 13. Search Parameters to Find SignalsThis action displays all the nodes that you can probe in this revision.
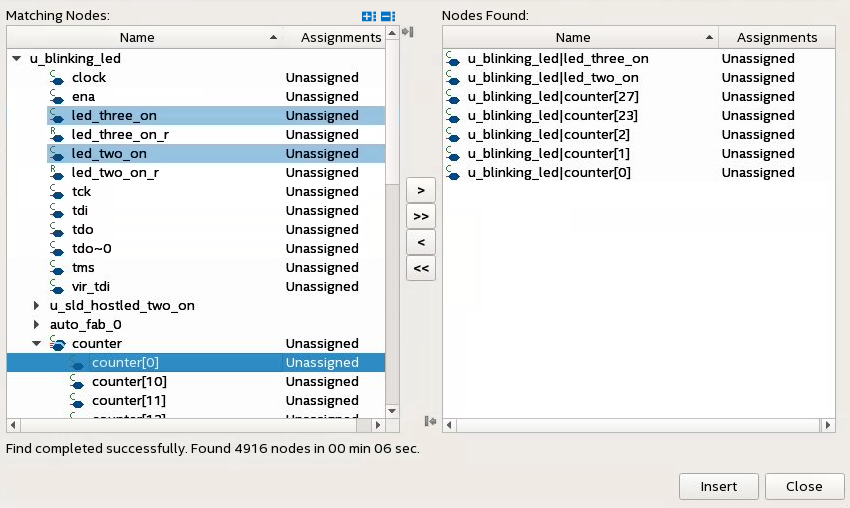
- From the Matching Nodes list, select led_three_on, led_two_on, and counter[2:0], counter[27], and counter[23], and then click >.
This action adds the signals to the Nodes Found list.Figure 14. Signals in Nodes Found List

- Click Insert.
The signals now appear in the Instance Manager pane of the Signal Tap GUI.
Related Information