Visible to Intel only — GUID: euz1592959750576
Ixiasoft
3.5.2.5.1. Build and Install Netdev Driver
3.5.2.5.2. Enable VFs if SRIOV is Supported
3.5.2.5.3. Configure the Number of Channels Supported on the Device
3.5.2.5.4. Configure the MTU Value
3.5.2.5.5. Configure the Device Communication
3.5.2.5.6. Configure Transmit Queue Selection Mechanism
3.5.2.5.7. Test Procedure by Using Name Space Environment
3.5.2.5.8. PIO Test
Visible to Intel only — GUID: euz1592959750576
Ixiasoft
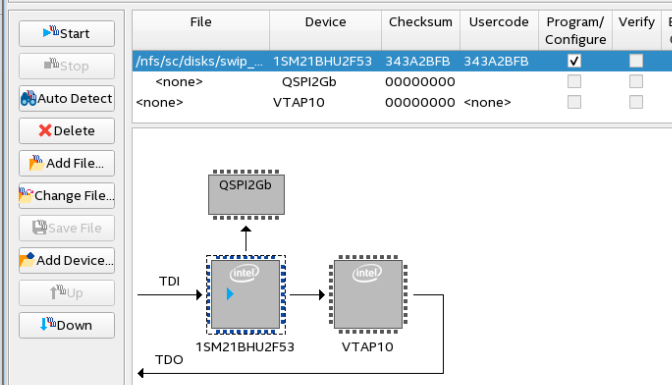
3.5.1. Program the FPGA
Note: This section describes how to program the FPGA using the Intel® Stratix® 10 Development Board. If you are using one of the boards listed in the previous section, the name of the development board you select to use shall apply for this section accordingly.
- Connect a FPGA programming cable to the Intel® Stratix® 10 FPGA Development Board
- On the Tools menu, select Programmer
- In the Programmer, click Hardware Setup and verify the Intel® Stratix® 10 FPGA Development Board is detected in Hardware Setting tab and JTAG Settings tab
- Select Auto Detect to detect the JTAG device chain
- Select the target FPGA device in the JTAG chain, select Change File, and select the pcie_ed.sof
- Select Start to start programming
Figure 27. Programming Stratix 10 MX FPGA Development Board