Visible to Intel only — GUID: fac1632940353983
Ixiasoft
1.3. Specify EDA Tool Settings
Perform the following steps to specify EDA Tool Options and generate simulation files for the supported simulators:
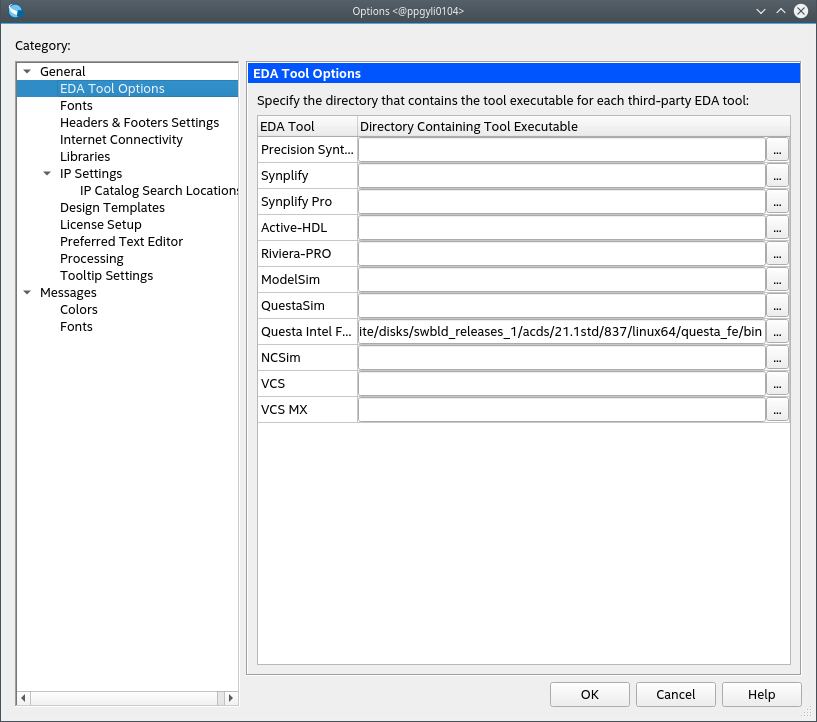
- Click Tools > Options > EDA Tool Options to specify the location of your simulator for integration with Intel® Quartus® Prime Standard Edition. The Options dialog displays.
Figure 2. EDA Tool Settings

- In the Questa Intel FPGA field, enter one of the following Questa* Intel® FPGA Edition executable path:
- On Linux systems: <installation directory>/questa_fe/bin
- On Windows systems: <installation directory>/questa_fe/win64
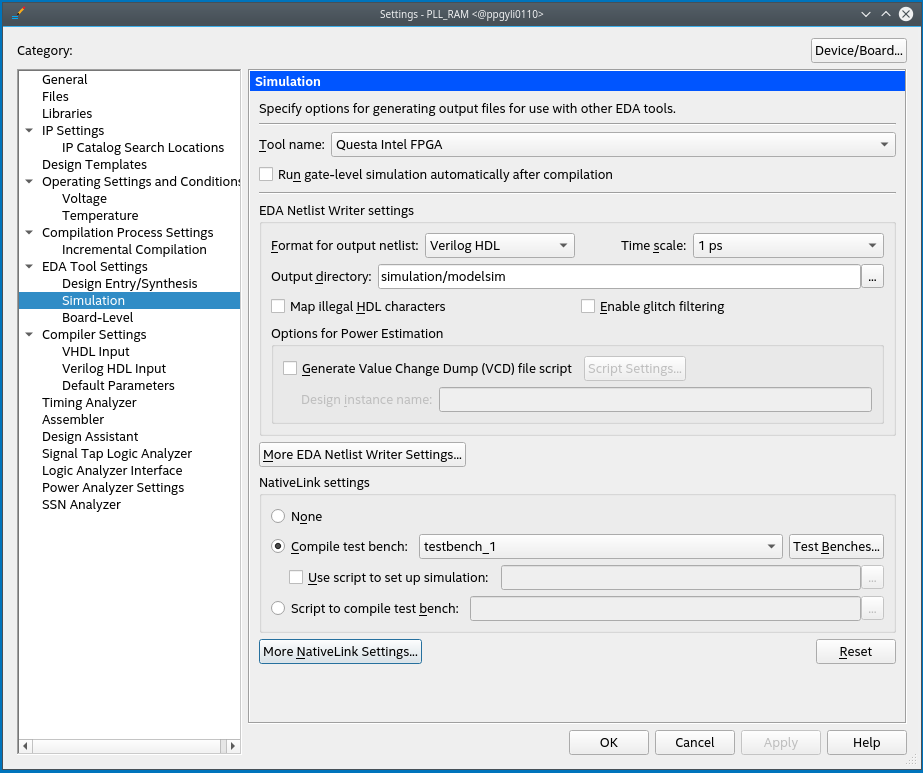
- Click Assignments > Settings > EDA Tool Settings > Simulation. Ensure the settings are as shown in the following image:
Figure 3. Simulation Settings

- Under NativeLink Settings, select the Compile test bench option.
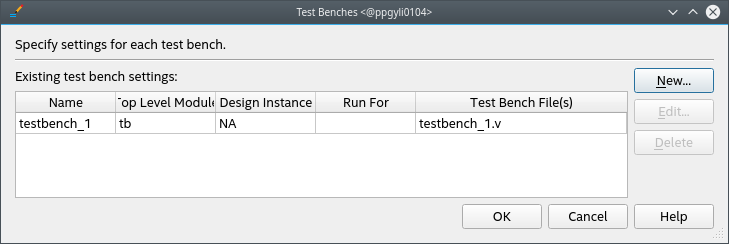
- Click the Test Benches button.
- Click the New option to create a new test bench.
- Specify testbench_1 as the test bench name and tb as the top-level module in the test bench.
- Under Test bench and simulation files, enter or select testbench_1.v file, click Add, and then click OK. The Test Benches dialog displays the properties of the test benches in your project.
Figure 4. Test Benches Dialog

- Click OK to exit Test Benches and Settings dialogs.