Visible to Intel only — GUID: jka1463620280548
Ixiasoft
Step 1: Getting Started
Step 2: Creating a Design Partition
Step 3: Allocating Placement and Routing Region for a PR Partition
Step 4: Adding the Intel® Arria® 10 Partial Reconfiguration Controller IP Core
Step 5: Defining Personas
Step 6: Creating Revisions
Step 7: Generating the Partial Reconfiguration Flow Script
Step 8: Running the Partial Reconfiguration Flow Script
Step 9: Programming the Board
Modifying an Existing Persona
Adding a New Persona to the Design
Visible to Intel only — GUID: jka1463620280548
Ixiasoft
Step 4: Adding the Intel® Arria® 10 Partial Reconfiguration Controller IP Core
The Intel® Arria® 10 Partial Reconfiguration Controller IP core enables reconfiguration of the PR partition. This IP core uses JTAG to reconfigure the PR partition. To add the Intel® Arria® 10 Partial Reconfiguration Controller IP core to your Intel® Quartus® Prime project:
- Type Partial Reconfiguration in the IP Catalog (Tools > IP Catalog).
- Double-click the Intel® Arria® 10 Partial Reconfiguration Controller IP core.
- In the Create IP Variant dialog box, type pr_ip as the file name, and then click Create. Use the default parameterization for pr_ip. Ensure that the Enable JTAG debug mode and Enable freeze interface options are turned on, and Enable Avalon-MM slave interface option is turned off.
Figure 7. Intel® Arria® 10 Partial Reconfiguration Controller IP Core Parameters
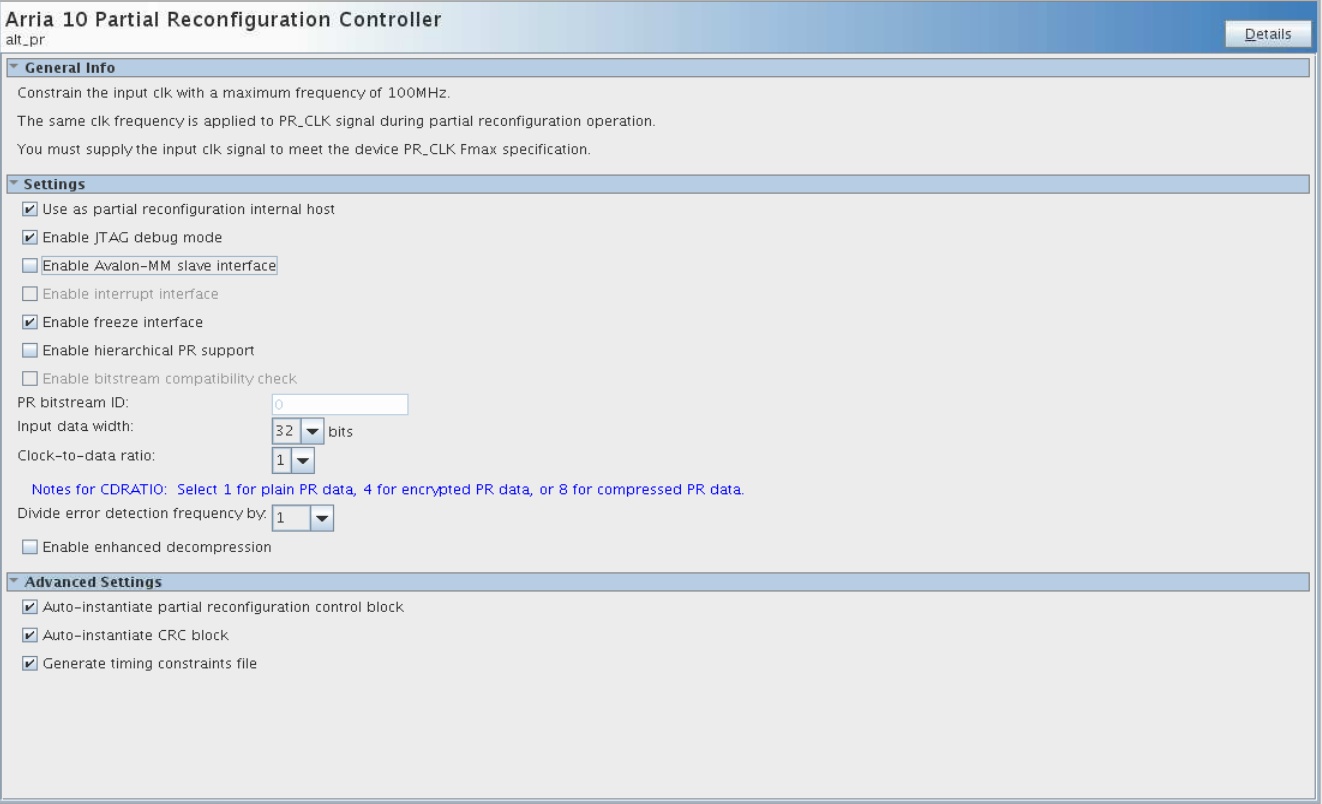
- Click Finish, and exit the parameter editor without generating the system. The parameter editor generates the pr_ip.ip IP variation file and adds the file to the blinking_led project.
Note:
- If you are copying the pr_ip.ip file from the pr folder, manually edit the blinking_led.qsf file to include the following line:
set_global_assignment -name IP_FILE pr_ip.ip - Place the IP_FILE assignment after the SDC_FILE assignments (jtag.sdc and blinking_led.sdc) in your blinking_led.qsf file. This ordering ensures appropriate constraining of the Partial Reconfiguration Controller IP core.
Note: To detect the clocks, the .sdc file for the PR IP must follow any .sdc that creates the clocks that the IP core uses. You facilitate this order by ensuring the .ip file for the PR IP core comes after any .ip files or .sdc files that you use to create these clocks in the .qsf file for your Intel® Quartus® Prime project revision. For more information, refer to the Partial Reconfiguration IP Solutions User Guide.
- If you are copying the pr_ip.ip file from the pr folder, manually edit the blinking_led.qsf file to include the following line:
Related Information