The Enterprise AI Art Exhibition at Intel Vision 2024 gave attendees a chance to run the opensource Stable Diffusion model on Intel® Gaudi® AI accelerator to create their own unique pieces of art. A standout feature of the demo was the practical application of few-shot training, which allowed participants to create artwork in real time, offering a tangible example of how AI can be harnessed in an enterprise setting to foster creativity and innovation.
This demo is described below, along with a tutorial to show you how to run it yourself.
Demo Overview
We highlighted the capabilities of an Intel Gaudi hardware and software stack to create a custom artwork based on Stable Diffusion. The demo involved fine-tuning a variant of the Stable Diffusion 1.5 model called Dreamlike Diffusion with a limited set of images utilizing the Dreambooth fine-tuning technique, showcasing the potential for personalized art generation with minimal data. The Intel Gaudi processors along with optimum-habana provided the necessary computational power, enabling fast model training.
The base model is Stable Diffusion 1.5-based Dreamlike Diffusion 1.0. DreamBooth fine-tuning is a method to personalize text-to-image models like Stable Diffusion given just a few (3-5) images of a subject.
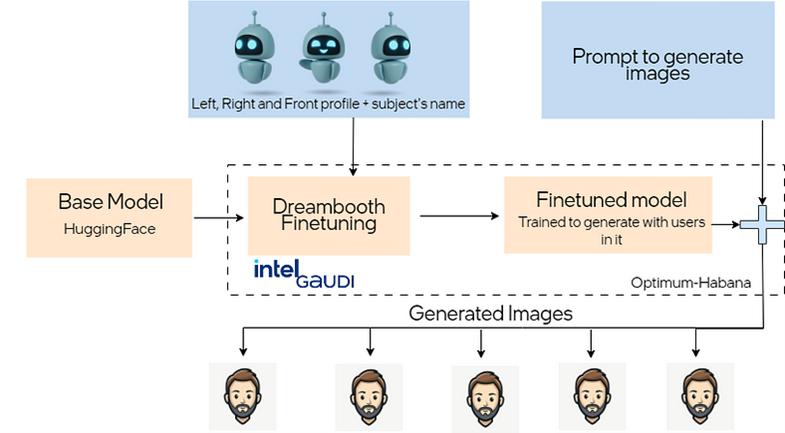
The resulting fine-tuned model can generate unique artwork based on user prompts, e.g.:
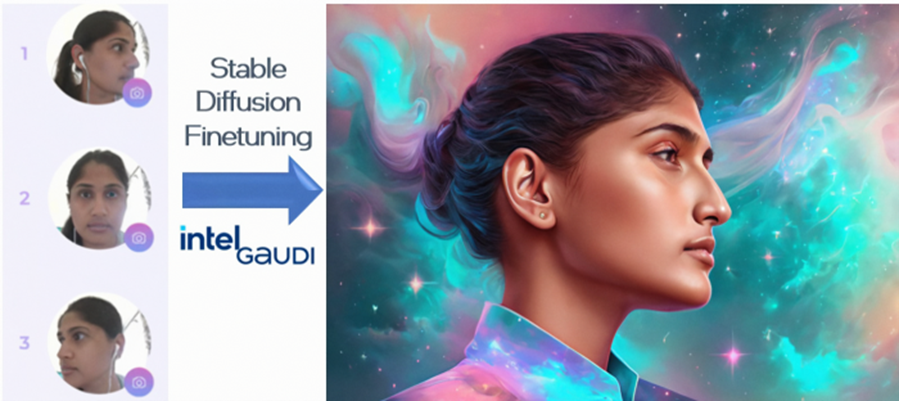
Prompt: a dreamlike vision of the universe swirling within close-up side portrait of solo gaudigeekatintel, fluid, constellations and nebulae, dreamlike art, fantasy, star trek aesthetic, vibrant pastel color aesthetic, concept art, sharp focus, flawless skin, pastel colors, digital painting, hd, dramatic lighting, trending in art station
You can watch the recorded version of the demo from Intel Vision 2024.
Tutorial: Create Your Own Stable Diffusion Art
DreamBooth Fine-Tuning
The demo uses dreambooth fine-tuning on Stable Diffusion 1.5 to create custom art for your own images (resized to 512 x 512 resolution). Four environment variables must be set:
- MODEL_NAME: Set this to the Dreamlike Diffusion 1.0 model “dreamlike-art/dreamlike-diffusion-1.0,” which is Stable Diffusion 1.5 fine-tuned on high quality art, made by dreamlike.art.
- INSTANCE_DIR: Set this to the directory (e.g., /home/art_studio/gaudigeekatintel/) with 3-5 input images: front, right side, and left side pictures of the subject resized to 512 x 512 at shoulder level with good lighting and a plain background (see example images below). Note that the subject’s reference or the name must be as unique as possible (e.g., “gaudigeekatintel”). For ease of use, this reference name will be used throughout the tutorial to create the model artifacts.
- OUTPUT_DIR: Set this to output directory to store the fine-tuned model (e.g., /home/art_studio/dd_model_gaudigeekatintel).
- CLASS_DATA_DIR: Set this to the directory with images of the class being trained on. In this case, download sample images of men and women that will be used by dreambooth fine-tuning to generate human-like images. Refer to this Kaggle dataset to choose about 50 images each of “men” and “women,” preferably JPEG, and save in a directory named /home/art_studio/person.

Fine-Tuning on Intel Gaudi
Launch the Gaudi docker image and mount the volume of all the directories created above:
cd /home/art_studio

docker run -it --runtime=habana \
-e HABANA_VISIBLE_DEVICES=all \
-e OMPI_MCA_btl_vader_single_copy_mechanism=none \
--cap-add=sys_nice \
--net=host \
--ipc=host \
-v $(pwd):/home \
vault.habana.ai/gaudi-docker/1.15.1/ubuntu22.04/habanalabs/pytorch-installer-2.2.0:latest
Additionally, install optimum-habana:
pip install optimum-habana==v1.11.0
pip install peft
Setup all the environment variables in the container:
export MODEL_NAME="dreamlike-art/dreamlike-diffusion-1.0"
export INSTANCE_DIR="/home/gaudigeekatintel/"
export OUTPUT_DIR="/home/dd_model_gaudigeekatintel"
export CLASS_DATA_DIR="/home/person"
Clone the optimum-habana git repo:
git clone -b v1.11.0 https://github.com/huggingface/optimum-habana.git
Support for optimum-habana with dreambooth fine-tuning is being added via the PR, which gives users the ability to run fine-tuning on Gaudi-based architectures. If the PR is still under review, use the dream_booth branch:
cd optimum-habana
git checkout dream_booth
cd examples/stable-diffusion/training/
When you’re training AI models on Intel Gaudi processors, the first time you run your training script, optimum-habana takes extra time to build a complex map of computations, known as a graph. This graph is tailored to the hardware to ensure efficient processing. The is a one-time warmup cost for the specific use-case. You’ll need to run just once for the first subject’s three images, after which the graph can be used to fine-tune for subsequent subjects. To build the graph, you control the recipe cache with the environment variable, PT_HPU_RECIPE_CACHE_CONFIG, which needs three pieces of information, separated by commas:
- Where to save the graph (a path on your computer, like /tmp/recipe_cache).
- Whether to delete the graph after use (False means keep it, True means delete it).
- How big the cache can be (in megabytes, like 1024 for 1 GB).
For example:
PT_HPU_RECIPE_CACHE_CONFIG=/tmp/recipe_cache,False,1024 python <script.py>
This will create the graph and store it in the given location for subsequent reuse.
Run the train_dreambooth.py script with the following parameters and five steps to create the graph. Please note that this step only needs to be run once on the specified bare-metal system or container. It is not required to repeat this process for subsequent runs, whether using the same or a different subject’s image once the graph is saved in the cache.
PT_HPU_RECIPE_CACHE_CONFIG=/tmp/dld_recipe_cache,False,1024 \
python train_dreambooth.py  \
--pretrained_model_name_or_path=$MODEL_NAME \
--instance_data_dir $INSTANCE_DIR \
--output_dir=$OUTPUT_DIR \
--class_data_dir=$CLASS_DATA_DIR \
--with_prior_preservation \
--prior_loss_weight=1.0 \
--instance_prompt="gaudigeekatintel" \
--class_prompt="person" \
--train_batch_size=1 \
--gradient_accumulation_steps=1 \
--learning_rate=2e-6 \
--lr_scheduler="constant" \
--lr_warmup_steps=0 \
--max_train_steps=5 \
--gaudi_config_name Habana/stable-diffusion \
--train_text_encoder \
--center_crop \
--num_class_images=12 \
--seed=0 \
--prior_generation_precision bf16 full
Now run the train_dreambooth.py script for 350 steps to fully fine-tune on the subject’s image. This step will reuse the graph saved in /tmp/dld_recipe_cache.
PT_HPU_RECIPE_CACHE_CONFIG=/tmp/dld_recipe_cache,False,1024 \
python train_dreambooth.py  \
--pretrained_model_name_or_path=$MODEL_NAME \
--instance_data_dir $INSTANCE_DIR \
--output_dir=$OUTPUT_DIR \
--class_data_dir=$CLASS_DATA_DIR \
--with_prior_preservation \
--prior_loss_weight=1.0 \
--instance_prompt="gaudigeekatintel" \
--class_prompt="person" \
--train_batch_size=1 \
--gradient_accumulation_steps=1 \
--learning_rate=2e-6 \
--lr_scheduler="constant" \
--lr_warmup_steps=0 \
--max_train_steps=350 \
--gaudi_config_name Habana/stable-diffusion \
--train_text_encoder \
--center_crop \
--num_class_images=12 \
--seed=0 \
--prior_generation_precision bf16 full
This will use the saved graph with the best parameters to fine-tune the model for your images saved in the INSTANCE_DIR. The fine-tuned model will be saved in OUTPUT_DIR. Fine-tuning with the saved graph will take about 3-4 minutes to run on a single Gaudi card. This version of the demo setup is targeted for a single card, but we are currently optimizing the workloads to run on eight cards.
Use Text Prompts to Generate Fine-Tuned Images
Example output from this demo is shown below. The following example script uses optimum-habana’s diffusers classes to run the Stable Diffusion pipeline and scheduler. It loads the fine-tuned model and generates a portrait based on the input prompt. The prompt we are trying here is “portrait of solo gaudigeekatintel in a multiverse universe with planets, moons and solar flares, star trek, pastel colors, blue and purple tone background, dramatic lighting, trending in art station.” Be sure to enter the instance prompt used in the dreambooth fine-tuning to create your own portrait.
import torch
import os
from optimum.habana.diffusers import GaudiStableDiffusionPipeline, GaudiDDIMScheduler

# Setting the Scheduler
scheduler = GaudiDDIMScheduler.from_pretrained(
 "dreamlike-art/dreamlike-diffusion-1.0",
 subfolder="scheduler"
)

# Using the Intel Gaudi stable diffusion pipeline
pipeline = GaudiStableDiffusionPipeline.from_pretrained(
 “/home/dd_model_gaudigeekatintel”,
 scheduler=scheduler,
 use_habana=True,
 use_hpu_graphs=True,
 gaudi_config="Habana/stable-diffusion"
)

negative_prompt="easynegative, head covered, face covered, helmet, not indoors, no flashy jewelry, not indian bride, two men, two women, two persons, two heads, two bodies, duplicate person, multiple person, mirror reflection, eye color change, low quality, worst quality:1.4, bad anatomy, bad composition, out of frame, ugly, old person with wrinkles, morbid, mutilated, out of frame, extra fingers, mutated hands, poorly drawn hands, poorly drawn face, mutation, deformed, ugly, blurry, bad anatomy, bad proportions, extra limbs, cloned face, disfigured, out of frame, ugly, extra limbs, bad anatomy, gross proportions, malformed limbs, missing arms, missing legs, extra arms, extra legs, mutated hands, fused fingers, too many fingers, long neck,  watermark, signature, text, deformed nose, deformed lips"

#Use the instance label used in the –-instance_prompt flag of dreambooth fine-tuning instead of “gaudigeekatintel”
prompt=" portrait of solo gaudigeekatintel in a multiverse universe with planets, moons and solar flares, star trek, pastel colors, blue and purple tone background, dramatic lighting, trending in art station"

image = pipeline(prompt, height=536, width=960, negative_prompt= negative_prompt, num_inference_steps=150, guidance_scale=7).images[0]

output_path= '/home/output/'
os.makedirs(output_path)
filename='gaudigeekatintel.png'
os.path.join(output_path, filename)
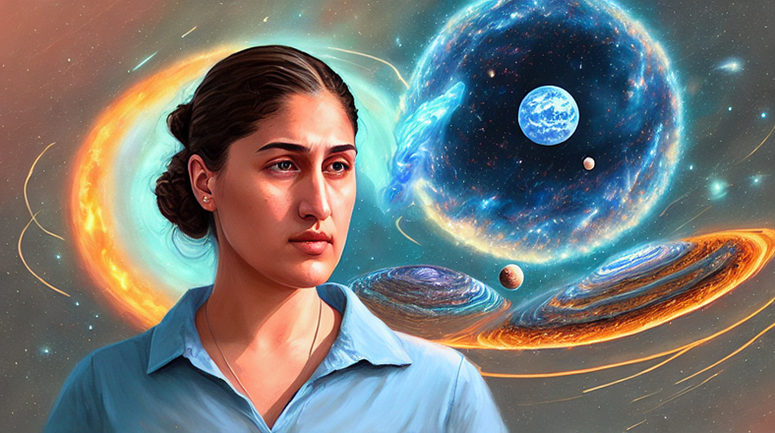
Prompt: portrait of solo gaudigeekatintel in a multiverse universe with planets, moons and solar flares, star trek, pastel colors, blue and purple tone background, dramatic lighting, trending in art station
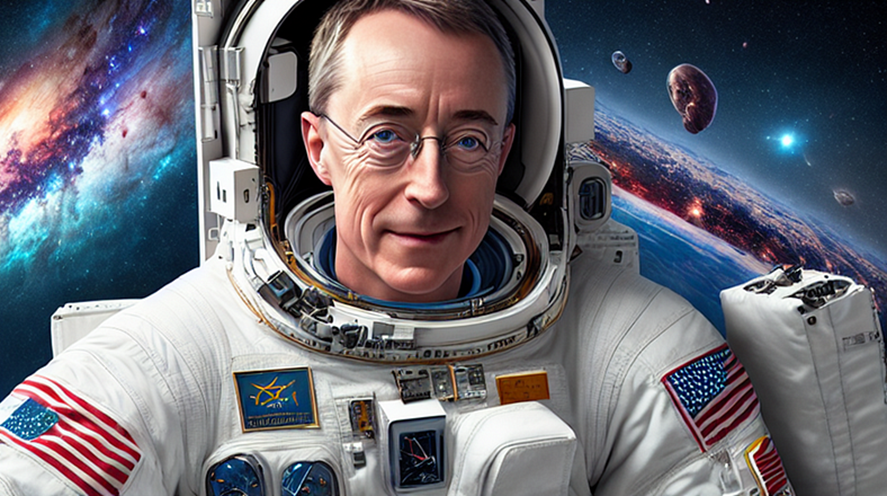
Prompt: create a captivating book cover of Patatintel as an astronaut in space, face not covered, bring illuminating large planet , dramatic lighting, 4k, trending in art station, sharp focus, flawless skin, photorealistic, dreamart, hd

Prompt: photorealistic close-up portrait of solo Christophatintel with suit, futuristic cityscape dominated with skyscraper with electronic gadgets, dramatic lighting, trending in art station
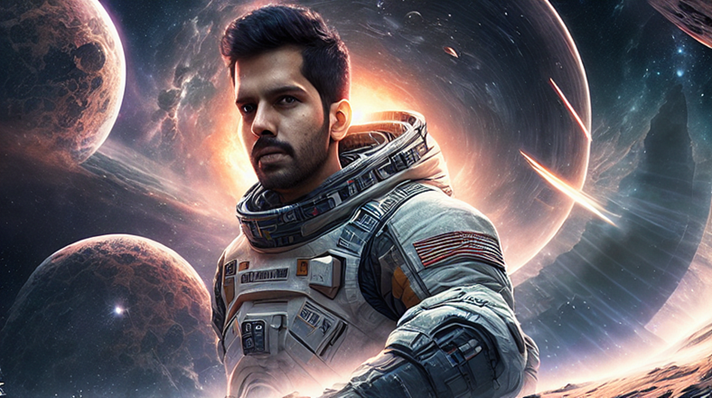
Prompt: portrait of solo Sriatintel in the interstellar space, dressed in the space suit from the movie interstellar, black hole, moons, universe, make it look like a movie poster, dramatic lighting, trending in art station
You can try this tutorial on Gaudi instances available in the Intel® Tiber™ Developer Cloud 1 or on AWS. For more information, please reach out to Intel AI Framework support.
