Visible to Intel only — GUID: svo1573610846737
Ixiasoft
1. Quick Start Guide
2. 10GBASE-R Ethernet Design Example
3. 10M/100M/1G/2.5G/10G Ethernet Design Example
4. 1G/2.5G Ethernet Design Example with IEEE 1588v2 Feature
5. 1G/2.5G/10G Ethernet Design Example with IEEE 1588v2 Feature
6. 10M/100M/1G/2.5G/5G/10G (USXGMII) Ethernet Design Example
7. Interface Signals Description
8. Configuration Registers Description
9. Low Latency Ethernet 10G MAC Intel® Stratix® 10 FPGA IP Design Example User Guide Archives
10. Document Revision History for the Low Latency Ethernet 10G MAC Intel® Stratix® 10 FPGA IP Design Example User Guide
Visible to Intel only — GUID: svo1573610846737
Ixiasoft
2.5.2. Configuring FIFO Depth for Avalon® Streaming Loopback
If you want to send Ethernet packets from external switch or tester with jumbo packet length such as 9600 bytes, you must increase the FIFO depth of the design example components.
These components are the CHANNEL[x].fifo_inst and CHANNEL[x].gen_mon_inst | avalon_st_loopback_u0 in the Avalon® streaming loopback path. The x index in the CHANNEL[x] are either 0 or 1.
To configure the FIFO depth of the design example components, follow these steps:
- Edit the rtl\eth_traffic_controller\avalon_st_loopback.sv file.
- Increase the value of the sc_fifo_depth parameter to increase the FIFO depth. Save the changes.
Note: The default FIFO depth is 2048 and is sufficient to support 9600 bytes jumbo packets.
- In the Intel® Quartus® Prime Pro Edition software, on the the Project menu, select Upgrade IP Components.
- Select sc_fifo entity (IP Components: <Platform Designer>) from the list and click Upgrade in Editor. This launches the Platform Designer.
- At the FIFO depth parameter of both tx_sc_fifo and rx_sc_fifo components, increase the value of the FIFO depth from 1024 to 2048, for example.
- Click Generate HDL, then click Generate and Yes to save the changes and re-generate the SC FIFO IP. After the generation process is completed, exit the Platform Designer and close the Upgrade IP Components window.
- Perform full compilation of the design example.
- Edit the hw_testing\system_console\csr_pkg.tcl file.
- Add the following parameters under the MAC Address Map banner and save the changes:
# RX path set RX_MAX_FRAME_LENGTH_ADDR 0x00002004; #Added to change max packet length # TX path set TX_MAX_FRAME_LENGTH_ADDR 0x00006004; #Added to change max packet length - If you want to test channel 1, add the following command before the if {![info exists CHANNEL]} { set CHANNEL 0 } command. Refer to the example in Setting Channel Number for Testing.
set CHANNEL 1
If you want to test channel 0, remove this command.
Figure 11. Setting Channel Number for Testing
- Add the following parameters under the MAC Address Map banner and save the changes:
- Edit the hw_testing\system_console\config.tcl file.
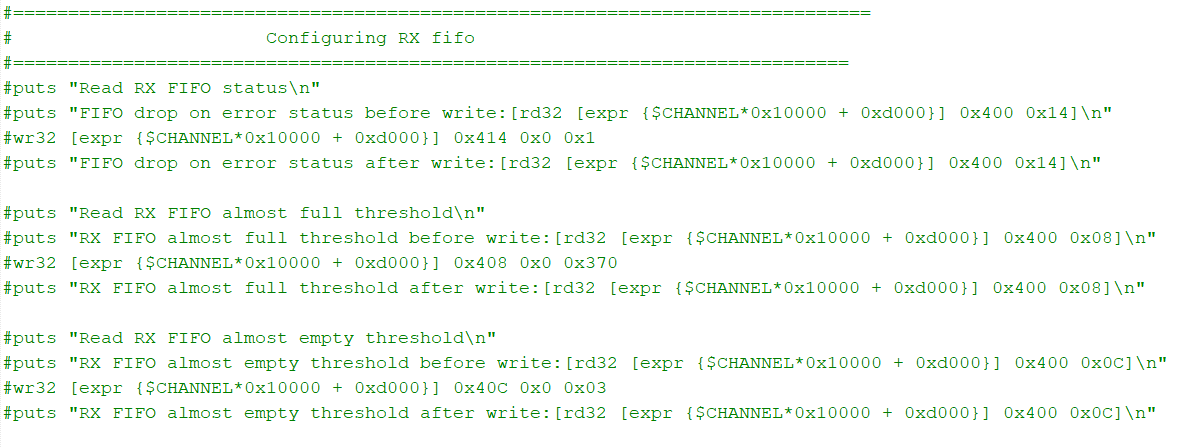
- Comment out the Configure RX fifo section. Refer to the example below.

- Add commands to configure the TX and RX MAC's tx_frame_maxlength and rx_frame_maxlength Configuration and Status registers respectively to increase the maximum frame length without causing oversized frame error condition being triggered. Save the changes. Refer to the example in Example Command to Configure TX and RX MAC Maximum Frame Length .
wr32 [expr {$CHANNEL*0x10000 + $MAC_BASE_ADDR}] $TX_MAX_FRAME_LENGTH_ADDR 0x0 0x2580   ;# 9600 bytes jumbo frame
wr32 [expr {$CHANNEL*0x10000 + $MAC_BASE_ADDR}] $RX_MAX_FRAME_LENGTH_ADDR 0x0 0x2580   ;# 9600 bytes jumbo frame
Figure 12. Example Command to Configure TX and RX MAC Maximum Frame Length
- Comment out the Configure RX fifo section. Refer to the example below.
When these steps are performed, the FIFO depth at both CHANNEL[0] and CHANNEL[1] in the Avalon® streaming loopback paths are increased. Follow the steps in Running Avalon Streaming Loopback Test Case with Jumbo Ethernet Packets to run the Avalon® streaming loopback test case.