3.2. Measuring the Total Board Power
Follow these steps:
- Install the Intel® PAC with Intel® Arria® 10 GX FPGA into a qualified PCIe slot in the server. If you are using BWMonitor for measurement, connect the Micro-USB cable from back of the card to any USB port of the server.
- Load your AFU and run at its maximum power.
- If the AFU uses Ethernet, then ensure that the network cable or module is inserted and connected to the link partner and network traffic is turned on in the AFU.
- If appropriate, run DMA continuously to exercise on-board DDR4.
- Run your applications on the host to feed the AFU the worst-case traffic as well as to fully exercise FPGA. Ensure that you stress the FPGA with the most stressful data traffic.
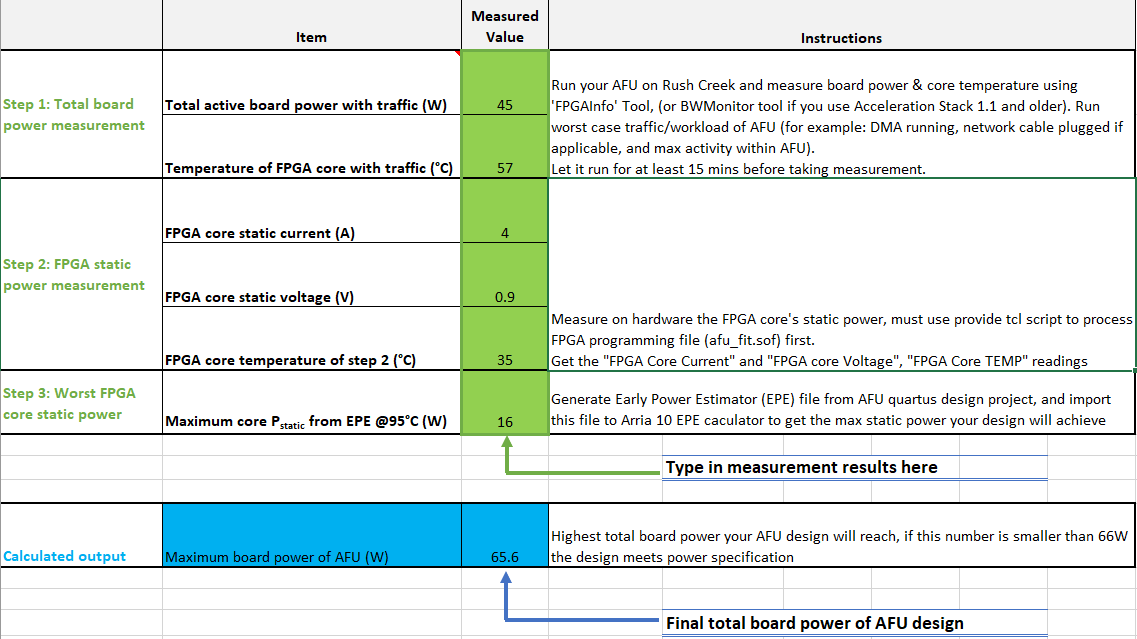
Note: During testing, monitor the total board power, FPGA power, and FPGA core temperature value to ensure they stay within specification. If 66 W, 45 W, or 100°C limits are reached, stop the test immediately. - After the FPGA core temperature becomes stable, use the fpgainfo program or BWMonitor tool to record the total board power and FPGA core temperature. Input these values in row Step 1: Total board power measurement of the Intel® FPGA PAC Power Estimator Sheet.
Figure 2. Intel® FPGA PAC Power Estimator Sheet Sample