At some point, you may have to replace your Intel® Server Board, potentially due to warranty replacement.
Follow the steps below to move RAID volumes from one system to another with a reduced risk of data loss.
| Note | - It is always recommended to back up all data before proceeding with the steps below.
- This should only be done when the old system and new system are the exact same models with same hardware and software configurations. Example: Make sure the BIOS version is the same on both systems.
- If any issues with failed volumes are encountered during this process, they can be attempted to be reset to normal through the UEFI HII menu.
- A SATA RAID array is used in this case. To learn more about how to configure an Intel® VROC (VMD NVMe* RAID) Array for NVMe* drives, consult the system user guide as the BIOS settings are slightly different.
|
- Power down the current system to be replaced.
- Disconnect the drives.
- Reconnect the drives to the new system in the same slots they were removed from in the old system. Make sure the drives are properly installed.
- Power on the system and enter the BIOS by pressing the key F2.
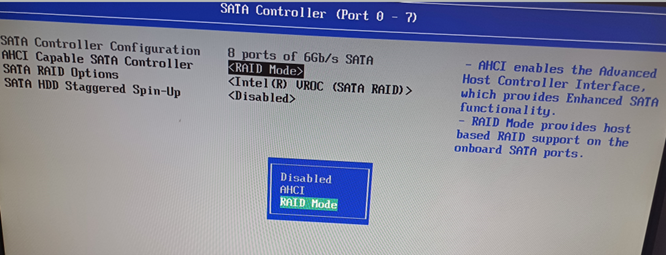
- Navigate to Advanced > Mass Storage Controller Configuration > SATA Controller and/or sSATA Controller.
- In the AHCI Capable SATA Controller field, select RAID Mode option.
- Press the key F10 to save and restart the system.
- Boot to the BIOS by pressing the key F2 during power-on.
- Navigate to Advanced > PCI Configuration > UEFI Option ROM Control.
- Scroll to the bottom of the screen and select the option Intel® VROC SATA Controller.
- Verify the RAID configuration is set properly to match what was on the previous system.
- Press the key F10 to save.

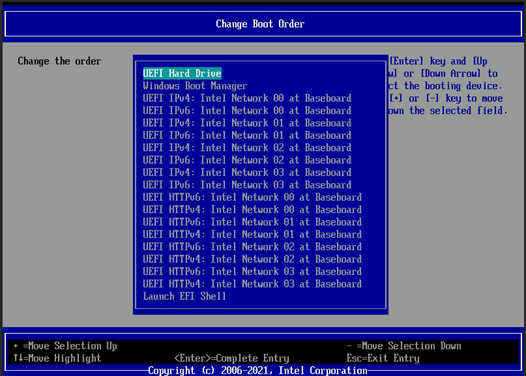
- If this is a boot volume, navigate to the menu Boot Maintenance Manager and change the Boot Order menu.
- Select the proper volume as a boot drive.
- Press F10 key to save and reboot.