Visible to Intel only — GUID: GUID-8001D37E-0E13-4F1B-8975-B76C849DCFA9
Profile Creation, Delta Profiles
Occasionally IT administrators need to add configuration options to an existing Intel® Active Management Technology (Intel® AMT) configuration without losing the current configuration.
To do this, we need to create a Delta profile. This profile is typically generated by a tool like the ACUWizard, which creates a configuration file that includes only those values that need to be added or changed, such as adding wireless profiles, modifying ping response, and updating passwords.
When using the ACUwizard, the following steps will be required to generate a Delta profile for configuring an Intel AMT device with a wireless connection profile.
Step 1: Gathering an opening the required file
- Download the Intel® Setup and Configuration Software (Intel® SCS), and then extract the zip file to a local directory on an admin system.
- Navigate to the ACUWizard directory, and then launch ACUWizard.exe as admin.
Step 2: Configuring the Delta Profile

- On the Welcome screen, select Create Settings to Configure Multiple Systems.
The Intel AMT Profile Designer page now displays.

- Select the green Plus sign to create a new profile.
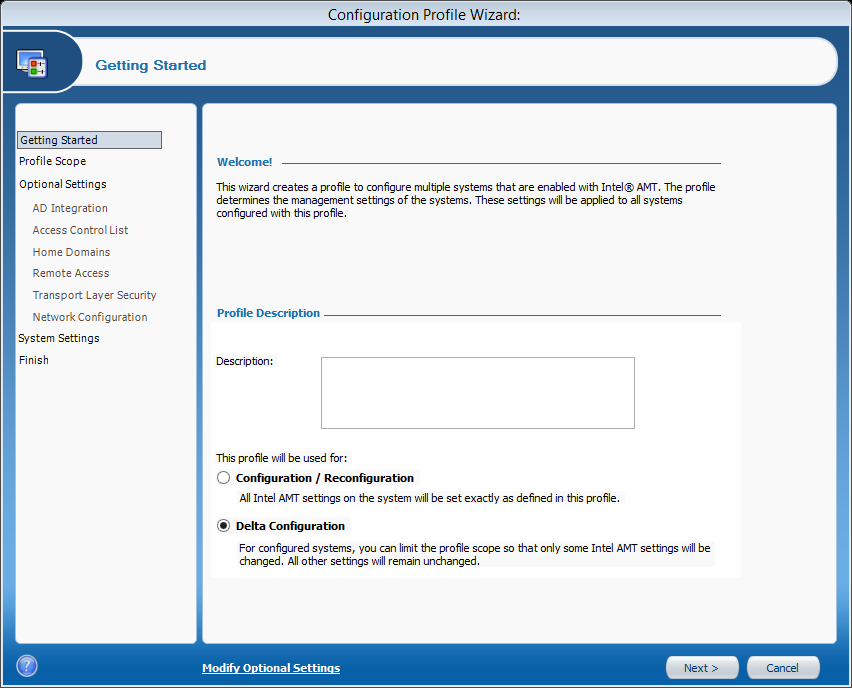
The Getting Started page now displays.

- Select Delta Configuration.
- Click Next.
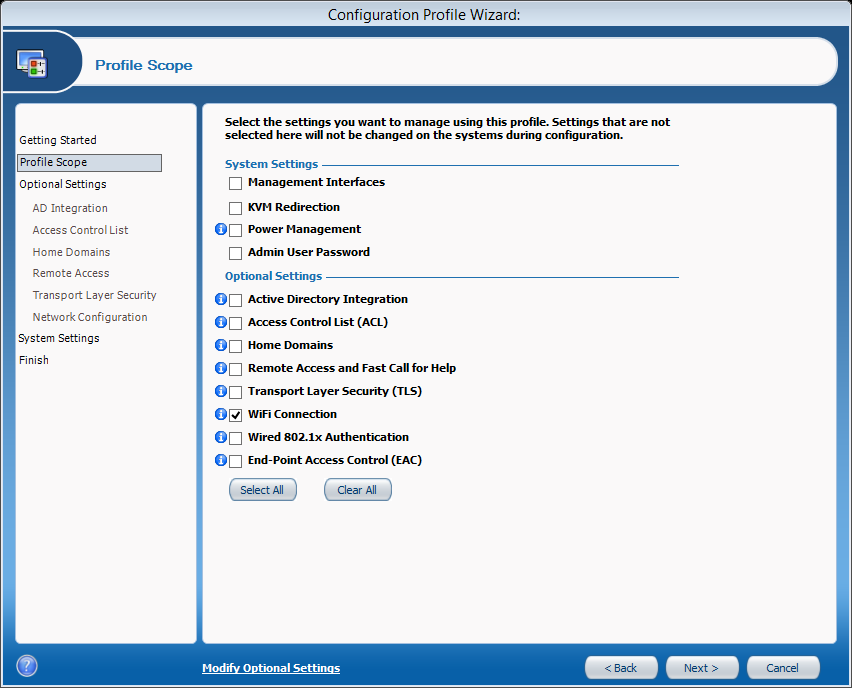
The Profile Scope page now displays.

- Select Clear All.
- Select the Wi-Fi Connection check box.
- Click Next.
The Optional Settings page now displays.

- Confirm that Network Configuration is selected
- Confirm that Wi-Fi Connection is selected.
- Click Next.
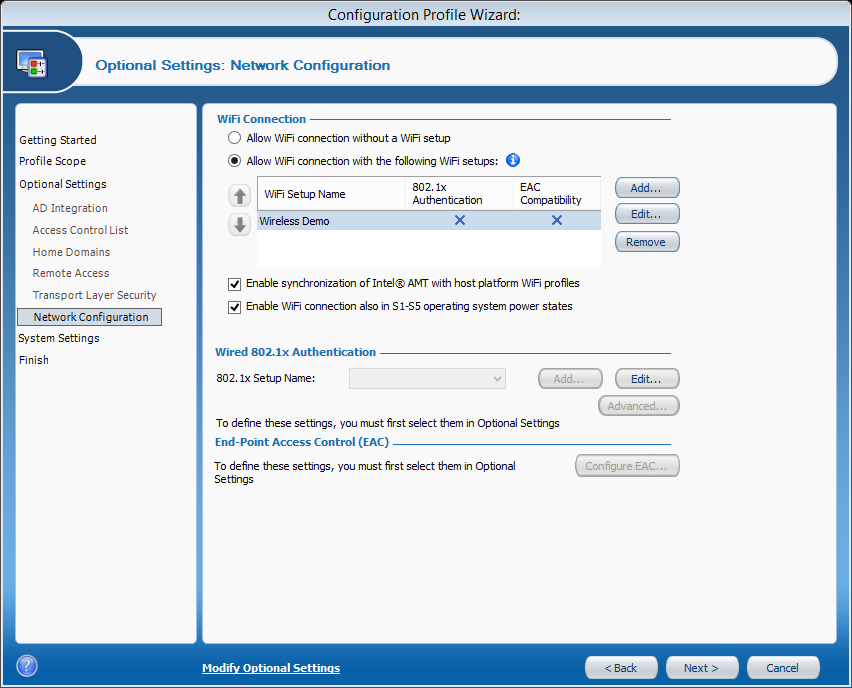
The Wi-Fi Setup window now displays. **

- Select the Enable WiFi connection also in S1-S5 operating system power states check box.
- Select Add.
The WiFi Setup page displays

- Type the Setup Name.
- Type the SSID.
- Select the Key Management Protocol.
- Tip: If your router uses WPA2 security, select RSN.
- Select the Encryption Algorithm.
- TIP: If your router uses AES encryption, select CCMP.
- Type and then confirm the Passphrase.
- Click OK.
The Optional Settings: Network Configuration page displays.

- Click Next
The Finnish page displays.

- In the Name of XML file box, type a name for the XML file.
- In the Confirm Password box, type and then confirm the password for encryption.
- Click Finish.
Note: The profile you just created is saved by default to the Documents\scs profiles folder.
Step 3: Configuring the Intel AMT client with the Delta profile
After you create the file, you’ll need to source the configurator folder from the Intel SCS download. The ACUWizard can be used to create a script or be run manually in the command line of the Intel AMT device requiring the configuration update.
To run the tool from the command prompt (run as admin), navigate to the acuconfig folder and run the following command:
acuconfig configamt /decryptionpassword [password] /adminpassword [password]
*No product or component can be absolutely secure.