What's the RAID environment I'll be using?
- You use hardware Intel® RAID Controllers.
- Online RAID level migration allows for upgrading a RAID level. Options are to go from:
- RAID 1 to RAID 0
- RAID 5 to RAID 0
- RAID 6 to RAID 0
- RAID 6 to RAID 5
- With Online Capacity Expansion (OCE), options are to go from:
- RAID 0 to RAID 1
- RAID 0 to RAID 5
- RAID 0 to RAID 6
- RAID 1 to RAID 5
- RAID 1 to RAID 6
- RAID 5 to RAID 6
- OCE is not supported on spanned RAID arrays such as RAID 10, RAID 50, or RAID 60.
How can I increase the capacity of a virtual disk?
You can use Intel® RAID Web Console 2 to increase the capacity of an existing virtual disk by adding physical disk drives to it. In order to add physical drives, you must be logged on to the system in All Access mode.
Caution | Before you change a virtual disk’s capacity, back up the data on the virtual disk. |
To increase the capacity of a virtual disk, follow these steps:
-
User Logical View and select a Drive Group icon in the left panel, and then select Go To -> Drive Group -> Modify Drive Group.
The Modify Drive Group window is displayed:

-
Click Add Drive.

Note Depending on the current RAID level, targeted migrated RAID level, and available Unconfigured Good drive numbers, the pop-up window may allow you to select: - Adding drives
- Removing drives
- Migrating RAID level

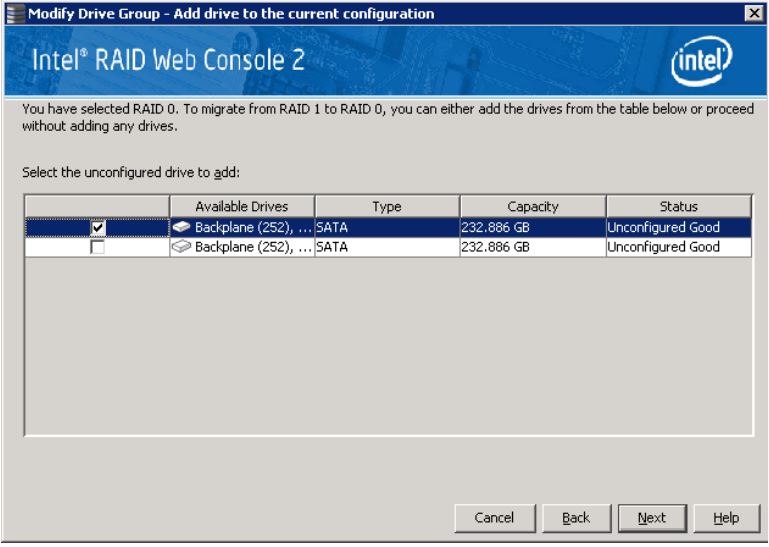
- In the panel, check the disk drives that you want to add to the virtual disk.
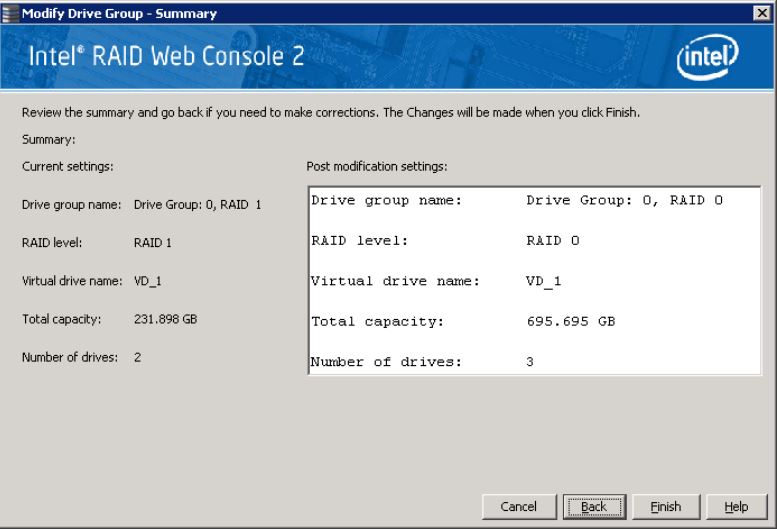
- When you are finished adding disk drives, click Next. The next screen appears. This screen allows you to review the summary and go back if you need to make corrections.

When everything is acceptable, click Finish to accept the new configuration. A Reconstruct operation begins on the virtual disk. You can monitor the progress of the reconstruction in the Group Show Progress window. Select Manage -> Show.
This information is from the Intel® RAID Software User Guide.