Visible to Intel only — GUID: GUID-605AC1D4-9B86-44B4-A0BF-8D778892E4EB
Visible to Intel only — GUID: GUID-605AC1D4-9B86-44B4-A0BF-8D778892E4EB
Using Containers with Eclipse*
Install Eclipse
- Prerequisite: ensure Java* JRE 8 or 11 is installed.
- Download the latest Eclipse IDE for C/C++ Developers.
- Download and install the Intel® IoT Toolkit in order to easily browse samples.
Use the Samples Browser to Create an Eclipse Project
If you have installed the Intel® IoT Toolkit, you can use the Samples Browser integrated into the Eclipse IDE to create a project based on Intel samples.
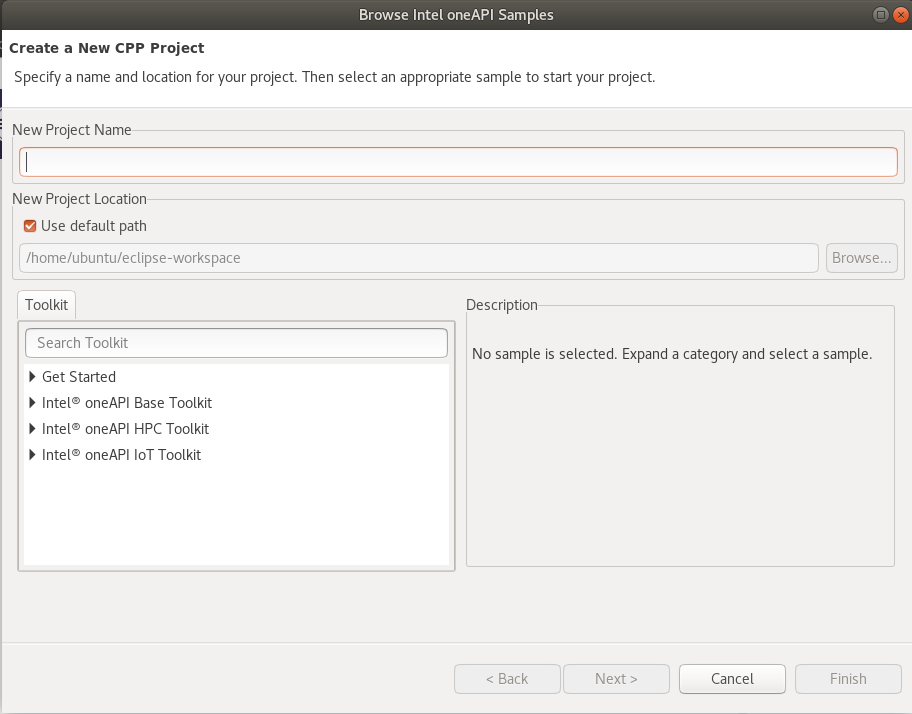
Run Eclipse and select Intel > Browse Intel oneAPI Samples…

The Sample Browser dialog window will be displayed.

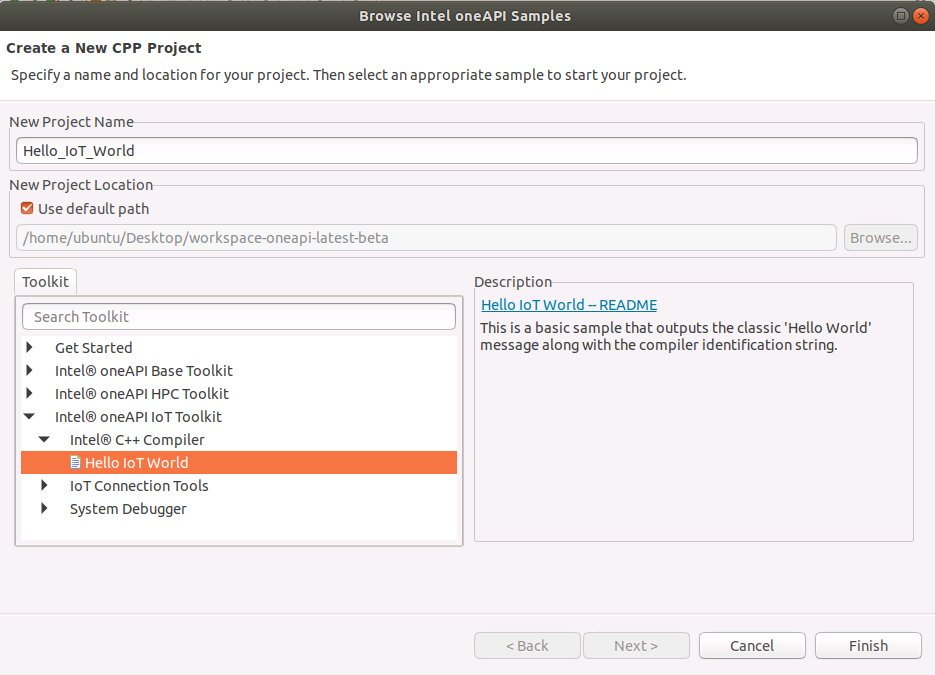
Expand the Intel® IoT Toolkit tree and select Hello IoT World. Click Finish to create a project based on the sample.

Configure Project Properties
- Make sure you've followed the steps described on the Using Containers page to download the Docker image.
- Open the Project Properties by right clicking Project > Properties.
- In Properties select C/C++ Build > Settings, and open the Container Settings tab to set the following:

- Check Build Inside Docker Image.
- Select the docker image to use. If there are no images listed, verify that Docker is enabled for non-root users. Alternatively, you can run Eclipse with sudo.
- Apply and close the settings.
Compile the Application
- Click the Build Icon
 .
. - Confirm that the console prints "Running in image..."
Run Application
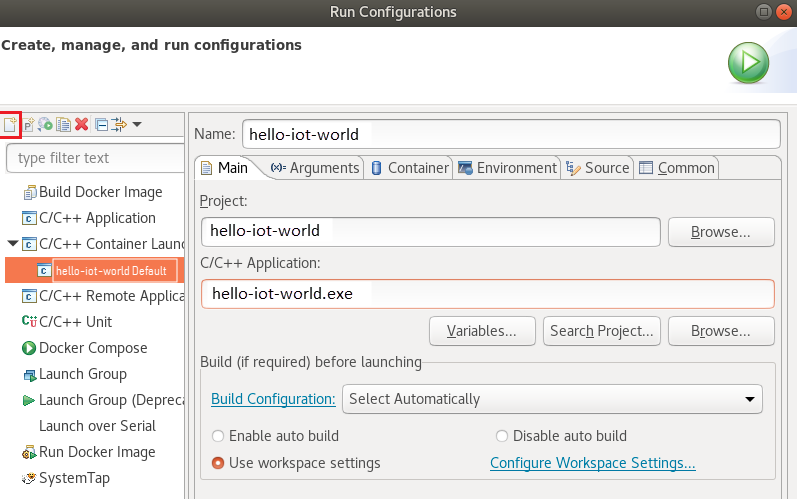
- Create a Run Configuration with Run > Run Configurations.
- Create a new C/C++ Container Launcher.

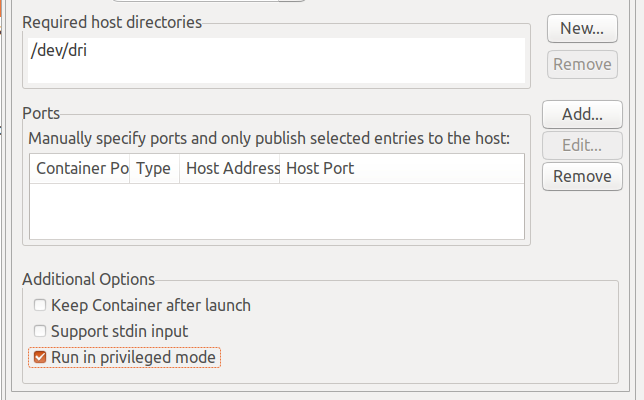
Select the Container tab and make sure the Image is set to the correct Docker image. To enable GPU in the container, add /dev/dri in the Required Host Directories and check Run in Privileged Mode.

- Click the Run icon.
- Confirm that the console prints Running in image...