Thunderbolt™ Share Application Setup
Content Type: Install & Setup | Article ID: 000098894 | Last Reviewed: 11/27/2024
Installation Guide
Step 1: Download the software.
Step 2: Open the downloaded file and follow the wizard guide instructions.
Step 3: Once the installation has successfully completed, a Thunderbolt™ Share application icon will appear on your Windows Desktop.
Step 4: Repeat Steps 1, 2, and 3 above on the second PC that you wish to use with Thunderbolt™ Share.
Step 5: Connect both PCs by plugging a Thunderbolt™ cable into the Thunderbolt™ ports on both PCs. Alternatively, you can connect both PCs with Thunderbolt™ cables to a Thunderbolt™ dock or a Thunderbolt™ monitor.

Step 6: Once the Thunderbolt™ Share application has successfully been installed on both PCs, you can manually start Thunderbolt™ Share from the desktop icon or simply connect both PCs with a Thunderbolt™ cable. See the image below.
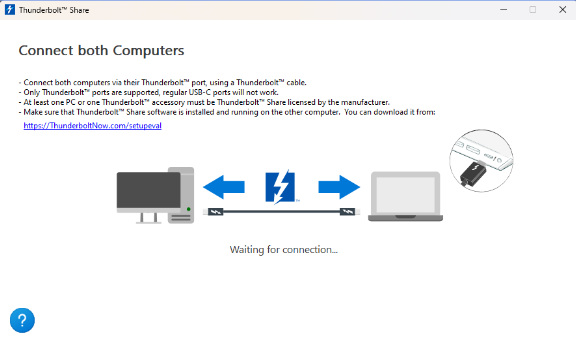
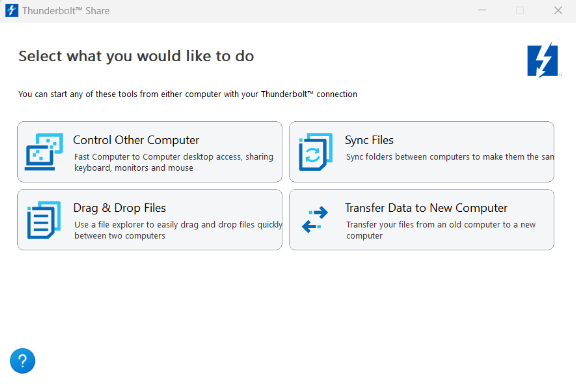
Step 7: After the application indicates that a connection has been made and verifies at least one PC or Thunderbolt™ accessory is Thunderbolt™ Share licensed by the manufacturer, then the Main Menu will appear, indicating that the application is ready to use. See image below.
| Note | Only one PC or Thunderbolt™ accessory that is connected needs to be Thunderbolt™ Share licensed by the manufacturer. |
Specifications
Requirements
Support
For support, please go to the Intel support website for Thunderbolt™ Share.
For more information about the product, go to the Thunderbolt™ Technology website’s Thunderbolt™ Share landing page or to the Thunderbolt™ product manufacturer page from which you purchased the product with the Thunderbolt™ Share license.