Steps to workaround the issue of CPU showing incorrect frequency using task manager when hyper-V is enabled.
Windows Task Manager shows incorrect CPU speed when Hyper-V is enabled on Windows 10*
This is a known issue in Windows* 10 and Window* Server 2012 R2 when hyper-v is enabled in the system. To work around this issue, use the built-in Performance Monitor tool (perfmon.exe), and add the "\Hyper-V Hypervisor Logical Processor\Frequency" performance counter. For more information, refer to Windows Task Manager shows incorrect CPU speed when Hyper-V is enabled.
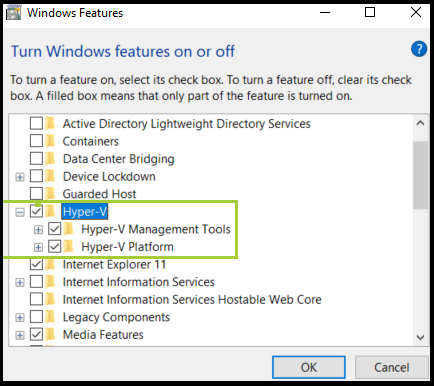
Step 1: Check if Hyper-V is enabled in Windows 10. Follow steps below:
- Using the search window on your system, type "Turn Windows Features on or off."
- View Hyper-V options, and if checked that means Hyper-V is enabled.
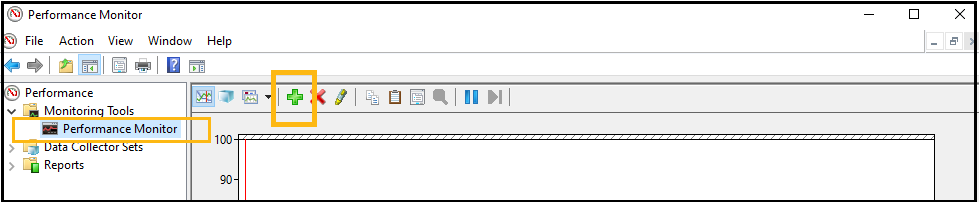
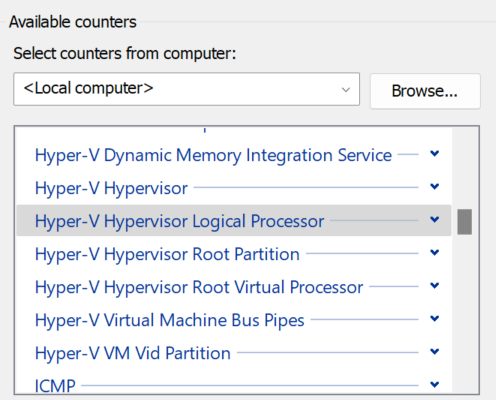
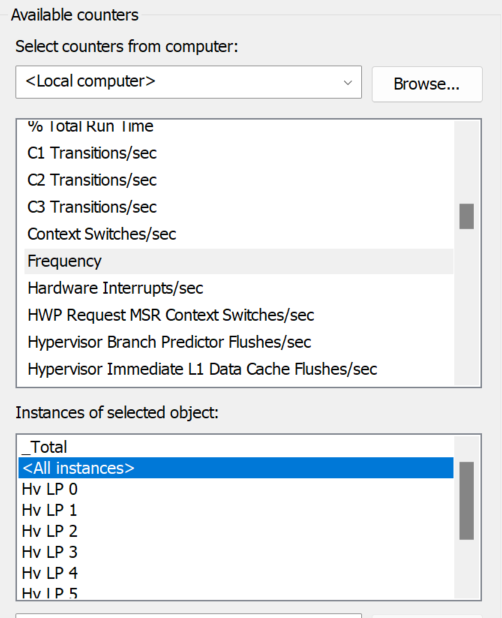
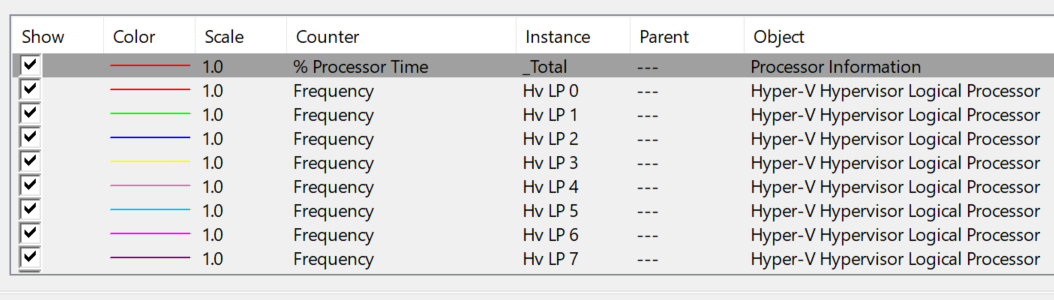
Step 2: Use the built-in Performance Monitor tool to add the "\Hyper-V Hypervisor Logical Processor\Frequency" performance counter.
- Using the search window on your system, type "Performance Monitor."
- Select Performance Monitor tool.
- Select Monitoring tools drop down and select Performance Monitor.
- Click on Add button and this will the open the Add Counters window.
- In the Add Counter window, you will see the available counters, scroll down until you find Hyper-V Hypervisor Logical Processor.
- Click the arrow to open the drop down menu and look for Frequency then click to highlight it. Choose <All instances> under Instances of selected objects:
- When it's highlighted, click the Add >> button and you should be able to see it in the Added Counters.
- Click ok to apply.
- When applied you should be able to see the following at the bottom of the Performance Monitor:
For reference - Windows Task Manager shows incorrect CPU speed when Hyper-V is enabled