Article ID: 000090608 Content Type: Maintenance & Performance Last Reviewed: 07/15/2024

How to Update Your BIOS Using the iFLASH Utility for Intel® NUCs

BUILT IN - ARTICLE INTRO SECOND COMPONENT
Summary

Steps to use to update the NUC's BIOS using the iFLASH tool.

Description

I want to update the BIOS from the command prompt of a bootable USB.

Resolution
Note

To create a bootable USB Device refer to any of the following third-party websites for tips on creating bootable USB devices. Intel is unable to assist with the creation of bootable devices.

Create bootable USB drives the easy way
Boot from USB Flash Drive
You can also search for additional resources on the web for creating bootable USB devices. Search on “How to create bootable USB drives”.

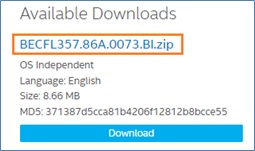
  1. Download the iFlash BIOS Update file (*.BI.zip). Example:

    Available downloaded

  2. Double-click the *BI.zip to extract its files.

    Extract the files

  3. Copy IFLASH2.exe and the .bio file to the bootable USB device.
  4. Configure the BIOS of the target computer to boot to the USB device:
    1. Press F2 during boot to enter BIOS Setup.
    2. Go to the Boot menu.
    3. Enable USB Boot.
    4. Press F10 to save and exit the BIOS Setup.
  5. Boot the target computer with the USB device connected.
  6. At the prompt, type IFLASH2 /PF XXX.bio, where XXX.bio is the filename of the .bio file and press Enter.
  7. Follow all prompts.

If you run into any issues, contact Intel® Customer Support.

Related Products

This article applies to 59 products

Intel® NUC 8 Mainstream-G mini PC (NUC8i3INH)