Article ID: 000090607 Content Type: Maintenance & Performance Last Reviewed: 12/09/2022

How To Update Your Intel® NUC BIOS Using the Power Button Menu

BUILT IN - ARTICLE INTRO SECOND COMPONENT
Summary

Steps to update the Intel® NUC BIOS by using the Power Button to enter the boot menu

Description

Can't update the BIOS by any other means.

Resolution
Note

All BIOS update files for Intel® NUCs are available on Download Center.

The Power Button Menu Update allows you to update the system BIOS during the boot process and before the operating system loads.

  1. Download and save the Recovery BIOS (.BIO) file to a USB device. Example:

    Screenshot

  2. Plug the USB device into a USB port of the Intel NUC when it’s turned off (not in Hibernate or Sleep mode).
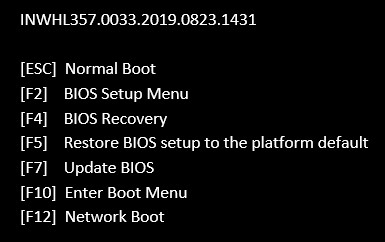
  3. Press and hold down the power button for three seconds, then release it before the 4 second shutdown override. The Power Button Menu displays. (Options on the menu can vary, depending on the Intel NUC model.)

    Power Button Menu displays

  4. Press F7 to start the BIOS update.
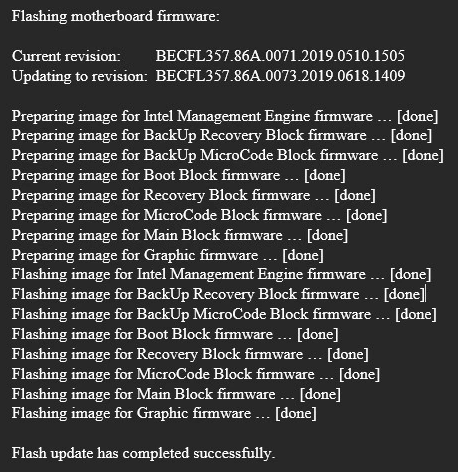
  5. Wait 2–5 minutes for the update to complete.

    Screenshot

  6. When the BIOS update is complete, the computer will boot back into Windows

After any BIOS update, Intel recommends the following steps:

  1. Press F2 during start to enter BIOS Setup.
  2. Press F9 to set BIOS default values.
  3. Customize any BIOS settings, if desired (optional).
  4. Press F10 to save and exit BIOS Setup.