All Intel® NUC Laptop Kits use the Aptio® V UEFI Firmware BIOS core.
Click or the topic for details:
Express BIOS Update (Windows-based)
- Download and save the Express BIOS Update (.EBU.exe) file to a temporary folder. Example:
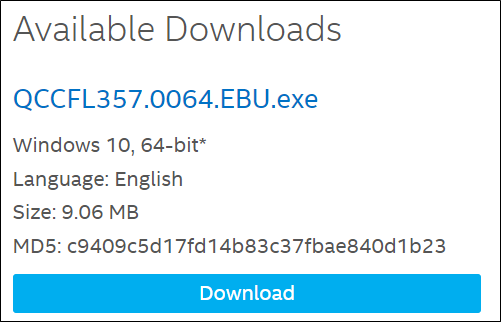
- Double-click the .EBU.exe to run the Express BIOS update.

| Note | You must have the AC power adapter connected to run the BIOS update using the Express BIOS method. |
- A command dialog appears. Press Y to restart the computer and start the update.
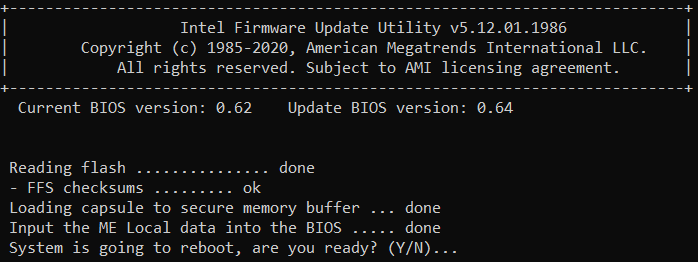
- Wait 2-5 minutes for the update to complete.
- When the BIOS update is complete, the computer will boot back into Windows.
F7 Update
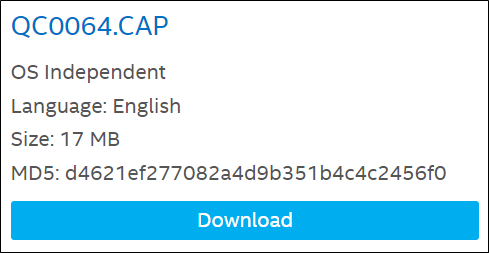
The F7 BIOS update option allows you to update the system BIOS during the boot process and before the operating system loads. - Download and save the BIOS (.CAP) file to a USB device.
- Plug the USB device into a USB port of the target computer.
- Start the Intel NUC Laptop Kit. During boot, when the F7 prompt is displayed, press F7 to enter the BIOS Flash Update tool.
- Select the USB device and press Enter.
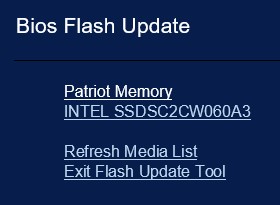
- Select the .CAP file and press Enter.
- Confirm you want to update the BIOS by pressing Enter.
- Wait 2-5 minutes for the update to complete.
- When the BIOS update is complete, the computer will boot back into Windows.
BIOS Recovery by the Power Button Menu
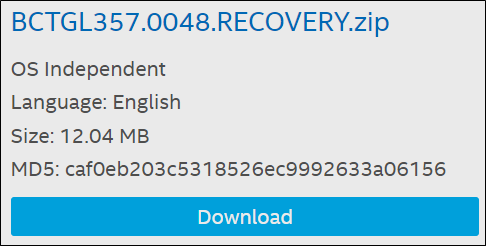
- Download the RECOVERY.ZIP file. Example:
- Extract the .CAP file and transfer it to a USB flash drive.
| Note - There can only be one .cap file on the root of the USB flash drive or the recovery process will abort.

|
- Plug the USB flash drive into a USB port on the Intel NUC Laptop Kit when it’s turned off (not in Hibernate or Sleep mode) and connect the Intel NUC Laptop Kit to AC power.
- Press and hold the power button for 6-7 seconds, release the power button and the Power Button Menu will appear.
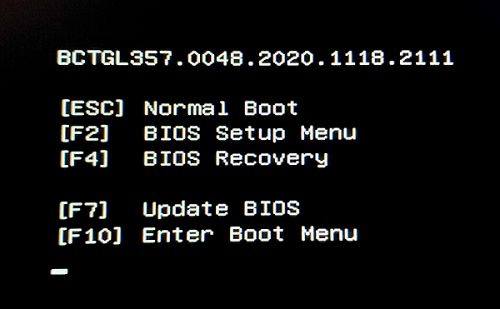
- Press F4 to start a BIOS Recovery.
- Wait 2-3 minutes for the update to complete.
- The Intel NUC Laptop Kit will automatically restart when the recovery process is completed.
- Remove the USB flash drive.
- Restart the computer.
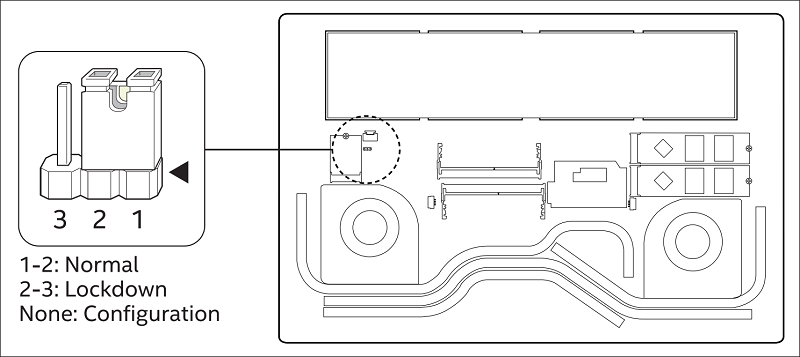
BIOS Recovery by Security Jumper for Intel® NUC 9 Extreme Laptop Kits Only
| Note | - BIOS recovery using the BIOS security jumper will clear Trusted Platform Module (TPM) keys, Intel® Platform Trust Technology (Intel® PTT) keys, and High-bandwidth Digital Content Protection (HDCP) keys.
- These keys will not be restored after the BIOS recovery.
|
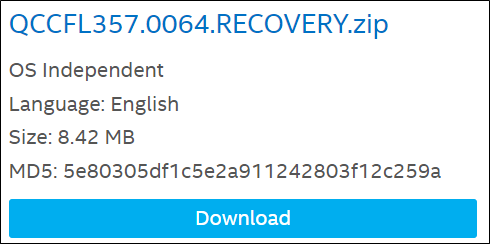
- Download the RECOVERY.zip file. Example:
- Extract the RECOVERY.zip file and copy the EFI folder to the root level of a USB flash drive.
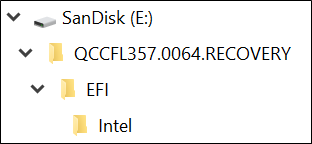
| Note | - It is critical to extract the files with the file folder structure as shown below.
- The USB device must contain a; \EFI folder with the sub-folder; \Intel, which contains the; xxxx.CAP file. Otherwise the recovery will fail.
Example: D:\EFI\INTEL\QCCFL357.CAP |
- Shut down the computer and unplug the AC power adapter.
- Remove the screws and open the bottom cover of the chassis, then remove the BIOS security jumper next to the wireless card.
- Plug the USB flash drive into a USB port of the Intel NUC Laptop Kit and connect the computer to AC power.
- Turn on the Intel NUC Laptop Kit and the recovery process will begin automatically after a 10 second countdown.
- Wait 2-5 minutes for the recovery process to complete.
- After the recovery process finishes, you will receive the message, "Recovery Complete".
- Power off the Intel NUC Laptop Kit and remove the USB device.
- Unplug the AC power from the computer and replace the BIOS security jumper.
- Attach the bottom cover and reattach the AC power.
- Restart the computer.