Environment
Operating System
End users who are interested in checking the integrity of information on systems disk drives should refer to the guidance below. If you are comfortable with command-line interface or have similar technical knowledge, you can follow the manual steps provided below to check the integrity of the information on your systems.
Ensure your data is backed up, then follow the detailed instructions provided. The time it takes to complete this process varies depending on system configuration, but may take up to one hour for all steps.
| What should you know before start? |
|
Step 1: Perform Error Checking
Follow the steps below to scan all internal storage drives (OS, secondary, and so on) for potential file integrity/structure errors.
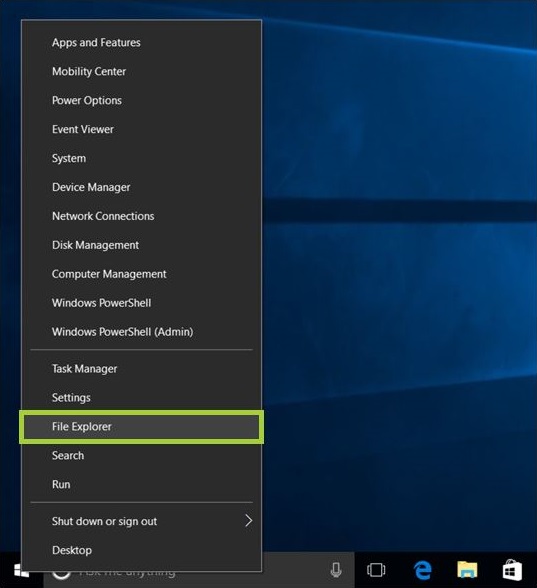
- Open File Explorer. (Right-click Windows Start Menu, located in lower left corner of screen, click File Explorer.)
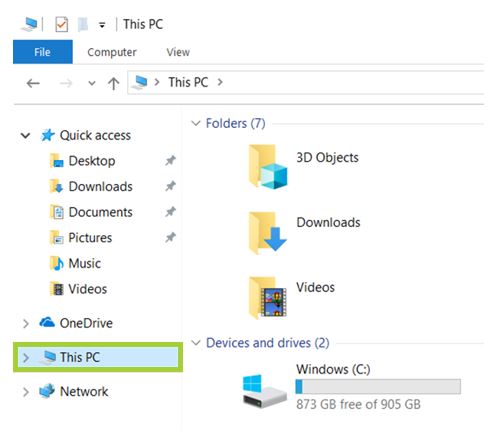
- Click This PC, located on the left side panel. On the center panel, under Devices and drives, storage devices are displayed.
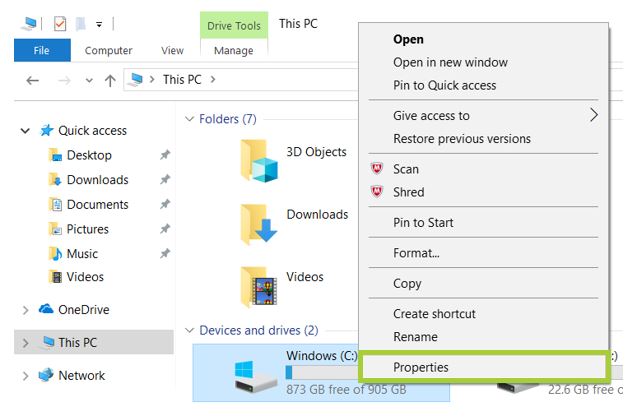
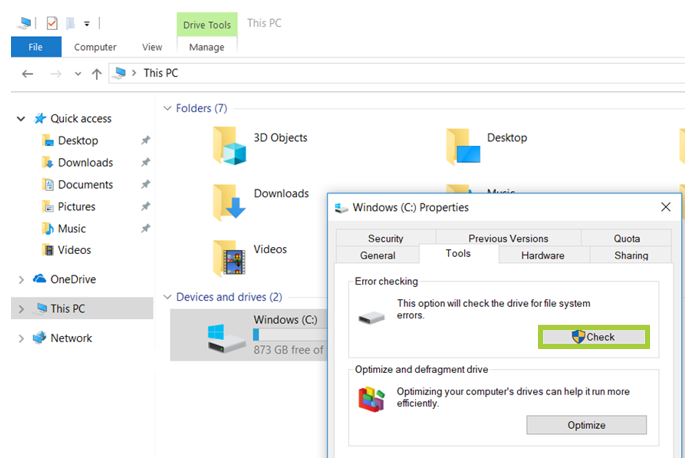
- Right-click the drive you would like to check (such as C:) and select Properties.
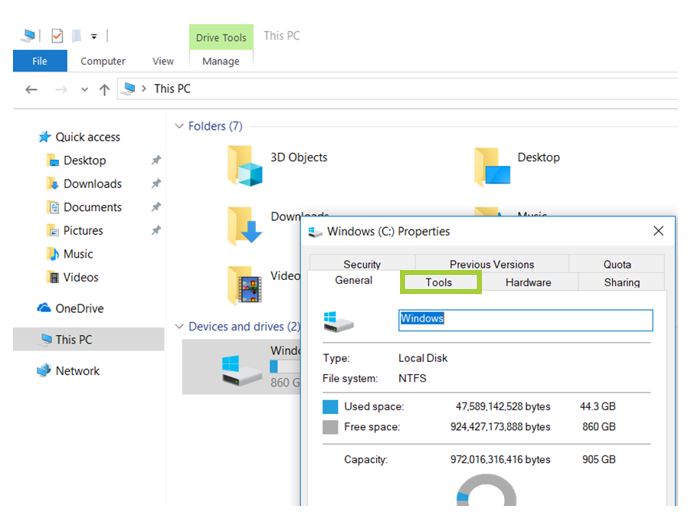
- Click the Tools tab.
- Under Error Checking, click the Check button.
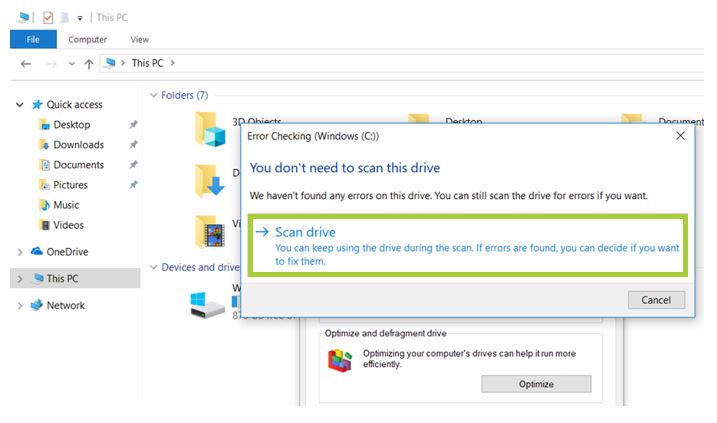
- If there are no unresolved errors that were previously detected, Windows will confirm if you want to scan the drive for errors anyway. Click Scan drive action to proceed.
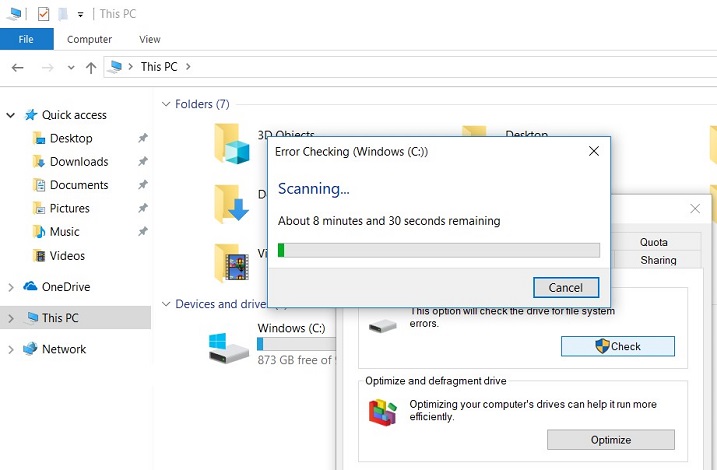
- Windows will proceed to scan the drive for errors and will immediately perform any repairs that can be done without requiring a restart.
- Once the scan is complete, Windows will inform you if it detected any errors, and if so, whether it was able to successfully repair errors without requiring a restart.
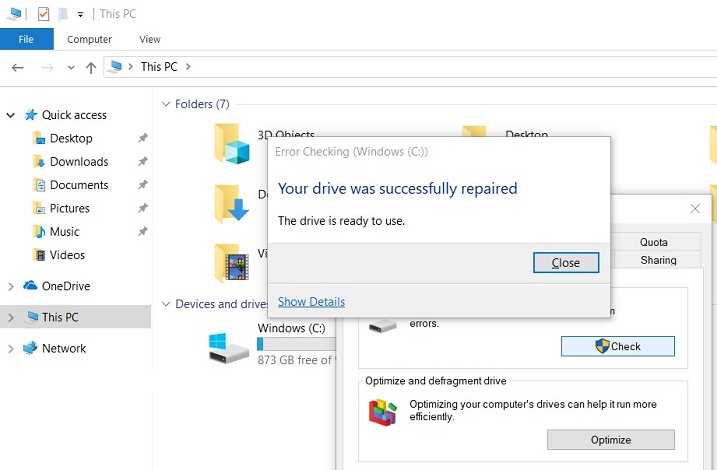
- If Windows detected one or more errors that require a restart, you'll be prompted to restart. Exit all programs and then restart your system. The repair will start automatically before the next Windows startup. During the repair process, the progress will be displayed on the screen.
Note Checking for drive errors can take a long time, especially when performed on larger drives. Once the process is complete, a summary of the results, including any errors found and repairs made, can be found in the Windows Event Viewer under the Application folder within Windows Logs. Some end users who follow the suggested steps may find that their hard drive space significantly reduced after running the command. This result may be due to a failing hard drive, as one of the crucial functions that drive error checking performs is to identify and block bad sectors on the drive. A few bad sectors on an old drive will typically go unnoticed to the user, but if the drive is failing or has serious problems, you could have large numbers of bad sectors that, when mapped and blocked by error checking, appear to “steal” significant portions of your hard drive's capacity.
This is expected behavior, and it means that those sectors, and any data potentially stored on them, have failed. Error checking will attempt to recover data from bad sectors, but some data may be corrupted and will need to be recovered from a back-up.
- Repeat the steps above for each internal storage drive in the system.
Step 2: Windows Deployment Image Servicing Manager (DISM)
The Deployment Image Servicing and Management (DISM) tool is built into the Microsoft Windows* 10/11 Operating System image. This tool will check and attempt to repair Windows files integrity.
| Note | It is recommended the system be connected to the Internet during this process. |
To learn more about this tool and this procedure, see Microsoft's What is DISM article.
- Run Command Prompt as administrator.
- Left-click the Windows Start Menu.
- Type Command Prompt.
- Right-click the result and select Run as administrator.
- To scan the health of the system, type the following command, then press Enter. (It may take several minutes for the command operation to be completed.)
- dism/online /cleanup-image /scanhealth
- To begin repair of any compromised Windows packages on your system, type the following command, then press Enter. (It may take several minutes for the command operation to be completed.)
- dism/online /cleanup-image /restorehealth
- If any issues with this process or errors are displayed, visit the Microsoft Windows* support site for more information.
- Close the Command Prompt window.