Setting up a RAID array using Non-Volatile Memory Express* (NVMe*) disks on Intel® Server Board S2600WF and Intel® Server Board S2600ST Product Family boards.
I want to make a RAID volume with NVMe* drives via Intel® Virtual RAID on CPU (Intel® VROC).
Notes | These steps are only valid for Intel® Server Board S2600WFR and Intel® Server Board S2600ST Product Family boards. |
This requires that BIOS Boot Mode option be set to UEFI. Refer to How to Change the Boot Mode (UEFI/Legacy) on Intel® Server Boards should there be any doubt. | |
Depending on your desired RAID array, you may need to use an Intel® Virtual RAID on CPU (Intel® VROC) Upgrade key (Review comparison chart). |
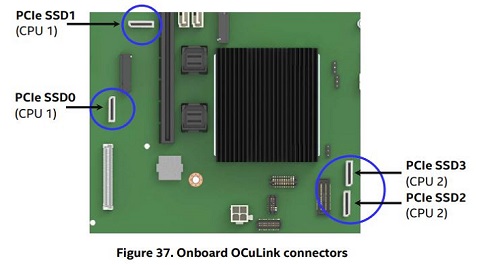
- Connect the NVMe* drives from the backplane to the server board using the onboard Optical Copper Link (OCuLink)* connectors (or PCIe* switches/Retimer) with the OCuLink cables (for example, OCuLink Cable Kit AXXCBL665CVCV). In this article, we will use onboard connectors. In the event only one processor is installed, use either PCIe* SSD0 or PCIe SSD1 connectors as shown below:
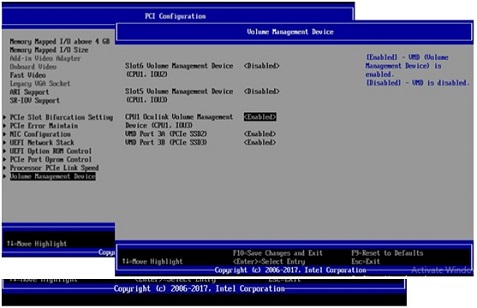
- For installed NVMe devices to utilize the Intel® Volume Management Device (Intel® VMD) features of the server board, it must be enabled in BIOS for the appropriate CPU PCIe root ports.
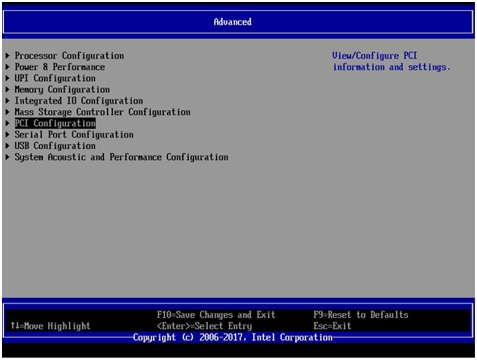
- Go to the Advanced / PCI Configuration / Volume Management Device menu as shown below:
- After enabling the VMD OCuLink(s), save and reboot back to the BIOS.
- Once in the BIOS:
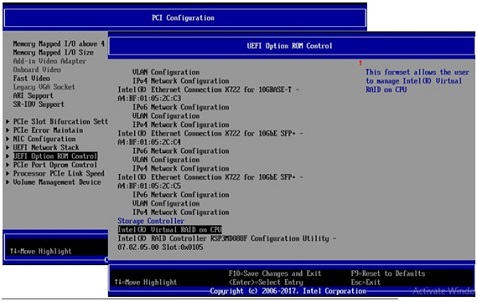
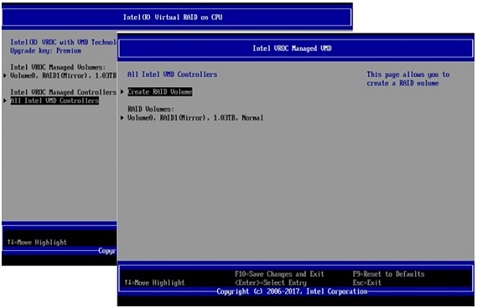
- Go to Advanced / PCI Configuration / UEFI Option ROM Control menu. Scroll down and select Intel® Virtual RAID on CPU.
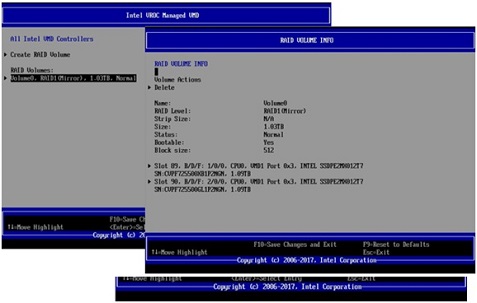
- Select All Intel VMD Controllers and select Create RAID Volume as shown below:
For more information, refer to the How to configure Intel® Virtual RAID on CPU (Intel® VROC) video.