How to Manually Enable or Disable the Wi-Fi Radio signal in Windows* Operating Systems
Content Type: Install & Setup | Article ID: 000024076 | Last Reviewed: 12/19/2022
In some cases Wi-Fi radio signal can be manually enabled or disabled. This could be done via Software or Hardware.
Some laptops have a hardware switch to enable or disable the wireless radio. If wireless is disabled via this hardware switch, the methods described below do not work. See Wireless Radio Cannot be Enabled from Software for further details.
Please check also with your Laptop Original Equipment Manufacturer (OEM) to confirm if your system has a hardware switch.
View additional details on how to enable or disable airplane mode.
First, select your operating system.
If you don't know which operating system you have, see What Version of Windows Do I Have?
 Wireless icon.
 Wireless icon.
| Note | The Wi-Fi switch and Airplane mode may not be available if you are using a desktop or other non-mobile PC. |


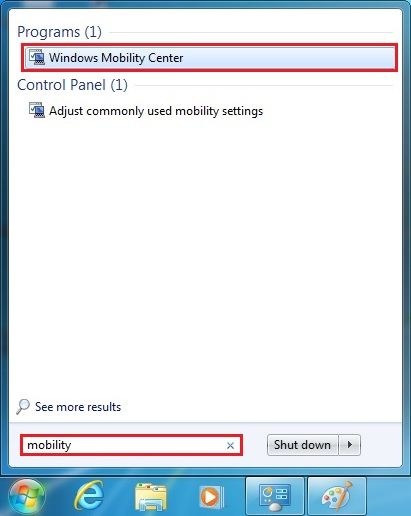
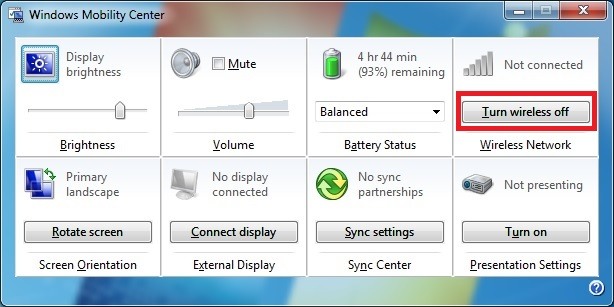
| Note | You may not find the Windows Mobility Center* if you are using a desktop or other non-mobile PC. Try Disable or Enable Network Adapter in Windows 7 instead. |
| Note | If you continue to have problems enabling the Wi-Fi adapter, there could be a hardware or software issue. Contact your Original Equipment Manufacturer or Intel customer support for additional help. |