Environment
Operating System
What's included in my environment?
- Intel® Server Board S1200BTL2x drives in a RAID 1 (boot drive)
- 1 drive as RAID 0
Are the methods different depending on which configuration I'm using?
The Intel® RAID Web Console 2 enables you to configure the Intel® RAID Controllers and disk drives installed on a system.
The following instructions focus on creating a virtual drive using the simple configuration and advanced configuration methods.
Creating a virtual drive using simple configuration
It is the quickest and easiest way to create a new storage configuration.
When you select simple configuration mode, the system creates the best configuration possible using the available drives.
Follow these steps to create a new storage configuration in simple configuration mode:
- Perform either of the following steps:
- Right-click the controller node in the device tree in the left frame of the Intel® RAID Web Console 2 window and select Create Virtual Drive.
- Or
- Select the controller node and select Go To -> Controller -> Create Virtual Drive in the menu bar:
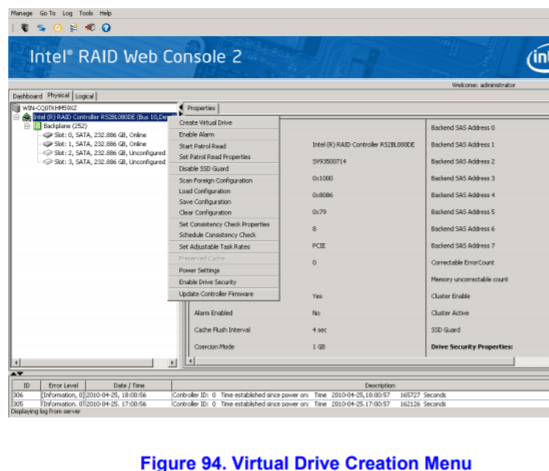
The dialog box for the configuration mode (simple or advanced) appears: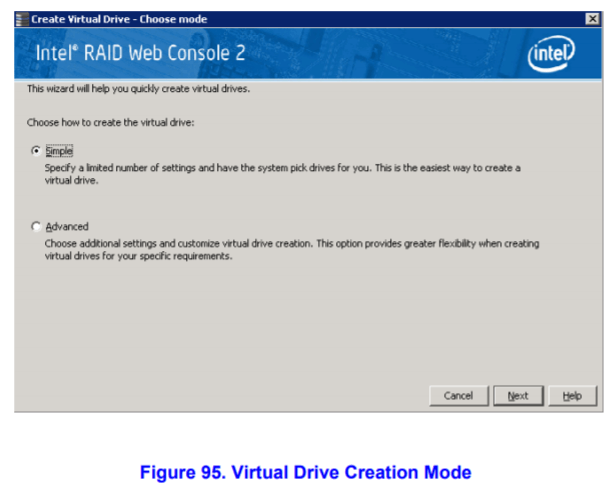
- Click Simple and press Next. The Create Virtual Drive screen appears:
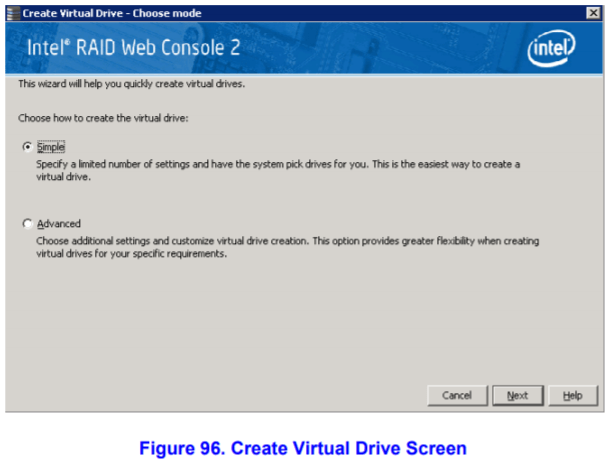
- Select the RAID level desired for the virtual drive.
When you use simple configuration, the Intel® RAID Controller supports RAID levels 1, 5, and 6. In addition, it supports independent drives (configured as RAID 0). The screen text gives a brief description of the RAID level you select. The RAID levels you can choose depend on the number of drives available. - Click the box next to Assign a hot spare if you want to assign a hot spare drive to the virtual drive. Hot spares are drives that are available to replace failed drives automatically in a redundant virtual drive (RAID 1, RAID 5, or RAID 6).
Note In the simple configuration procedure, you can assign dedicated hot spares to a maximum of 16 arrays at one time. This is because the dedicated hot spares can support only up to 16 drive groups. If you try to create more than 16 drive groups at one time, dedicated hot spares will not be assigned to drive groups beyond the first 16.
To create more than 16 drive groups with hot spares, you need at least 35 drives of the same capacity. - Select the number of virtual drives that you want to create.
- Select the capacity for the virtual drives.
Each virtual drive has the same capacity. - Click Next.
The Create Virtual Drive - Summary window appears, as shown in Figure 97. This window shows the selections you made for simple configuration.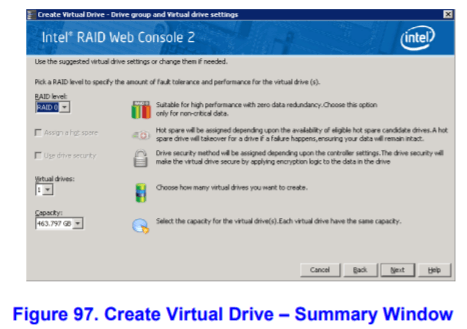
- Click Back to return to the previous screen to change any selections or click Finish to accept and complete the configuration.
The new storage configuration will be created and initialized.
After the configuration is completed, a dialog box may or may not notify (depending on different utility version) you that the virtual drives were created successfully, as shown in Figure 98. If more drive capacity exists, the dialog box asks whether you want to create more virtual drives. If no more drive capacity exists, you are prompted to close the configuration session.Note If you create a large configuration using drives that are in power save mode, it could take several minutes to spin up the drives. A progress bar appears as the drives spin up. If any of the selected unconfigured drives fail to spin up, a box appears to identify the drive or drives. 
- Select Yes or No to indicate whether you want to create additional virtual drives.
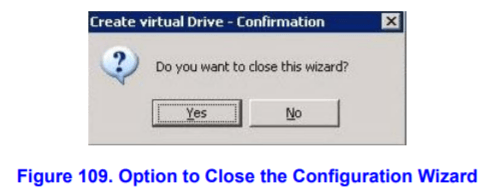
If you select Yes, the system takes you to the Create Virtual Drive screen. If you select No, the utility asks whether you want to close the wizard. - If you selected No in step 9, select Yes or No to indicate whether to close the wizard. If you select Yes, the configuration procedure closes. If you select No, the dialog box closes, and you remain on the same page.

Creating a virtual drive using advanced configuration
The advanced configuration procedure provides an easy way to create a new storage configuration. The advanced configuration gives you greater flexibility than simple configuration because you can select the drives and the virtual drive parameters when you
create a virtual drive. In addition, you can use the advanced configuration procedure to create spanned drive groups.
Follow these steps to create a new storage configuration in the advanced configuration mode. In this example, you create a spanned drive group.
- Perform either of the following steps:
- Right-click the controller node in the device tree in the left frame of the Intel® RAID Web Console 2 window and select Create Virtual Drive.
- OR
- Select the controller node and select Go To -> Controller -> Create Virtual Drive in the menu bar: The dialog box appears:
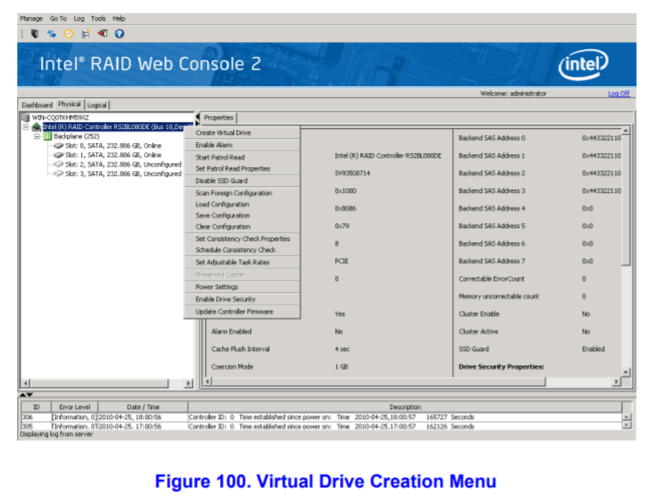

- Click Advanced and press Next.
The Create Drive Group Settings screen appears: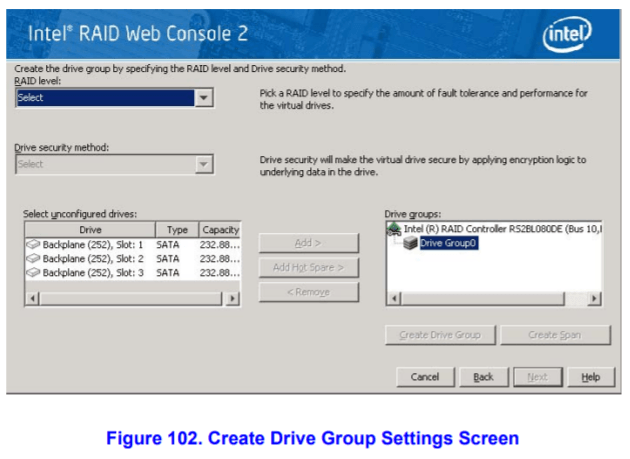
- Select the following items on the Create Drive Group Settings screen:
- Select the RAID level desired for the drive group from the drop-down menu.
To make a spanned drive, select RAID 10, RAID 50, or RAID 60 in the RAID level field.
Drive Group 0 and Span 0 appear in the Drive groups field when you select RAID 10, 50, or 60.
The Intel® RAID Controller supports RAID levels 1, 5, 6, 10, 50, and 60. In addition, it supports independent drives (configured as RAID 0 and RAID 00). The screen text gives a brief description of the RAID level you select. The RAID levels you can choose depend on the number of drives available. - Select unconfigured drives from the list of drives and click Add> to add them to the drive group.
The selected drives appear under Span 0 below Drive Group 0: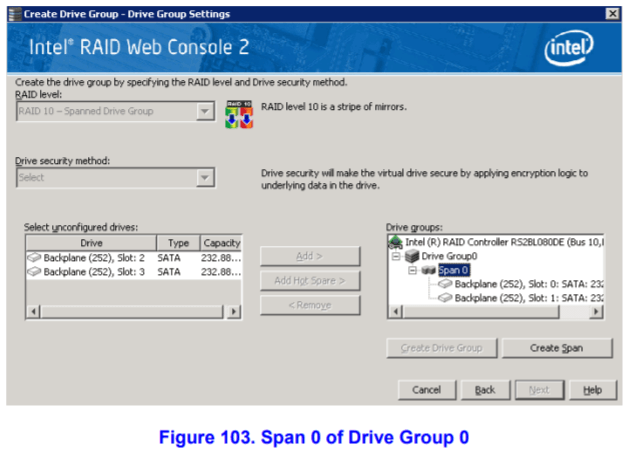
- Click Create Span to create a second span in the drive group.
- Select unconfigured drives from the list of drives and click Add> to add them to the drive group.
- The selected drives appear under Span 1 below Drive Group 0:
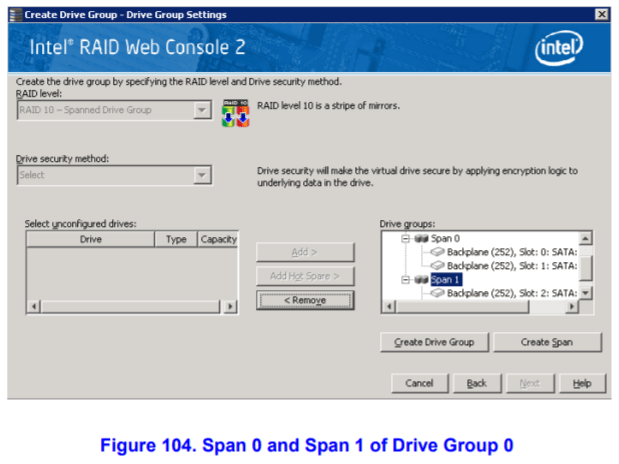
- Click Create Drive Group to make a drive group with the spans.
- Click Next to complete this step.
The Virtual drive settings window appears, as shown in Figure 105. The drive group and the default virtual drive settings appear. The options to update the virtual drive or remove the virtual drive are grayed out until you create the virtual drive.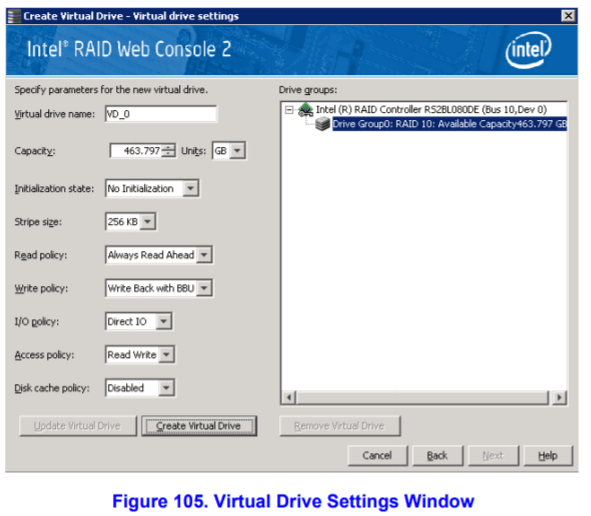
- Select the RAID level desired for the drive group from the drop-down menu.
- Change any virtual drive settings, if desired.
- Click Create Virtual Drive.
The new virtual drive appears under the drive group, as shown in Figure 106. The options Update Virtual Drive and Remove Virtual Drive are now available. Update Virtual Drive allows you to change the virtual drive settings, and Remove Virtual Drive allows you to delete the virtual drive.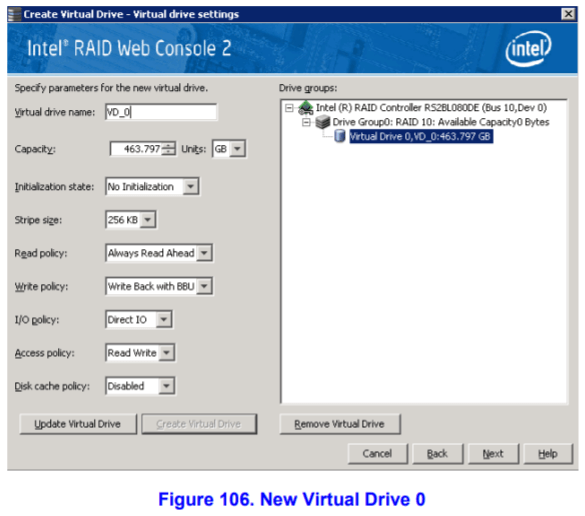
- Click Next. The Create Virtual Drive - Summary window appears, as shown in Figure 107. This window shows the selections you made for advanced configuration.
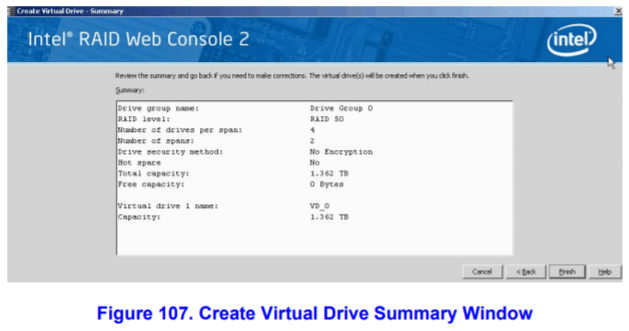
- Click Back to return to the previous screen to change any selections or click Finish to accept and complete the configuration.
The new storage configuration will be created and initialized.
Note If you create a large configuration using drives that are in power save mode, it could take several minutes to spin up the drives. A progress bar appears as the drives spin up. If any of the selected unconfigured drives fail to spin up, a box appears to identify the drive or drives. - After the configuration is completed, a dialog box may or may not notify (depending on different utility version) you that the virtual drives were created successfully, as shown in Figure 108. If more drive capacity exists, the dialog box asks whether you want to create more virtual drives. If no more drive capacity exists, you are prompted to close the configuration session.

- Select Yes or No to indicate whether you want to create additional virtual drives.
If you select Yes, the system takes you to the Create Virtual Drive screen, as shown in Figure 96 under the simple configuration step-through. If you select No, the utility asks whether you want to close the wizard, as Figure 109. - If you selected No in step 9, select Yes or No to indicate whether you want to close the wizard.
If you select Yes, the configuration procedure closes. If you select No, the dialog box closes, and you remain on the same page.