Warranty Process for Intel® NUCs with Replaceable Lids
Caution | Don't return custom lids, or any other custom functional components. Intel depots aren't equipped to screen for custom lids or components, and cannot return these items to you. |
See below to remove customized lids when you return Intel® NUCs for warranty replacement.
Click or the topic for details:
Standard Warranty Replacement (SWR)
Scenario 1: The Intel® NUC has a non-functional custom lid, such as a lid with a different color, or one that has a log.
- Remove the customized lid and keep it.
- If you have the original lid, attach it to the Intel NUC before returning it.
- If you don't have the original lid, return the Intel NUC without a lid.
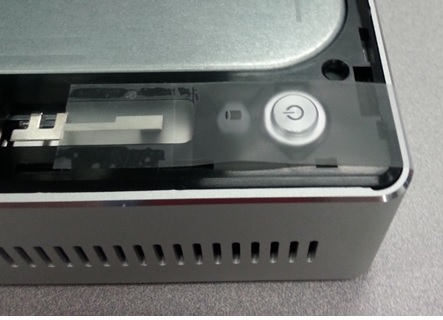
- Apply a strip of tape across the power button and HDD LED lens to keep them in place during shipping. See image below.
- The replacement unit ships with a standard lid. You can now install a customized lid on the new unit.

Scenario 2: Intel NUC has a functional custom lid. A functional custom lid provides space for TV tuner, NFC module, or other types of devices.
- Remove the custom lid, power button, and HDD LED lens, and keep them. Also keep any special functional components, such as modules or cables.
- If you have the original lid, power button, and HDD LED lens, attach these items to the Intel NUC before returning it.
- If you don't have these original items, return the Intel NUC without them.
- The replacement unit ships with a standard lid. You can now install the custom parts on the new unit.
Advanced Warranty Replacement (AWR)
Scenario: Intel NUC has a custom lid, either non-functional (cosmetic) or functional.
- The replacement unit ships with a standard lid.
- You can swap the lids, power button, and HDD LED lens between the defective and replacement units.
- Return the defective unit, that now has the standard parts.
| Related topic |
| Am I eligible for SWR or AWR? |