To manually install the Intel® Graphics Driver in the Windows XP* operating system, follow these steps:
Caution
 | Intel supplies generic versions of its graphics drivers for general purposes, but the computer manufacturer can change the features, incorporate customizations, or make other changes to the graphics driver software or software packaging. To avoid any potential installation incompatibilities, Intel recommends that you first check with your computer manufacturer and use the driver software it provides. |
- Download the graphics driver ZIP file.
- Unzip the file to a designated location or folder using these steps:
- Right-click the ZIP file.
- Click Extract All (or select WinZip* and an Extract option).
- Follow the prompts to extract or unpack the files to a folder of your choice. The folder should have the unpacked items such as the example in Figure 1.
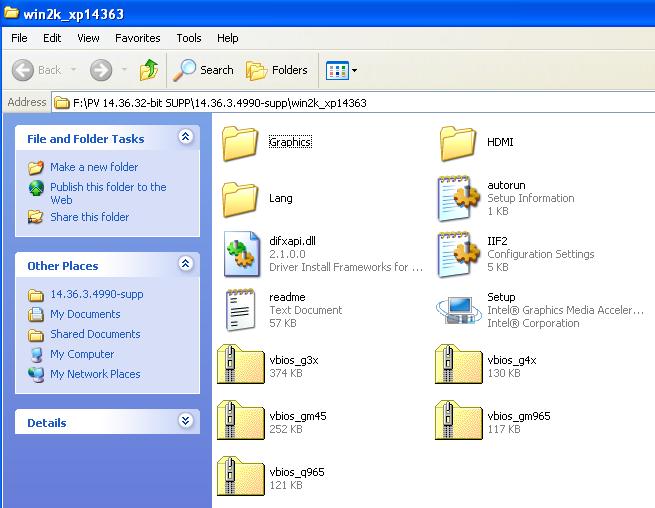
Figure 1: Unpack the Zip file to a folder of your choice
- Click Start, right-click My Computer, and then click Properties.
- The System Properties window opens. Click the Hardware tab, and then click Device Manager.
- The Device Manager window opens. Double-click Display adapters.
- Right-click the Intel® Graphics Controller and click Update Driver (see Figure 2).
| Note | Your computer might list a different Intel Graphics Controller or chipset, and the Intel Graphics Controller or chipset could be shown once or twice. |

Figure 2: The Device Manager window with Display adapters section expanded
- Select the following option when the Hardware Update Wizard asks to connect to Windows Update: No, not this time. Click Next (see Figure 3).
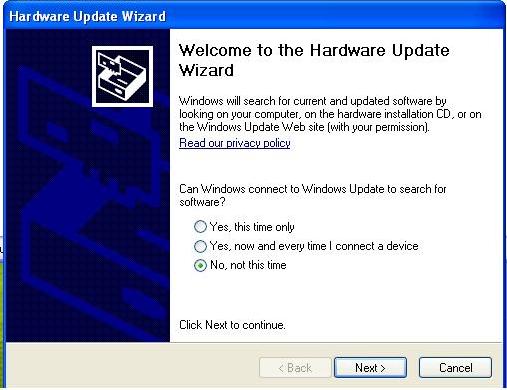
Figure 3: Hardware Update Wizard asks to connect to Windows* Update
- Select the following option: Install from a list or specific location (Advanced), and then click Next.
- Select the Don't search, I will choose the driver to install option, and then Next (see Figure 4).
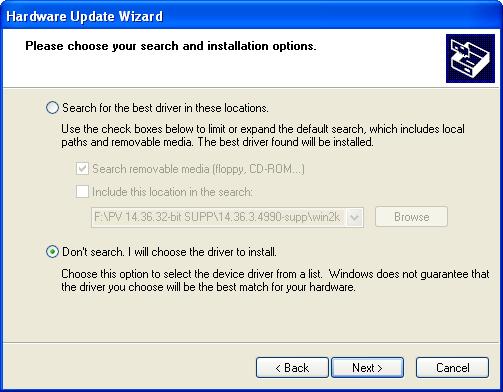
Figure 4: Please choose your search and install options
- Click the Have Disk button, and then click the Browse button.
- Browse to the directory where you unzipped the file you downloaded, and then select the Graphics subdirectory.
- Locate and highlight the igxp32.inf file, igxp64.inf file, or kitXXXXX.inf file where XXXXX can be various numbers.
- Click the Open button (see Figure 5).
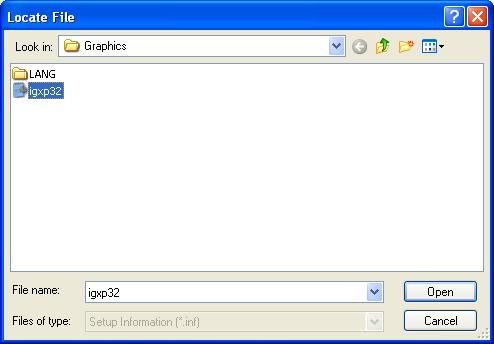
Figure 5: Locate File
- Click the OK button. A window listing all of the available display types should open. Select your computer display adapter and click the Next button.
- The operating system then installs the driver (see Figure 6). Click the Finish button when done.
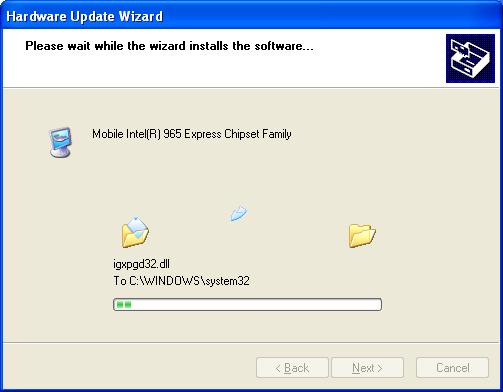
Figure 6: The driver is being installed.
- Click the Yes button to reboot. The driver should now be loaded.
- If you encounter a problem when using the above Have Disk installation method (steps 2-13) and are unable to successfully install the Intel® Graphics Driver, follow these steps to remove the previously installed graphics driver:
- Click Start on the left of Windows* taskbar.
- Click Control Panel or click Settings, and then Control Panel.
| Note | You need to switch to Classic View (see Figure 7) if you are in Category View (see Figure 8) to get to Control Panel. |
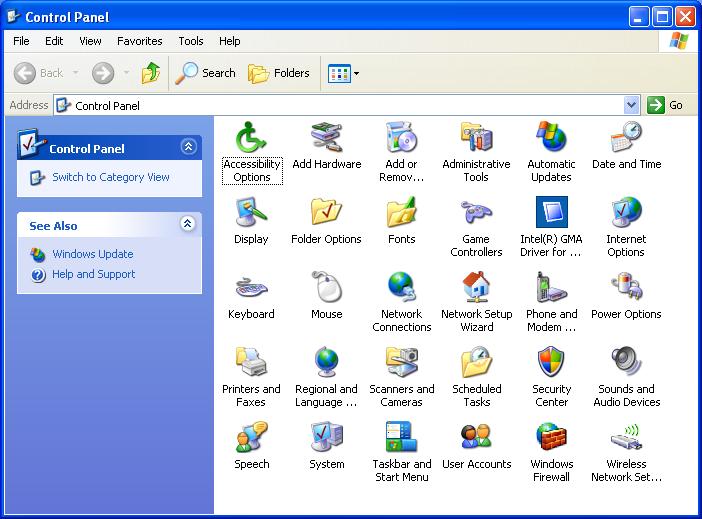
Figure 7: Control Panel in Classic View

Figure 8: Control Panel in Category View
- Double-click Add or Remove Programs.
- Select the Intel® Graphics Media Accelerator driver, and then click Remove button (see Figure 9). This function removes the previously installed graphics driver.
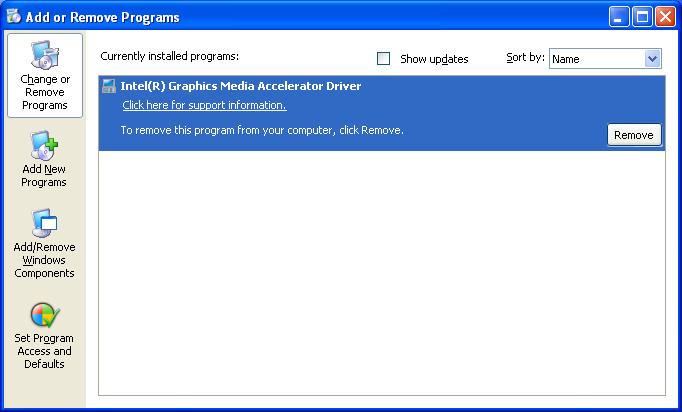
Figure 9: Add or Remove Programs
- Reboot the computer when prompted.
- At boot-up, Windows detects new hardware and displays the same window as shown above in Figure 3.
- Repeat steps 6-13 to re-apply the Have Disk Installation method. Ignore any new device messages displayed on the Windows taskbar. These messages disappear once the new driver has been installed.