AN 834: Using the Intel® HLS Compiler Pro Edition with an IDE

ID 683131
Date 5/29/2020
Public

2. Using Intel® HLS Compiler Pro Edition with an Eclipse* IDE on Linux Operating Systems

Before you use the Intel® HLS Compiler Pro Edition Version 20.1 with an Eclipse* IDE, ensure that you have complete the following tasks:

To use the Intel® HLS Compiler Pro Edition with an Eclipse* IDE, start a terminal session and complete the following steps in that terminal session:

  1. Run the following command:
    source <hls_installdir>/init_hls.sh

    Where <hls_installdir> is the path to your Intel® HLS Compiler. The default installation location for Intel® HLS Compiler Pro Edition is /home/<username>/intelFPGA_pro/20.1/hls.

  2. Set the CPATH and LIBRARY_PATH environment variables as follows:
    export "CPLUS_INCLUDE_PATH=<hls_installdir>/include"
    export "LIBRARY_PATH=<hls_installdir>/host/linux64/lib"
  3. In the same terminal session, start your Eclipse* IDE.

    If you have an HLS project that you have compiled before, you are ready to run and debug your HLS component, and you can skip the next step.

  4. Create and configure an Eclipse* project for your HLS component:
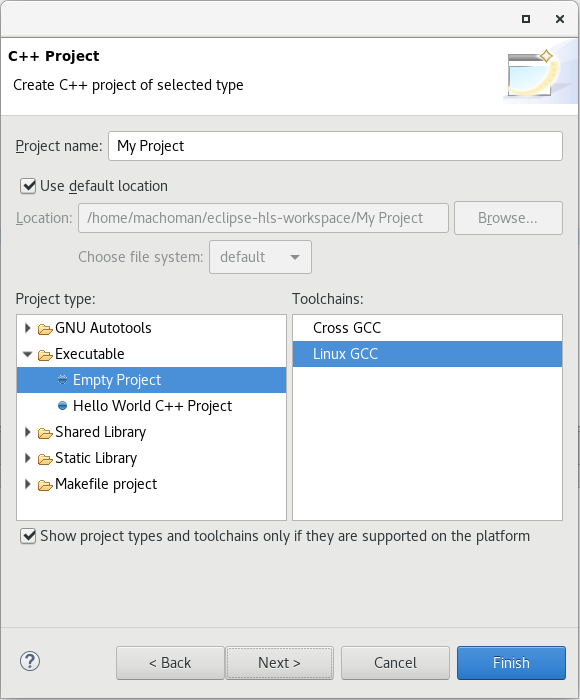
    1. Create a new C++ project in Eclipse (File > New > C++ Project).
    2. Select a C++ Managed Build template for the project and select the following properties:
      • Project type: Executable > Empty Project
      • Toolchains: Linux GCC


    3. Click Next and click Advanced Settings.
      You can also access these settings later through your project properties:
      1. In the Project Explorer view, right-click your project and select Properties.
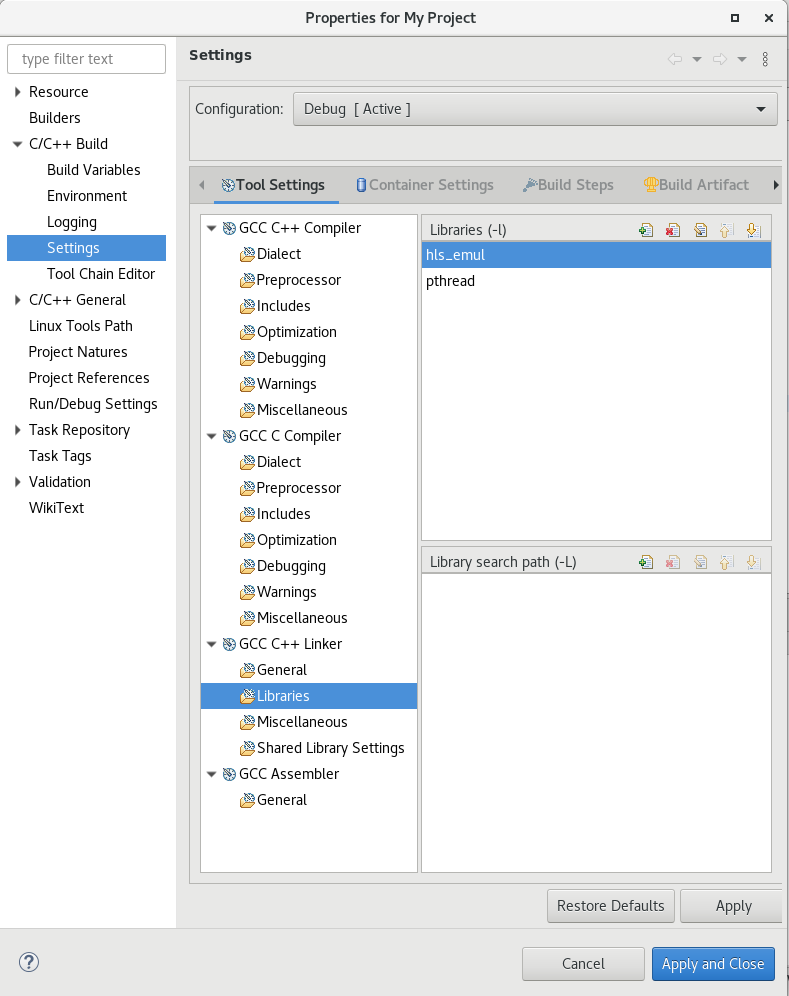
      2. In the Properties window for you project, go to C/C++ Build > Settings.
    4. Set the C++ dialect and libraries call properties for the project:
      1. On the Tool Settings tab, go to GCC C++ Compiler > Dialect and set the Language standard value to ISO C++17 (-std=c++17).

      2. On the Tool Settings tab, go to GCC C++ Linker > Libraries and add the hls_emul and pthreadlibraries to the list of libraries.


    5. Click Apply and Close.
    6. Click Finish to finish creating your project.
    7. Import or create your HLS source files.
    8. If there are problems with the header files, rebuild the index.

      To rebuild the index, right-click your project in the Project Explorer view and select Index > Rebuild.

You can now develop, run, and debug your HLS component using your Eclipse* IDE.

After you have confirmed the functional correctness of your component, you can start to optimize your HLS component by using the information in the Intel® HLS Compiler High-Level Design Reports. These reports are generated when you compile your component with the i++ command.

You can also use your Eclipse* IDE to debug executable files that are produced by compiling your component with the i++ command