Introduction
Intel® Graphics Performance Analyzers (GPA) offers a wide range of tools to analyze graphics applications across diverse workloads, platforms, and graphics APIs. Within Intel® GPA you can use Graphics Trace Analyzer to explore where you can distribute workloads evenly across CPUs and GPUs. This article will dive deep into analyzing selected events in Graphics Trace Analyzer to begin profiling and pinpointing performance regressions in your applications, based on the captured platform and hardware metrics. Topics covered in this article can be visualized in video format in the Data Selection and Event Summary Insights video by checking reference markers in the images associated with this article.
Pre-requisites
Before proceeding with this article, ensure you have the minimum system requirements to successfully analyze graphics applications using Intel® GPA. Also make sure you have downloaded and installed Intel® GPA on your host platform.
Types of Performance Events
All trace files contain performance events of varying characteristics and have specific data associated with the corresponding event types. All selected events are grouped together by this event type. Listed below are the different types of performance events contained in Graphics Trace Analyzer.
Queued Packages
Queued packages show the lifetime of render command buffers until they are executed on the GPU.
Regions
Regions show logical application execution blocks defined with Intel ITT API or Graphics debug API. By default, the block color corresponds to the color of the timeline track, where each block has a name and a duration.

Markers
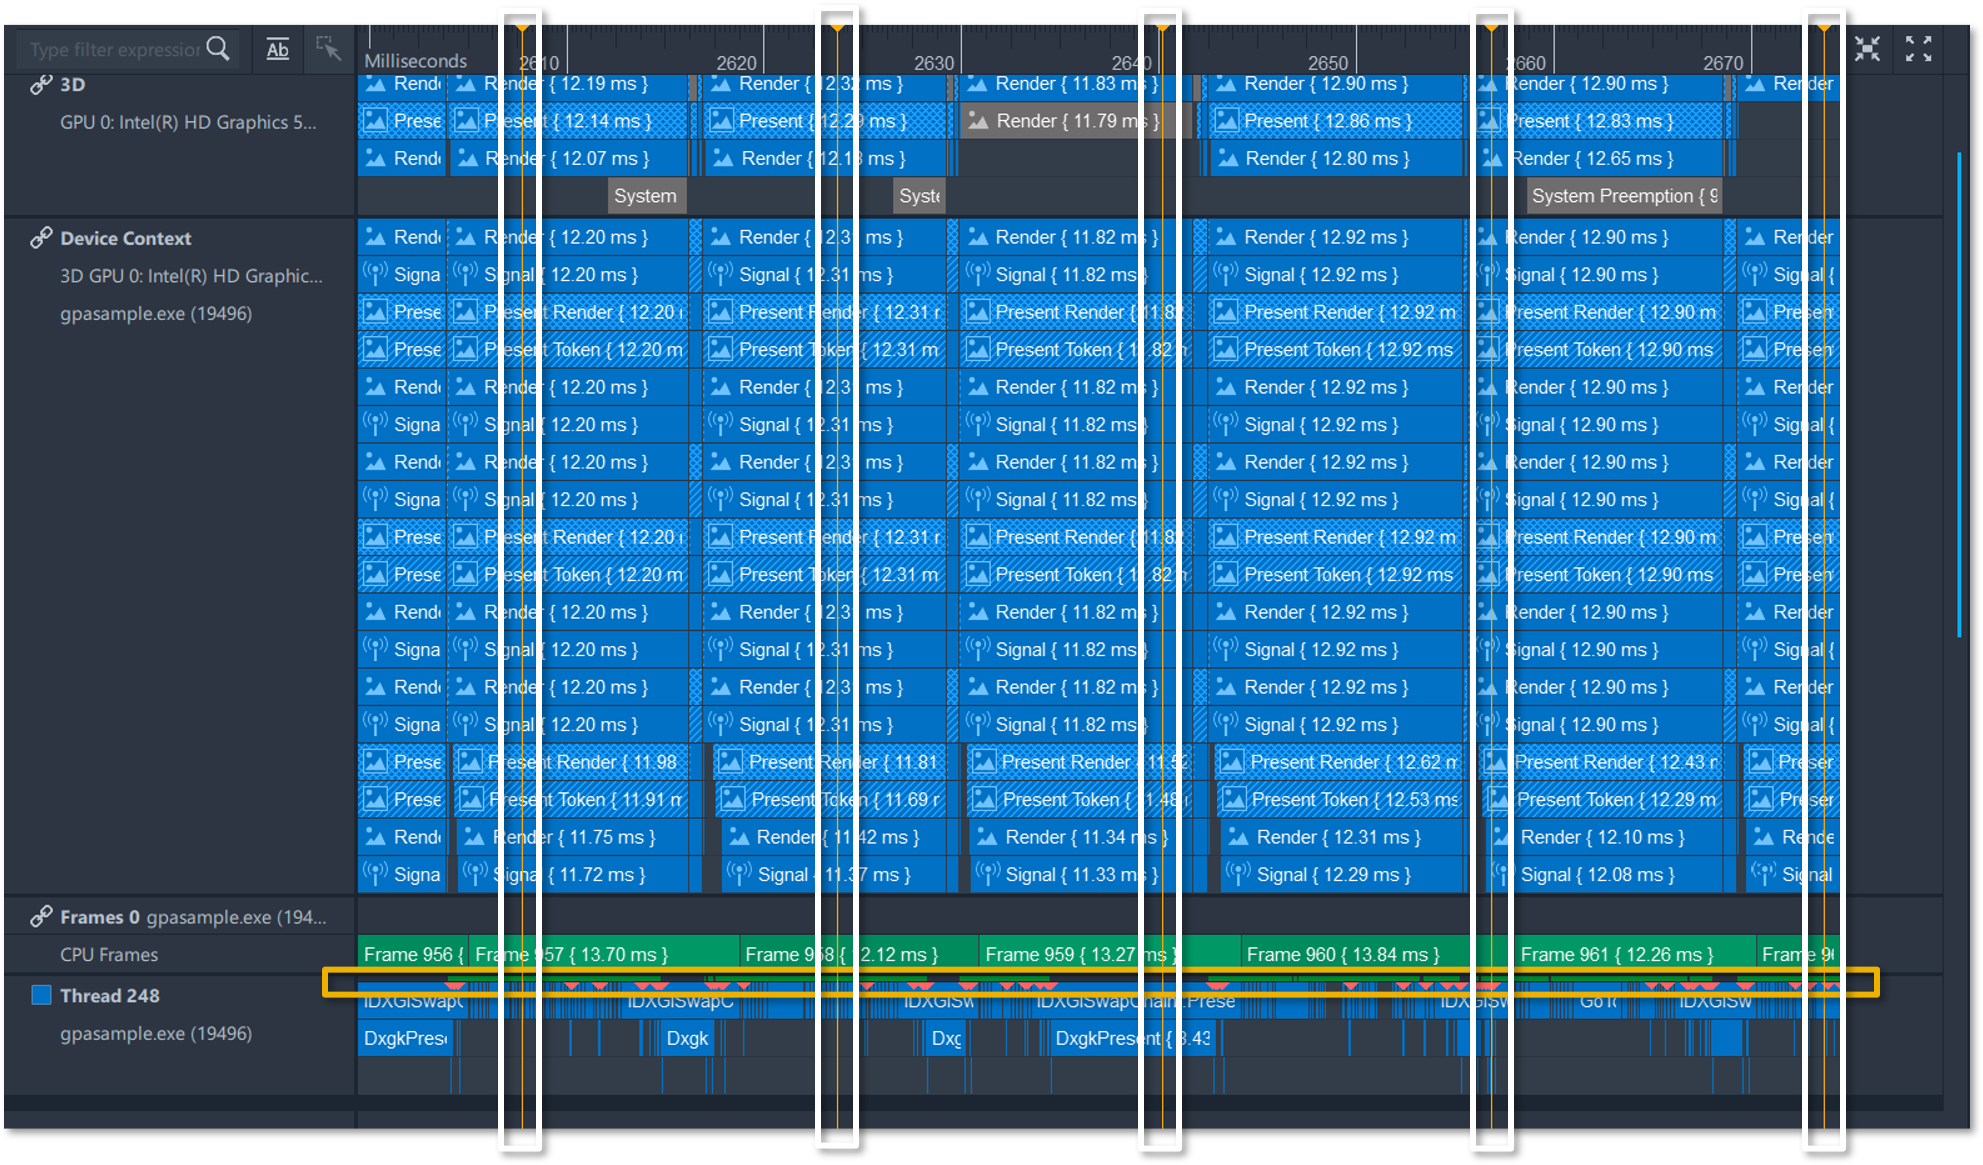
Markers display timestamps that are either globally or process defined. Markers are visualized as colored triangles. Global markers are placed on the timeline ruler and process defined markers are shown on the executed threads.
Metrics
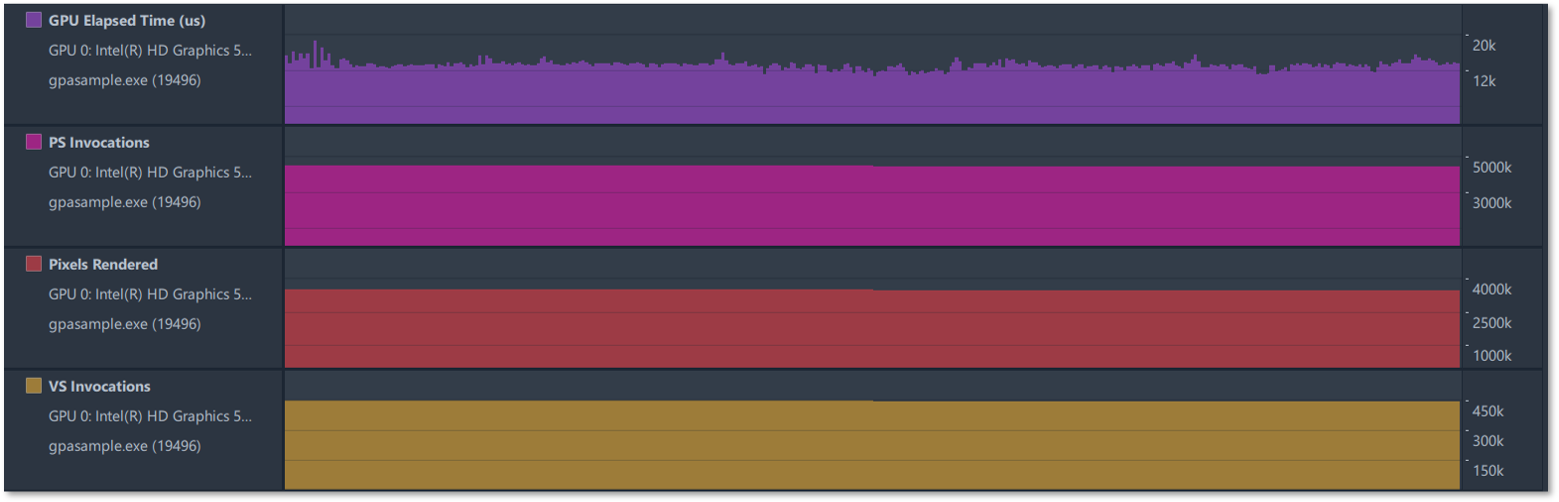
Metrics show user enabled CPU or GPU metrics enabled through System Analyzer or Graphics Monitor.
Data Selection
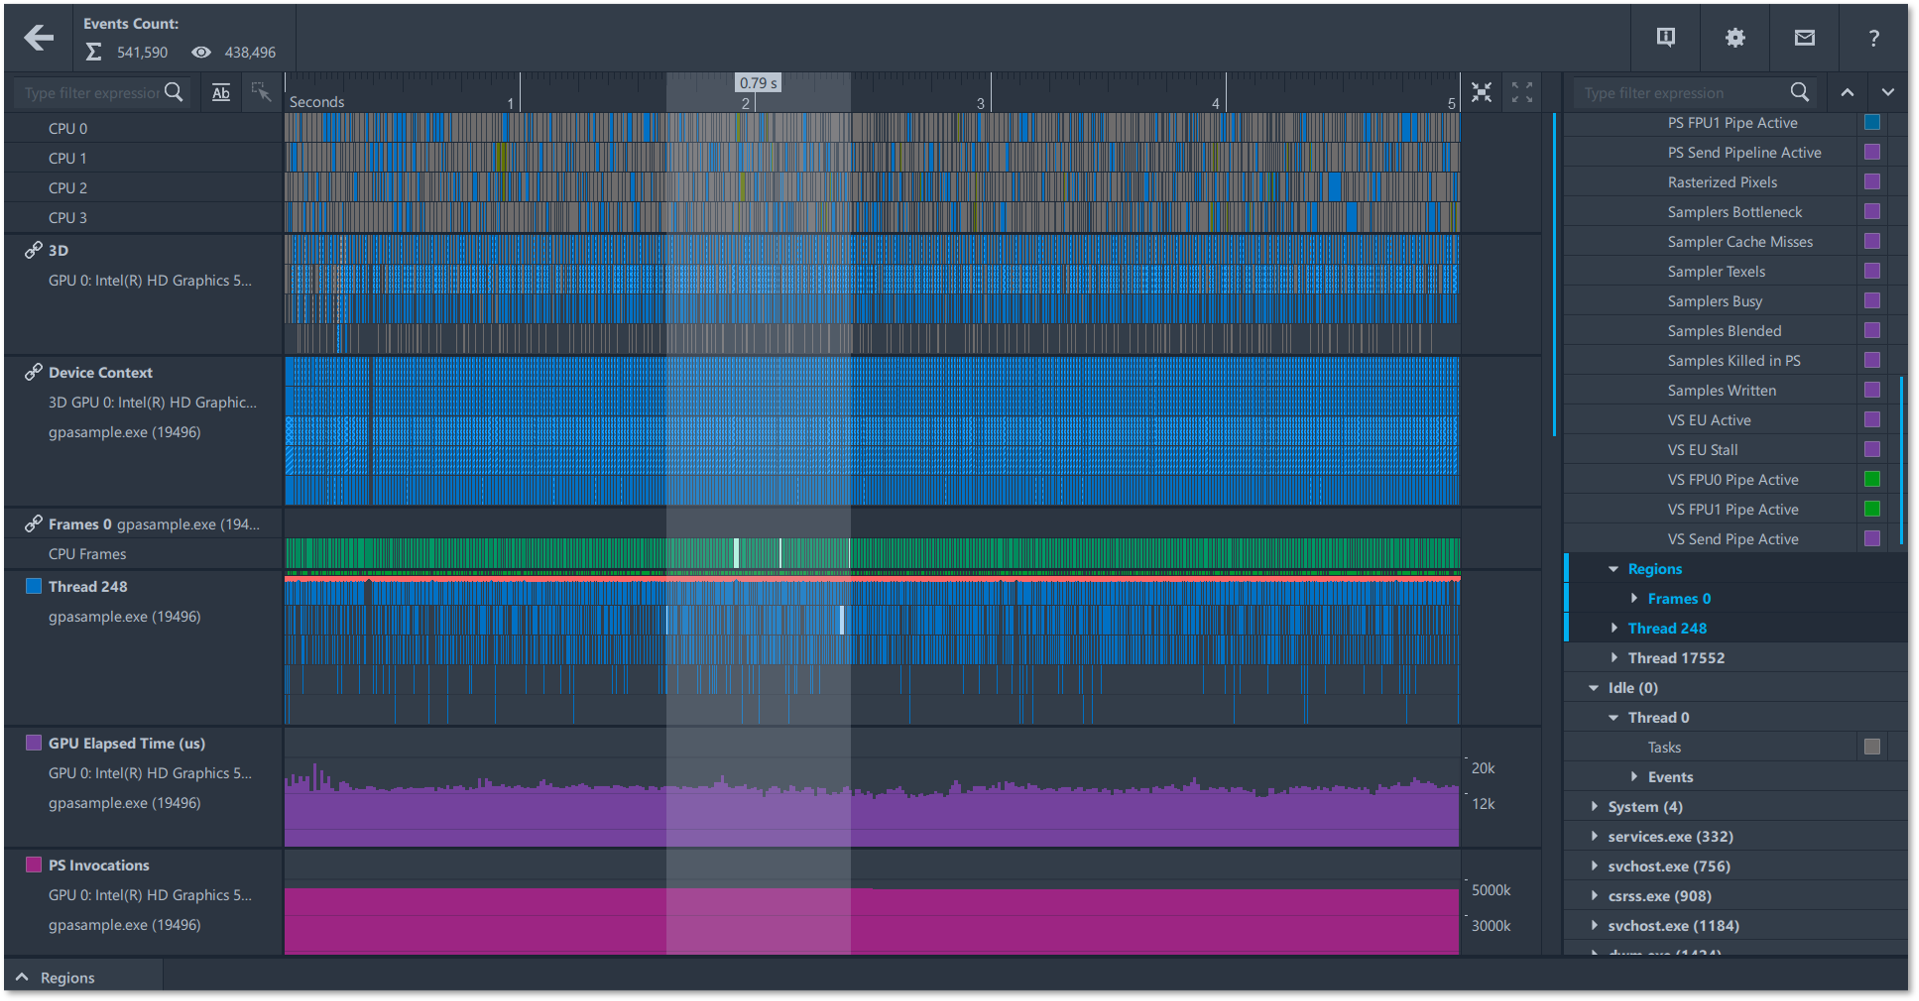
While analyzing trace data it’s important to first isolate problem areas in your application using a high-level overview then dive deep to inspect the issue at a precise level. In Graphics Trace Analyzer there are two mechanisms of doing that: data selection and zooming. There are three different types of selections that you can use to inspect your data further: Rectangular, Singular and Range Selection.
Rectangular Selection
Using rectangular selection, you can select multiple events from multiple tracks in the timeline over a specified duration. To use rectangular selection, left click on your mouse at the point you want to start your selection from, then simply drag your mouse to an ending point for that selection. All events within the rectangular selection are assumed to be selected.
Single Selection
To deselect all selected items simply click anywhere on the timeline and your selected items will be deselected. To select items using single selection, left click on an event in the timeline and that event will be selected. To select more than one event, hold down the CTRL button on your keyboard and click on the additional events you want to select. Once your events are selected you can analyze them further in the difference performance events tabs. Clicking on the regions tab will display an aggregated summary list of all region event instances for the selected items. Hovering over the items in the aggregated summary table will highlight the events in the timeline.
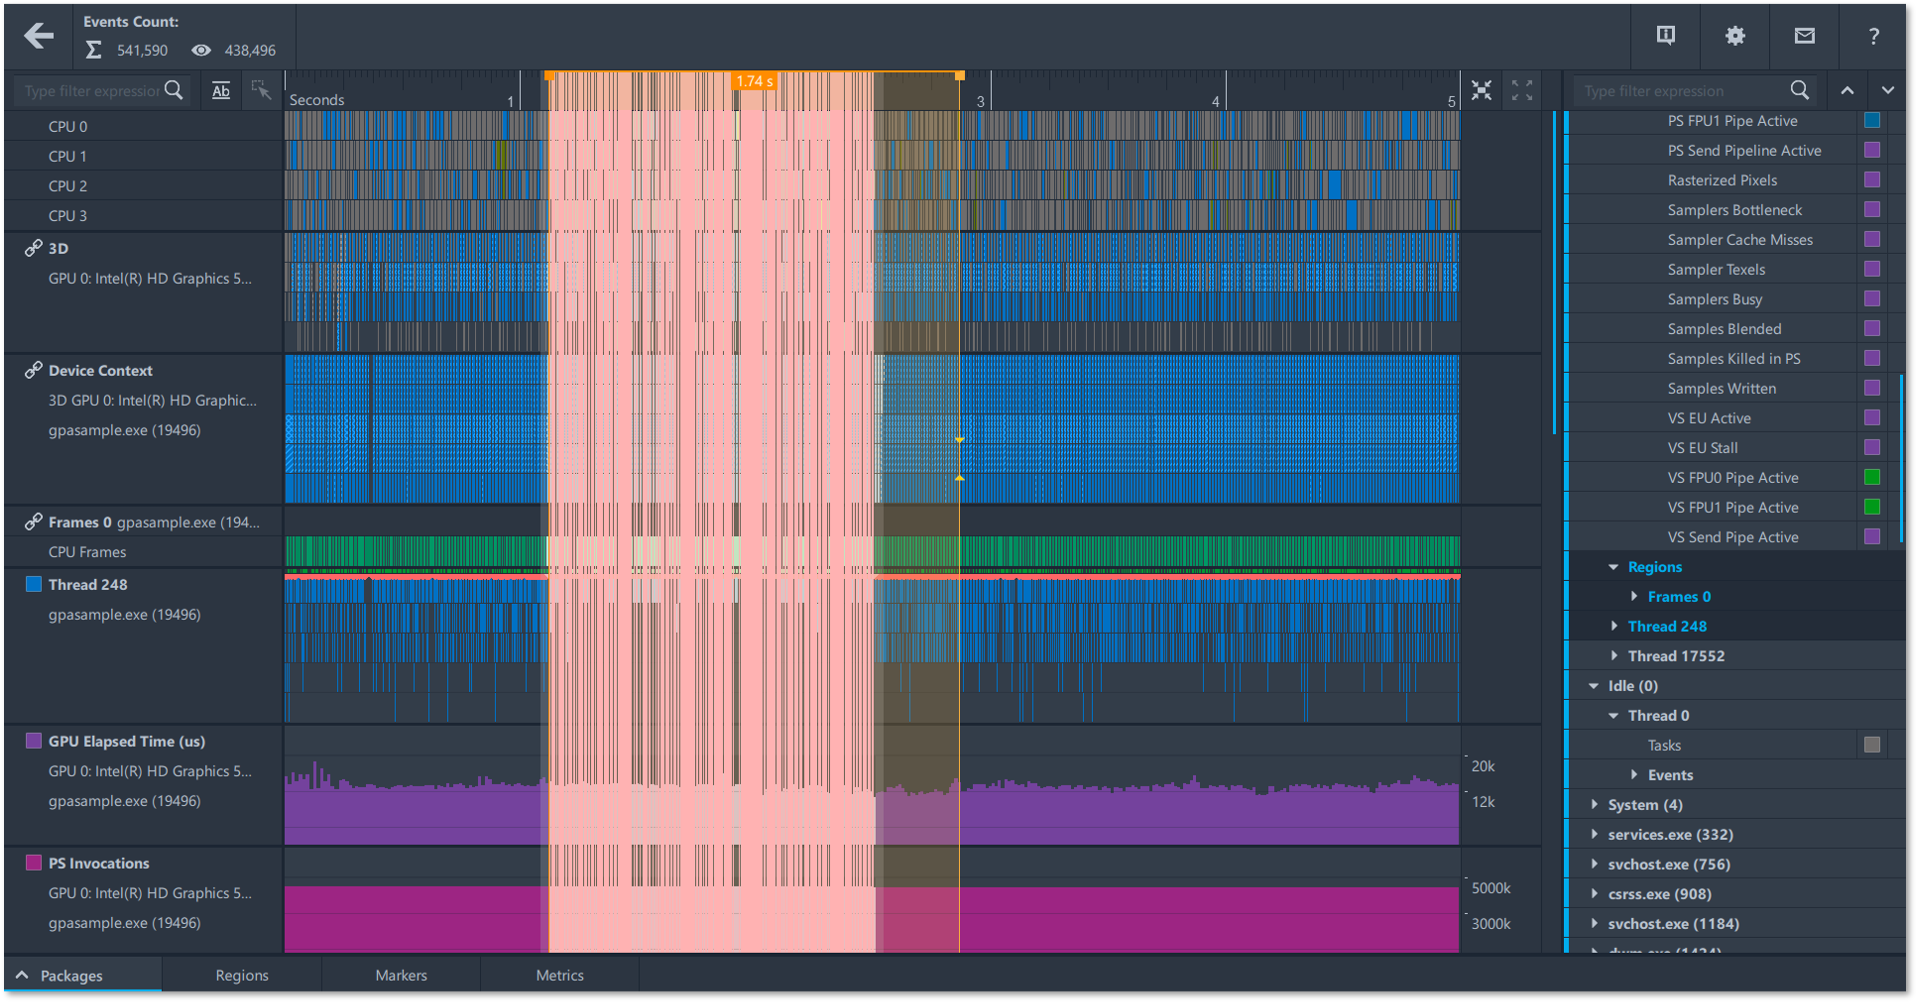
Range Selection
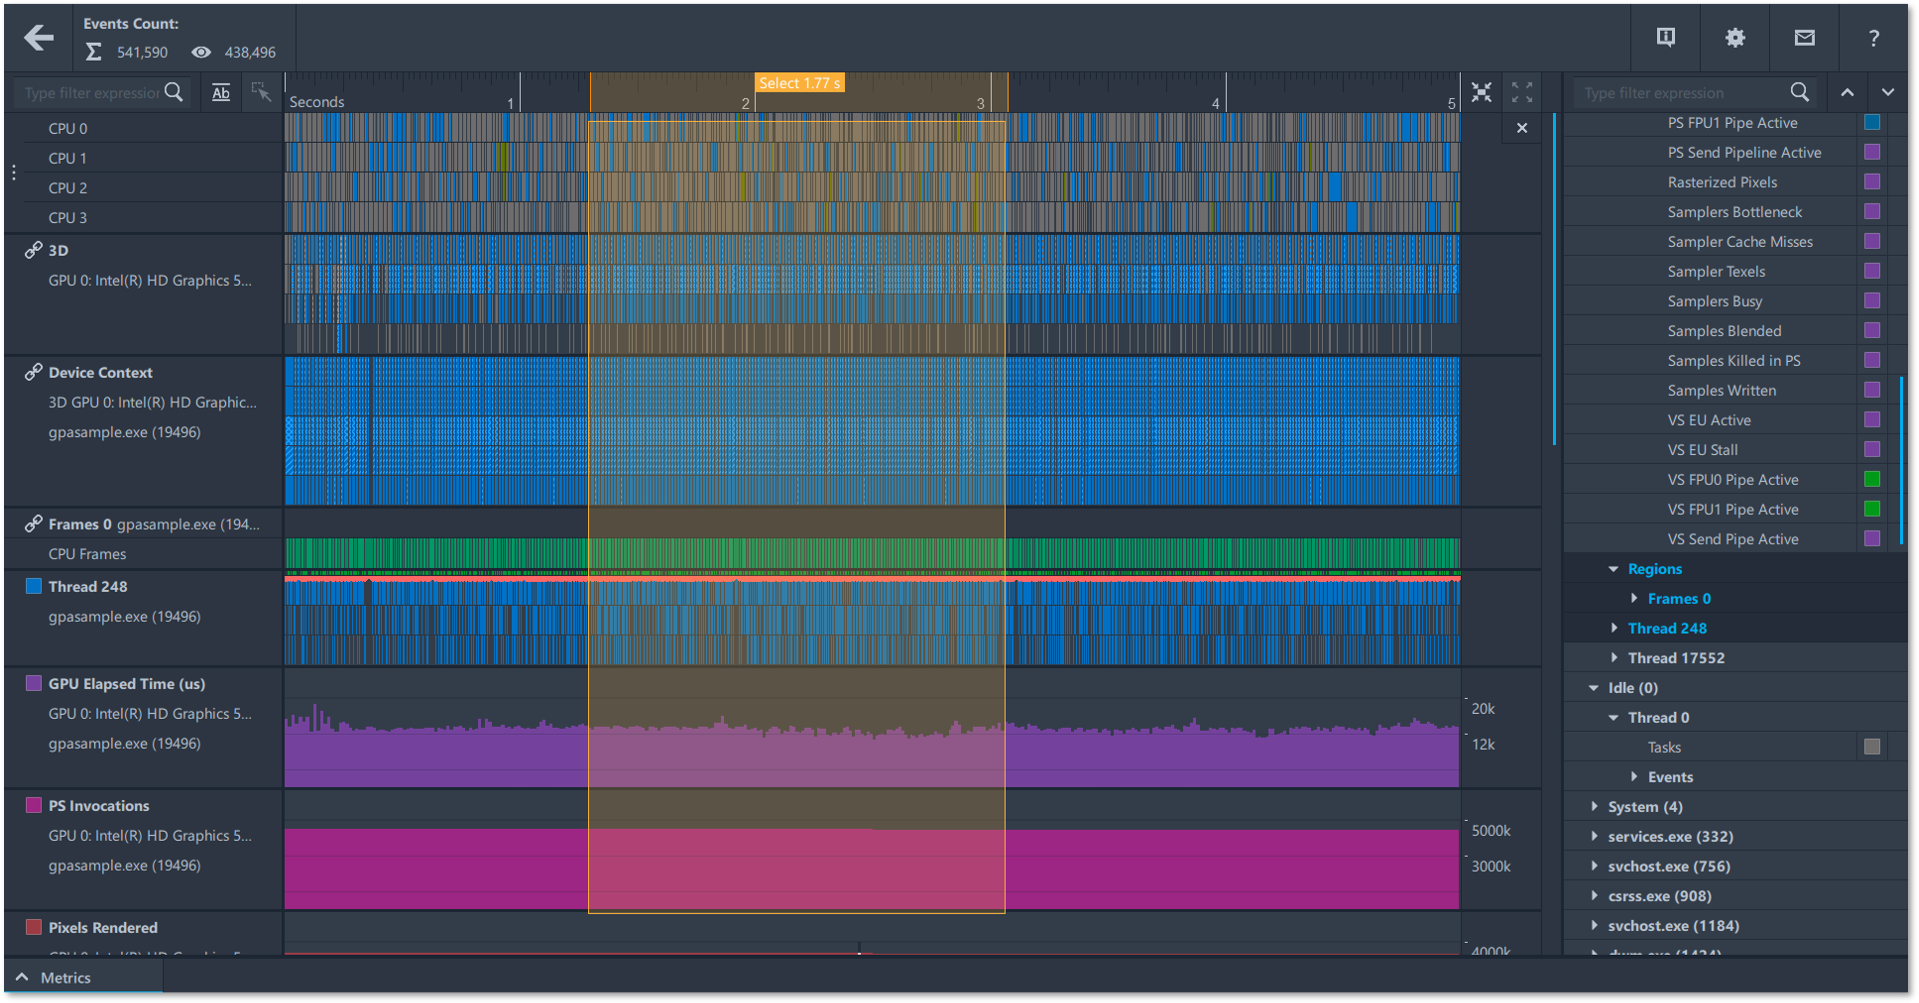
Using range selection, you can select all events over a time range in the timeline, including the tracks that are not visible in the timeline. To use range selection right click in the timeline at the point you want to start your range selection and then drag your mouse horizontally to an ending point for the range selection. You can also change the selection by dragging the left or right boundary. While changing the selection you can click on the boundary and drag your mouse along the vertical range boundary and an attach indicator will show up. The attach indicator aids in properly aligning range boundaries with regions or tasks residing underneath the mouse cursor.
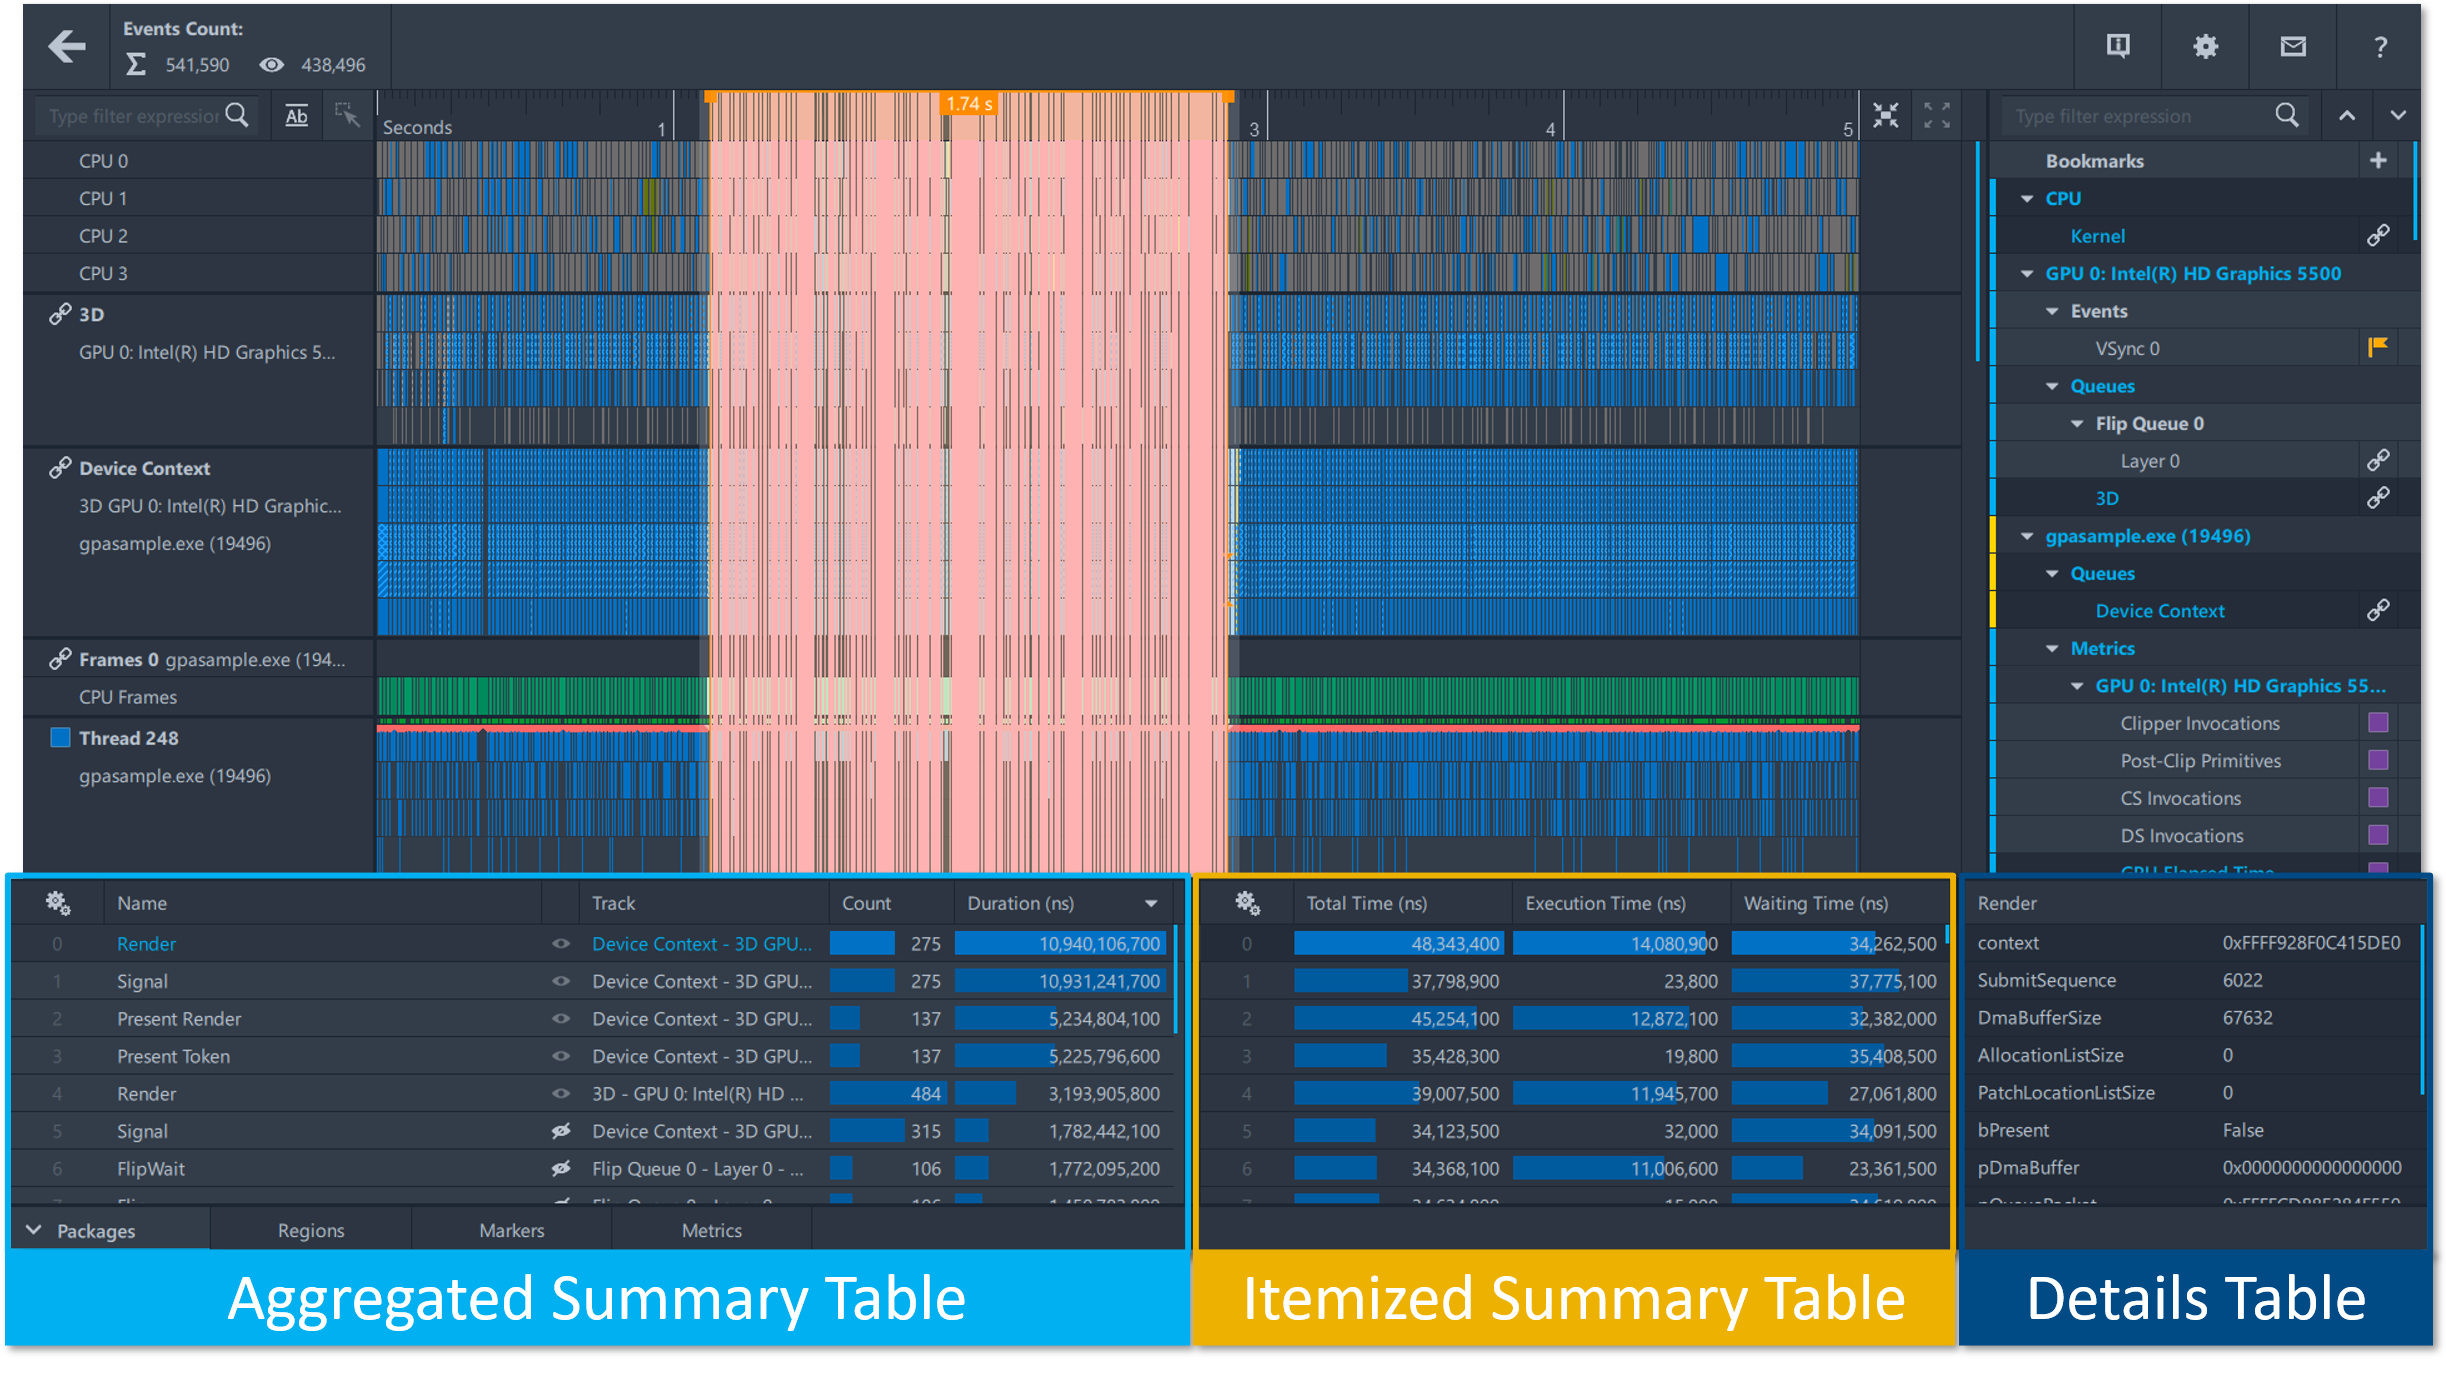
Inspecting Selected Events
While these events are selected you can press the Selected Items button at the bottom of the tool to open an aggregated summary table of all the selected events in your selection. To the right of the Selected Items tab there are four different tabs corresponding to the four different event types: Packages, Regions, Markers and Metrics. In the Packages tab you can view all the queued packages in your selected zone of the timeline. Each of these four tabs contains an aggregated summary table with slightly different items in each tab.
In the Packages aggregated summary table you can view the following:
- Name: The name of the selected event
- Track Visibility Status: Visibility of the selected timeline tracks. An eye icon indicates the track is visible/opened in the Trace viewer; a slashed eye icon indicates that the track is not visible/opened in the Trace Viewer. Clicking on the slashed eye icon will open the track.
- Track: The name of the selected track
- Count: The number of events with the same name in the selected timeline tracks
- Duration: The sum of the event durations in the selected tracks.
The items in the summary table are initially sorted by the Duration column, but this can be altered by pressing the name of the column you want to sort by. You can change whether you want the column to be sorted by ascending or descending order by simply clicking on the column name. Columns sorted in ascending order are indicated by an up arrow ▲ next to the column name. Columns sorted in descending order are indicated by a down arrow ▼ next to the column name.
You can rearrange the column order by simply clicking a column name and holding down your left mouse button to drag that column to different positions in the summary table. To resize each column, click on the control boundary next to the column name and drag that column until it is resized to your liking. To customize the displayed columns, click on the gears ![]() icon and press the toggle button next to the column name to enable or disable that column.
icon and press the toggle button next to the column name to enable or disable that column.
Hovering over the events in the package’s aggregated summary table will highlight the corresponding events in the timeline track. Selecting a package in the aggregated summary table will open the itemized summary table, displaying performance information for that selected package. Hovering over events in this table will also highlight the corresponding events in the timeline track. Selecting an event in this table will open the performance event details table, displaying important performance details of that specific event.
NOTE: The performance event details table is only available for GPU queue packages, CPU queue packets and VSync Events.
Useful Settings
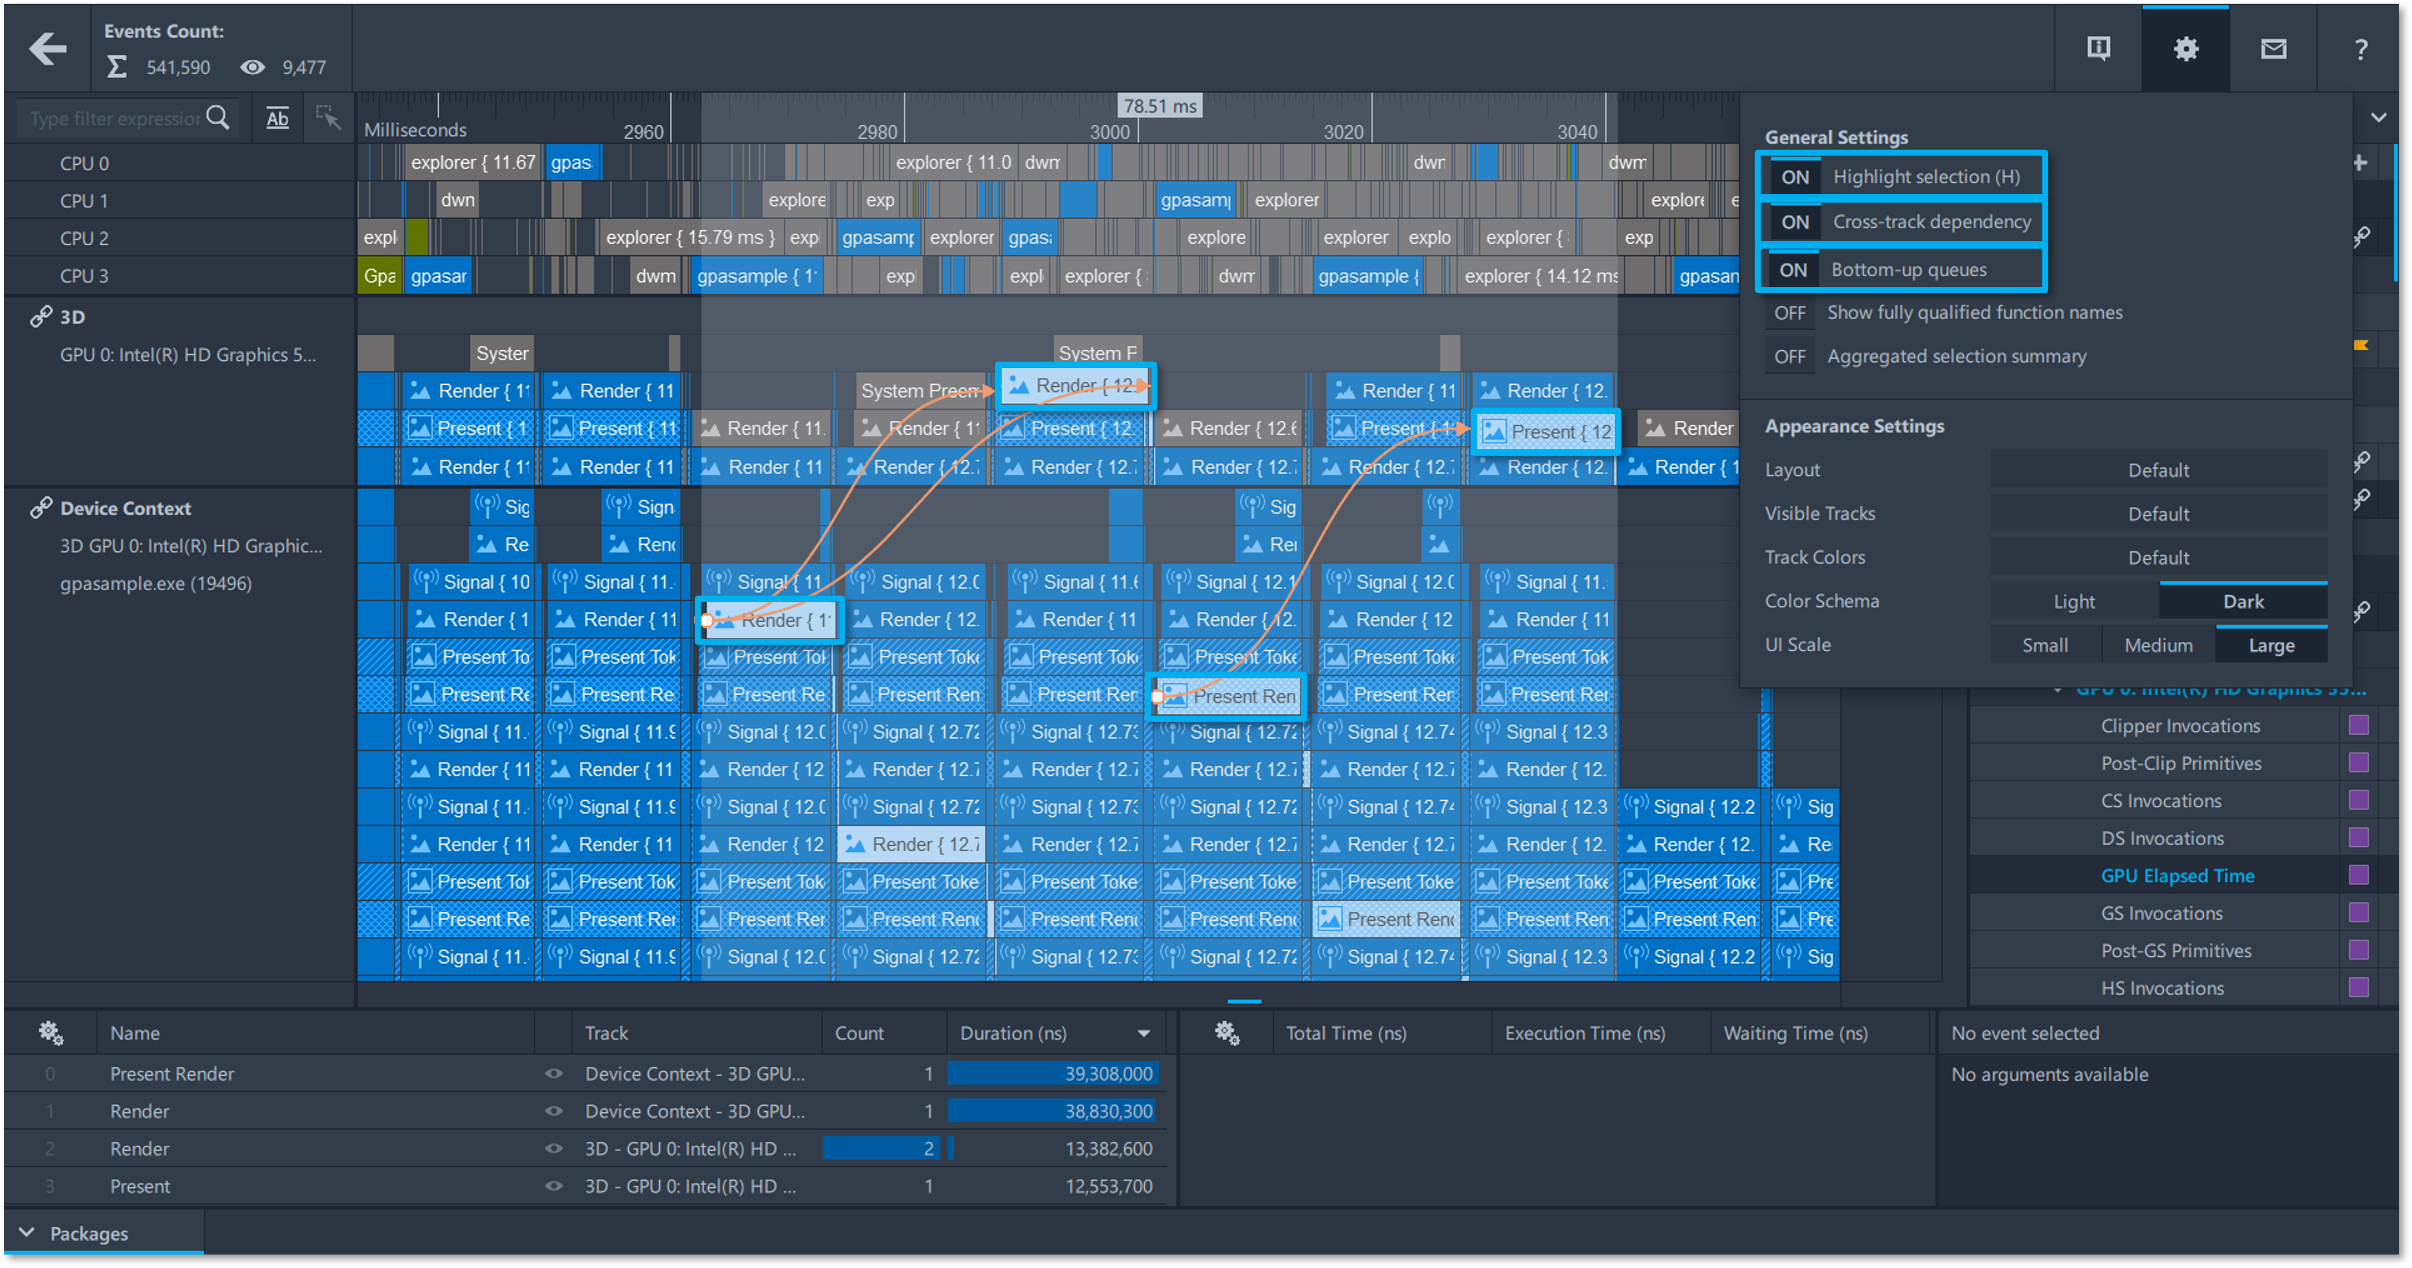
Graphics Trace Analyzer supports several useful options that can be viewed by clicking on the cogwheel ⚙ icon in the top right corner of the tool and then by pressing the toggle button next to the option to turn it on or off.
Cross-Track Dependency
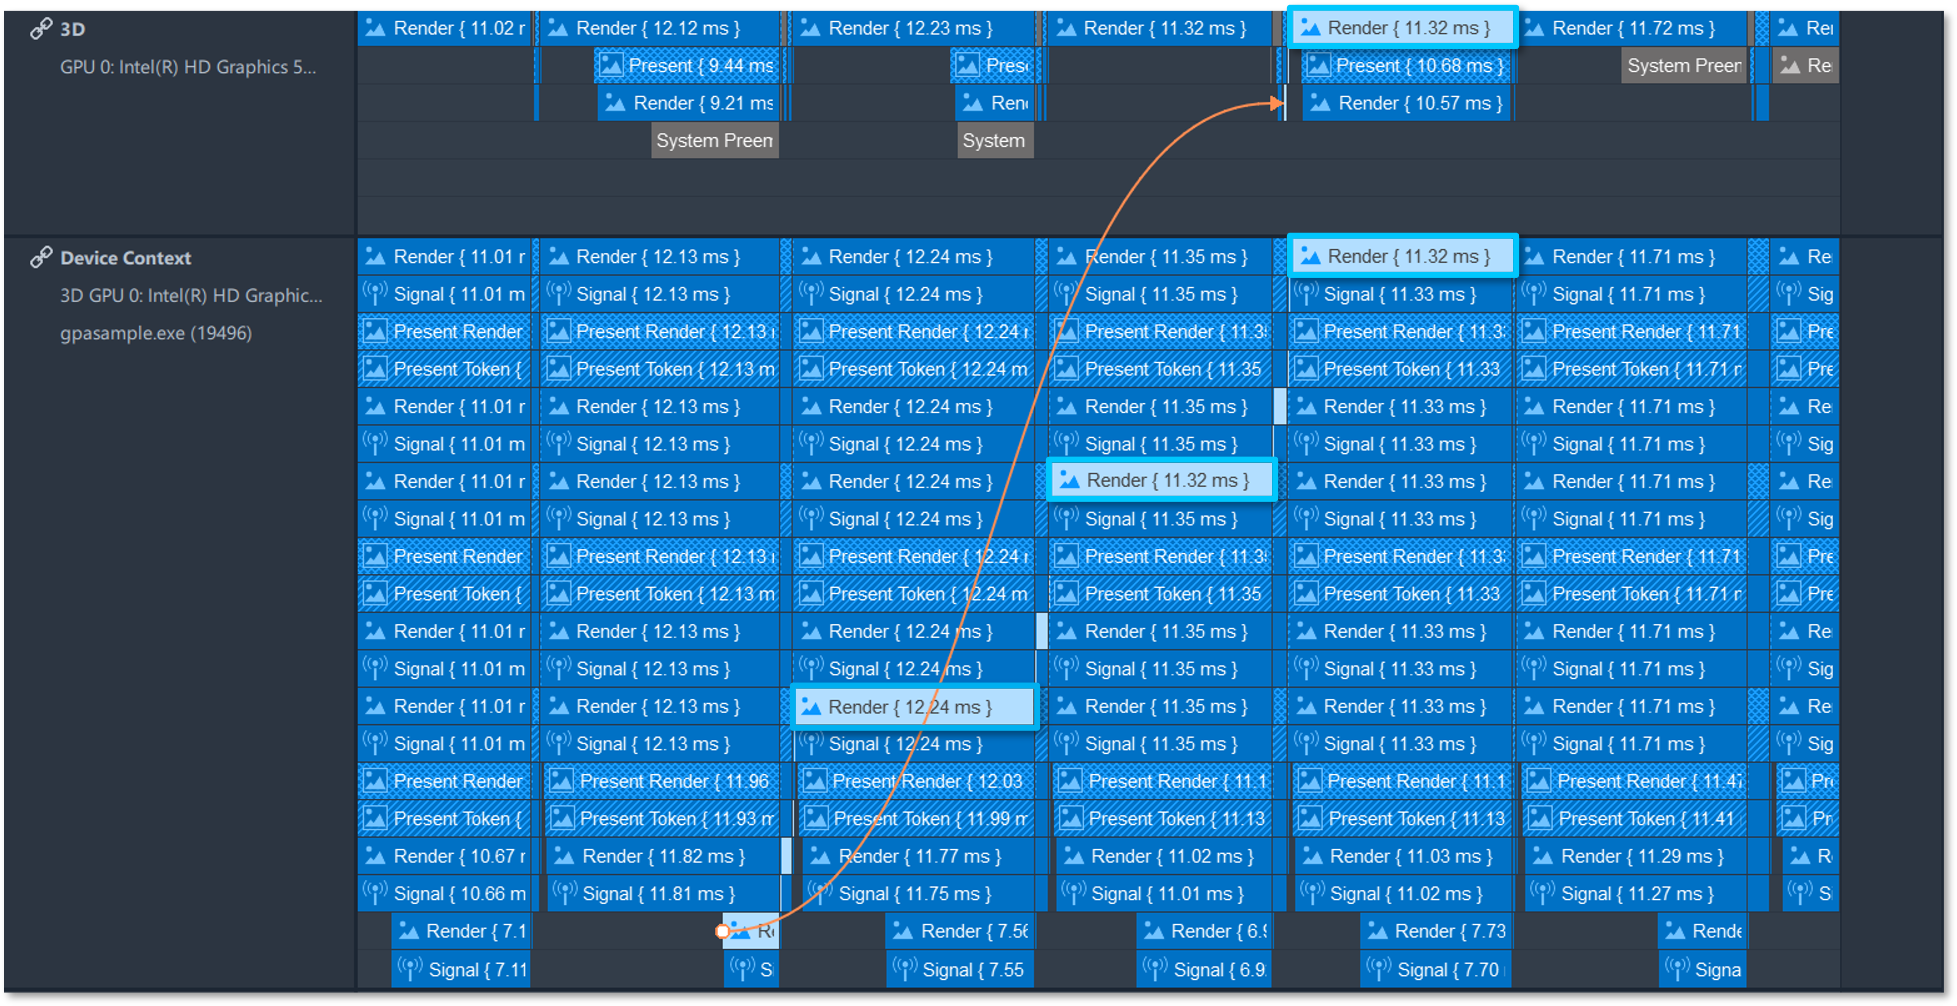
The Cross-Track Dependency option allows you to select all dependent events at once. When enabled, you can visualize this by selecting a render package in the timeline of the Device Context Queue and the corresponding render package in the 3D GPU queue will be selected as well. You can also visualize this by opening the Packages tab and both the render events in the Device Context Queue and 3D GPU queue are displayed in the aggregated summary table and can be further explored.
Highlight Selection
Graphics Trace Analyzer also supports background highlighting of selected items, which can be enabled by pressing the toggle button next to the Highlight Selection option. This feature is most suitable when used with single selection, but it can be used with all three selection methods.
Bottom-up Queues
The Bottom-up Queues option changes the order of GPU/CPU queues in the timeline of Graphics Trace Analyzer. This allows you to switch the queue stack order from top to bottom or bottom to top, allowing you to focus on the details that you need the most.
Conclusion
This article demonstrated how to select data using rectangular, single and range selection as well as how to inspect that data using the aggregate summary table, itemized summary table and details table. In addition, this article highlighted three useful settings that can be enabled or disabled according to your specific use case. For more information on how to identify and analyze problem areas in your applications to distribute workloads evenly across CPUs and GPUs, continue reading the Graphics Trace Analyzer Deep Dive articles.
Additional Resources
Part 1: Configure and Capture Trace (Article)
Part 2: Open and Explore Trace (Article)
Part 3: Configure a Custom Layout (Article)