Overview
Edge Video Analytics Microservice (EVAM) on Intel® Smart Edge Open Developer Experience Kit provides a horizontal microservice for video processing and analytics on an edge-native deployment. EVAM provides video analytics algorithms to perform object detection, classification, identification, counting, and tracking on the input video stream. Multiple services in an edge node can simultaneously use EVAM to set up required deep learning models, create pipelines, and perform video processing and analytics. This reference implementation can be used in a wide range of edge deployment scenarios covering wide IoT segments.
To run the reference implementation, you will need to first download and install the Intel® Smart Edge Open Developer Experience Kit.
Once you have installed the Intel® Smart Edge Open Developer Experience Kit, select Configure & Download to download the Edge Video Analytics Microservice and the software listed below.

-
Time to Complete: Approximately 60 - 90 minutes
-
Programming Language: Python*
-
Software:
- Intel® Smart Edge Open version 22.03 or above
- Edge Video Analytics Microservice
- Intel® DL Streamer Pipeline Server
- Intel® Distribution of OpenVINO™ toolkit
Target System Requirements
Intel® Smart Edge Open Nodes
-
One of the following processors:
- Intel® Xeon® Scalable processor
- Intel® Xeon® D processor
-
At least 32 GB RAM
-
At least 64 GB hard drive
-
An Internet connection
-
Ubuntu* 20.04 LTS
How It Works
Edge Video Analytics Microservice (EVAM) Architecture
Video Analytics basically refers to transforming video streams into insights through video processing, inference, and analytics operations.
These operations featured by Video Analytics are packaged in Edge Video Analytics Microservice (EVAM) on Intel® Smart Edge Open Developer Experience Kit. Edge Video Analytics Microservice on Intel® Smart Edge Open Developer Experience Kit is deployed as a single POD and it comes up with optimized video analytics pipelines. The pipelines run by the microservice are defined in GStreamer* using Intel® DL Streamer for inferencing. This microservice uses Intel® DL Streamer Pipeline Server as a library.
Edge Video Analytics Microservice on Intel® Smart Edge Open Developer Experience Kit provides the RESTful APIs to discover, start, stop, customize, and monitor pipeline execution and supports MQTT and Kafka message brokers for publishing the inference results. For REST API definition, refer to the RESTful Microservice interface.
The Intel® Smart Edge Open Developer Experience Kit platform infrastructure is used to deploy this Microservice. When Edge Video Analytics Microservice is deployed default pipelines and their respective models object detection, object classification, object tracking, face detection, emotion recognition, action recognition and ambient audio detection are already provided with it. Purpose of Edge Video Analytics Microservice on Intel® Smart Edge Open Developer Experience Kit is to showcase that Users can use this Microservice in backend for their applications or Users can develop new pipeline according to their requirement.
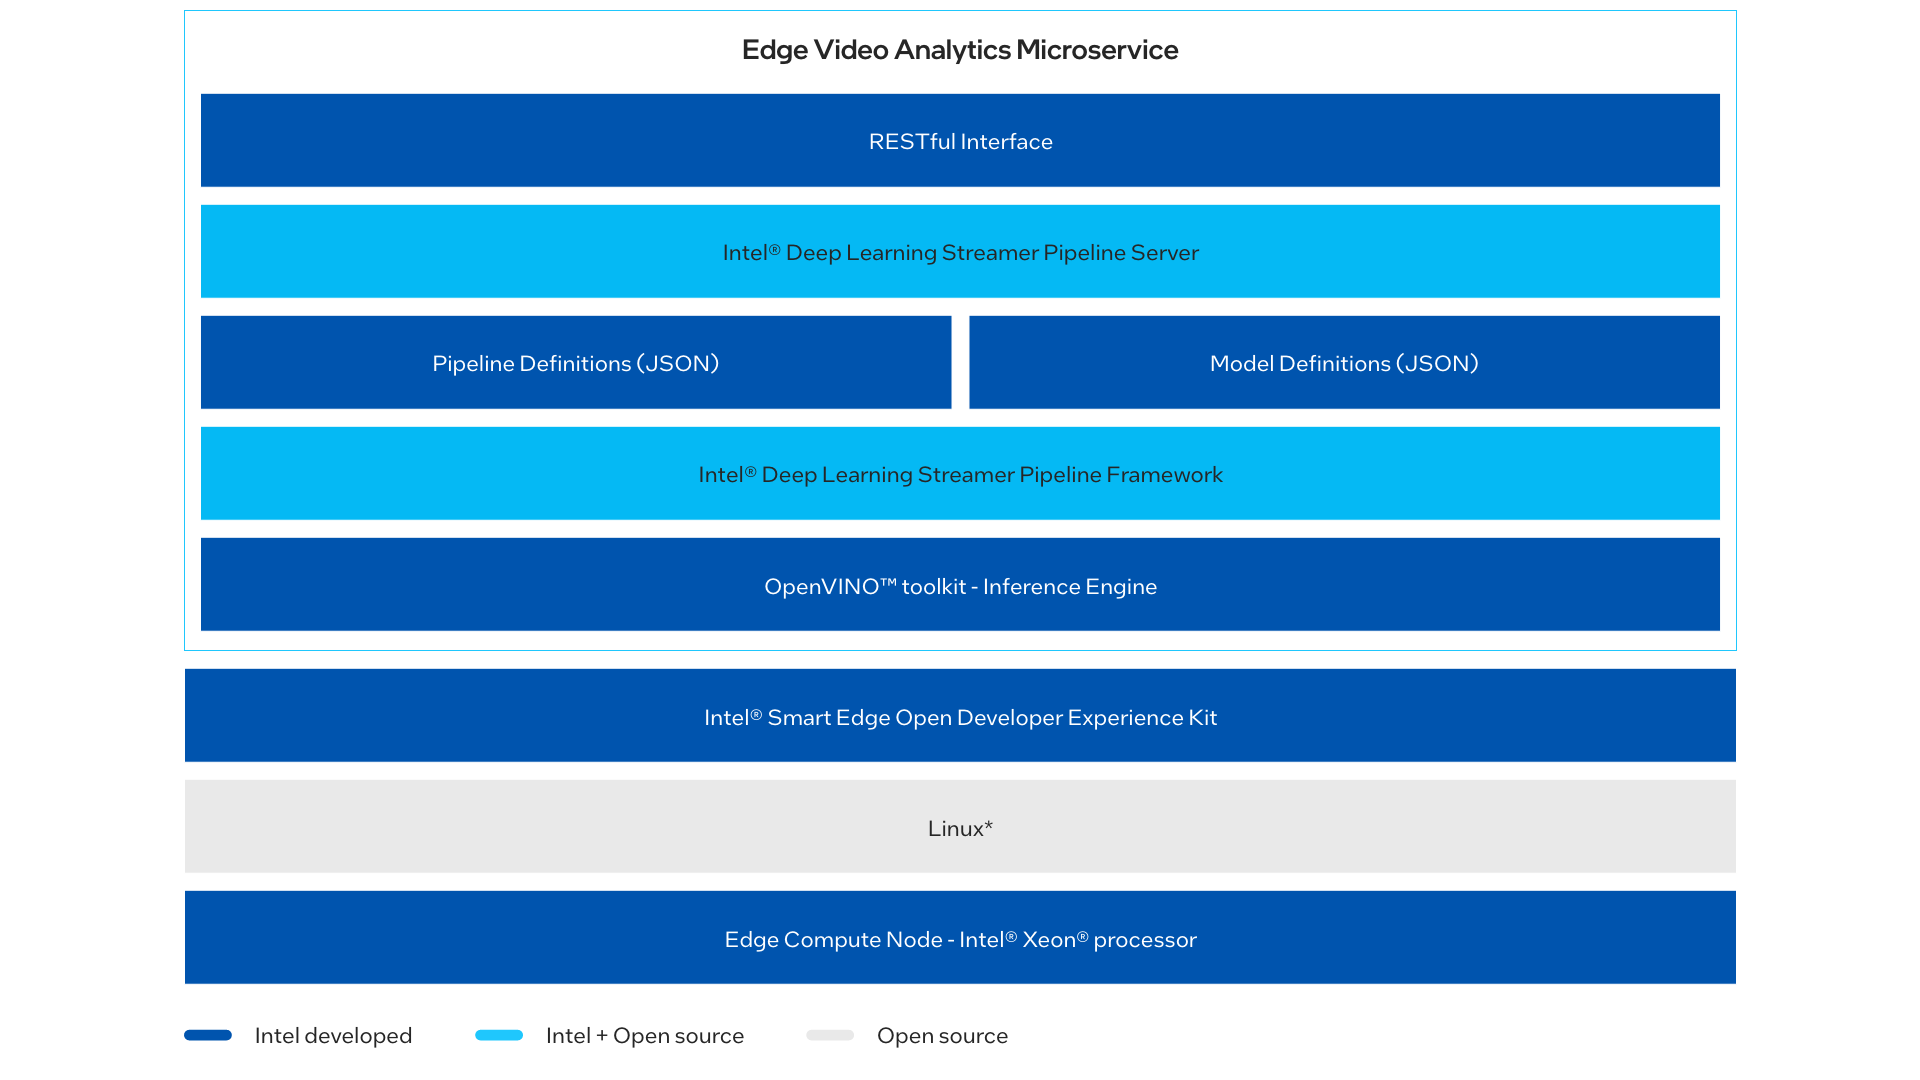
Figure 1: Architecture Diagram
NOTE: The microservice natively provides two modes of operation: Edge Video Analytics (EVA) Mode and Edge Insights for Industrial (EII) Mode. Here we are deploying the microservice in Edge Video Analytics (EVA) Mode only.
Get Started
These instructions walk you through installing and uninstalling an example Edge Video Analytics Microservice reference application using commands. After installation, you will be able to see the application is running on the cluster. The uninstall commands can be used to uninstall the application.
Installation Prerequisites
To run the reference implementation, you need to first download and install the Intel® Smart Edge Open Developer Experience Kit.
Ensure that the following conditions are met properly to ensure a smooth installation process for a Edge Video Analytics Microservice done through Intel® Smart Edge Open Developer Experience Kit package.
Hardware Requirements
We recommend that your system satisfies the specifications listed in the Target System Requirements section of this document. Also, be sure that you have a fresh installation of the Intel® Smart Edge Open Developer Experience Kit.
Ensure that following steps are completed in Intel® Smart Edge Open Developer Experience Kit Installation
-
Proxy Settings
If you are behind a proxy network, ensure that proxy addresses are configured in the system.
export http_proxy=<proxy-address>:<proxy-port>
export https_proxy=<proxy-address>:<proxy-port>
- Ensure the
/etc/wgetrcfile is configured with required proxy settings as follows:
https_proxy=<proxy-address>:<proxy-port>
http_proxy=<proxy-address>:<proxy-port>
ftp_proxy =<proxy-address>:<proxy-port>
use_proxy = on
-
Date and Time
Make sure that the date and time are in sync with current local time.
-
Create Non-Root User
Make sure that non-root user with name and password
smartedge-openand with sudoers permission is created. If not available, follow the instructions below.a. To create a user smartedge-open execute the command:
useradd -s /bin/bash -d /home/smartedge-open/ -m -G sudo smartedge-open
passwd smartedge-open
b. A password for the given user is required:
passwd smartedge-openc. As some tasks require root privileges, the non-root user needs to have a possibility to become a root:
echo “smartedge-open ALL=(ALL) NOPASSWD:ALL” | sudo tee /etc/sudoers.d/smartedge-open -
Exchange SSH Keys between hosts
Exchanging SSH keys between hosts permits a password-less SSH connection from the host running Ansible to the hosts being set up. If password-less SSH is not permitted, follow the instructions below to exchange SSH keys between hosts. Generate and install the public key on your host by logging in as root and executing the below commands:
In the first command, the Edge Controller host must have a generated SSH key. The SSH key can be generated by executing ssh-keygen and obtaining the key from the output of the command.
In the second command, the generated key must be copied to every Edge Node host, using the ssh-copy-id command.
ssh-keygen
ssh-copy-id smartedge-open@<host-name>
Install the Edge Video Analytics Microservice on Intel® Smart Edge Open Developer Experience Kit
Select Configure & Download to download the reference implementation and then follow the steps below to install it.
-
Make sure that the Target System Requirements are met properly before proceeding further.
-
For single-device mode, only one machine is needed. (Both controller and edge node will be on the same device.)
-
For multi-device mode, make sure you have at least two machines (one for controller and other for Edge Node).
NOTE: Multi-device mode is not supported in the current release.
-
-
Open a new terminal and login to server as a non-root user.
ssh smartedge-open@<server-ip-address> -
Confirm that the server is configured with Intel® Smart Edge Open Developer Experience Kit as prerequisite.
-
Move the downloaded zip package to
/home/smartedge-openfolder.mv <path-of-downloaded-directory>/edge_video_analytics_microservice_on_developer_experience_kit.zip /home/smartedge-open -
Go to the
/rootdirectory of the non-root user using the following command and unzip the RI package:cd /home/smartedge-open unzip edge_video_analytics_microservice_on_developer_experience_kit.zip -
Go to
edge_video_analytics_microservice_on_developer_experience_kit/directory:cd edge_video_analytics_microservice_on_developer_experience_kit -
Change permission of the executable edgesoftware file:
chmod 755 edgesoftware -
Run the command below to install the Reference Implementation:
./edgesoftware install -
Installation of the package starts.
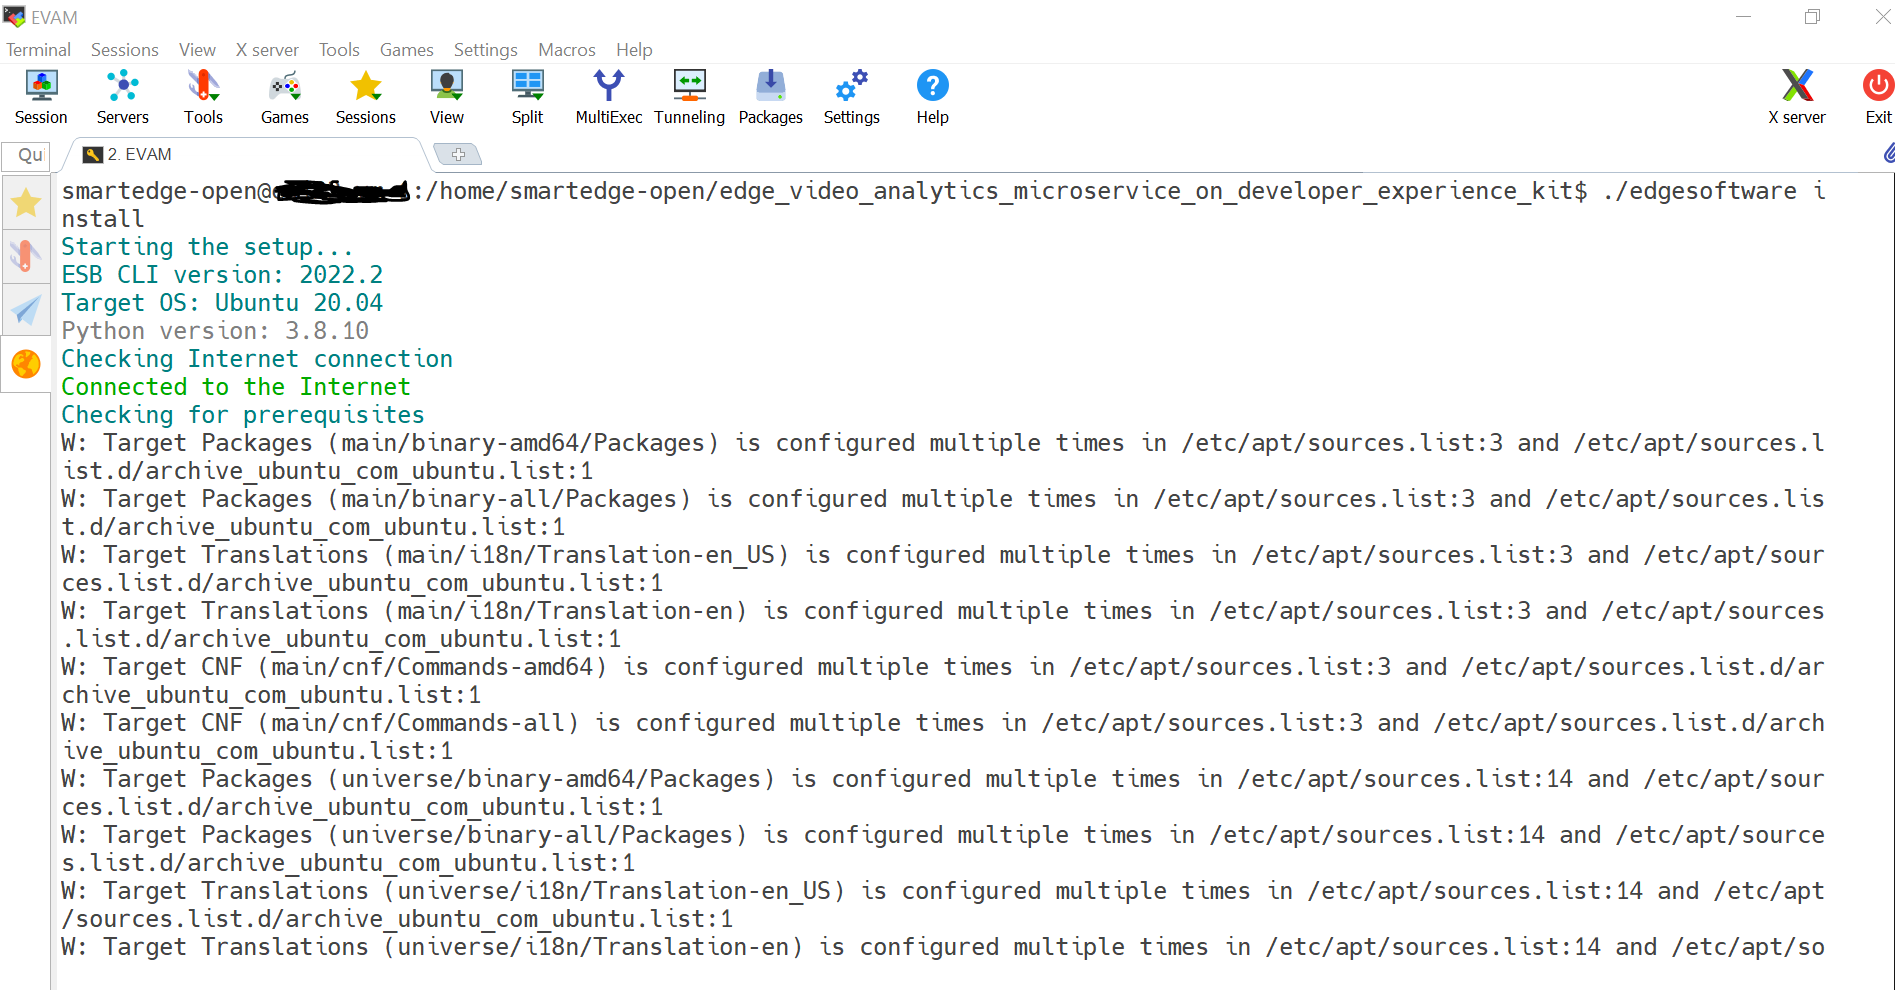
Figure 2: Installation Start Screen
-
When the installation is complete, you see the message
Installation of package completeand the installation status for each module.NOTE: Installation logs are available at:
/var/log/esb-cli/Edge_Video_Analytics_Microservice_on_Developer_Experience_kit_<version>/Edge_Video_Analytics_Microservice_on_Developer_Experience_kit/install.log, where<version>is the package version downloaded.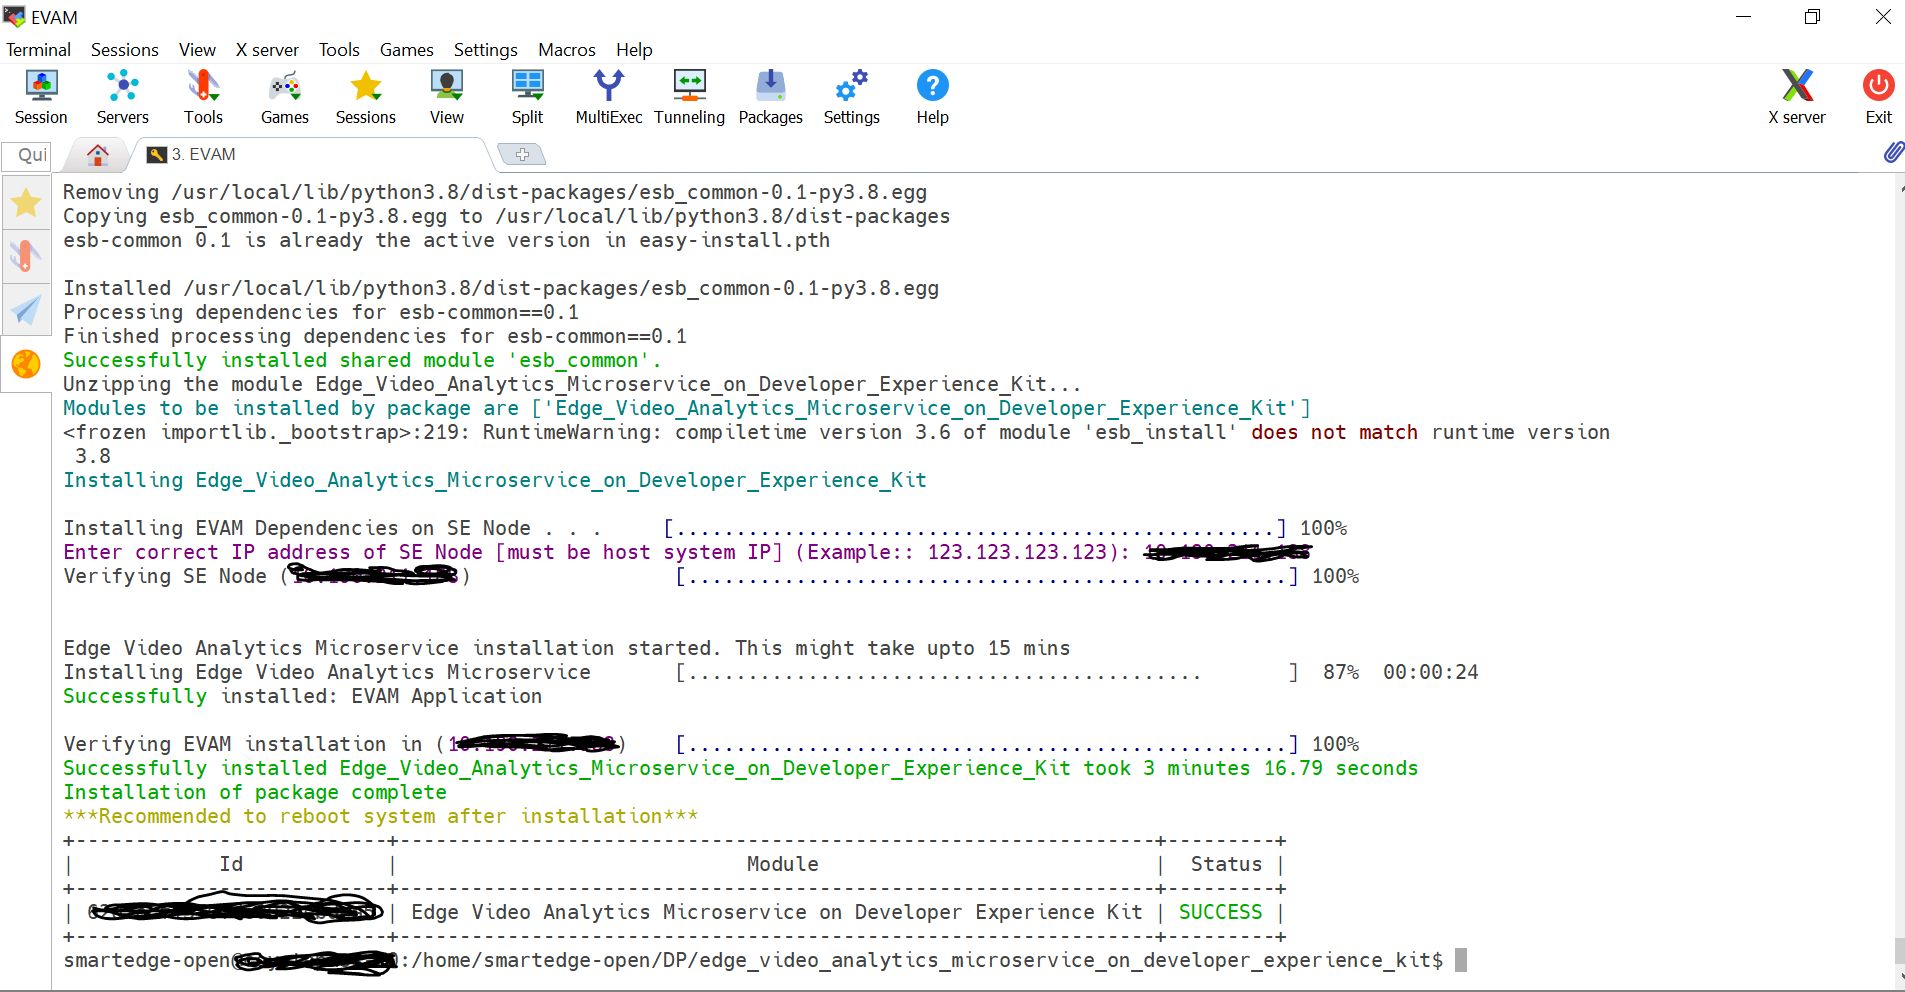
Figure 3: Installation Successful
-
If Intel® Smart Edge Open Developer Experience Kit is installed, running the following command should show output similar to the image below. All the pods should be either in the running or completed stage.
kubectl get pods -A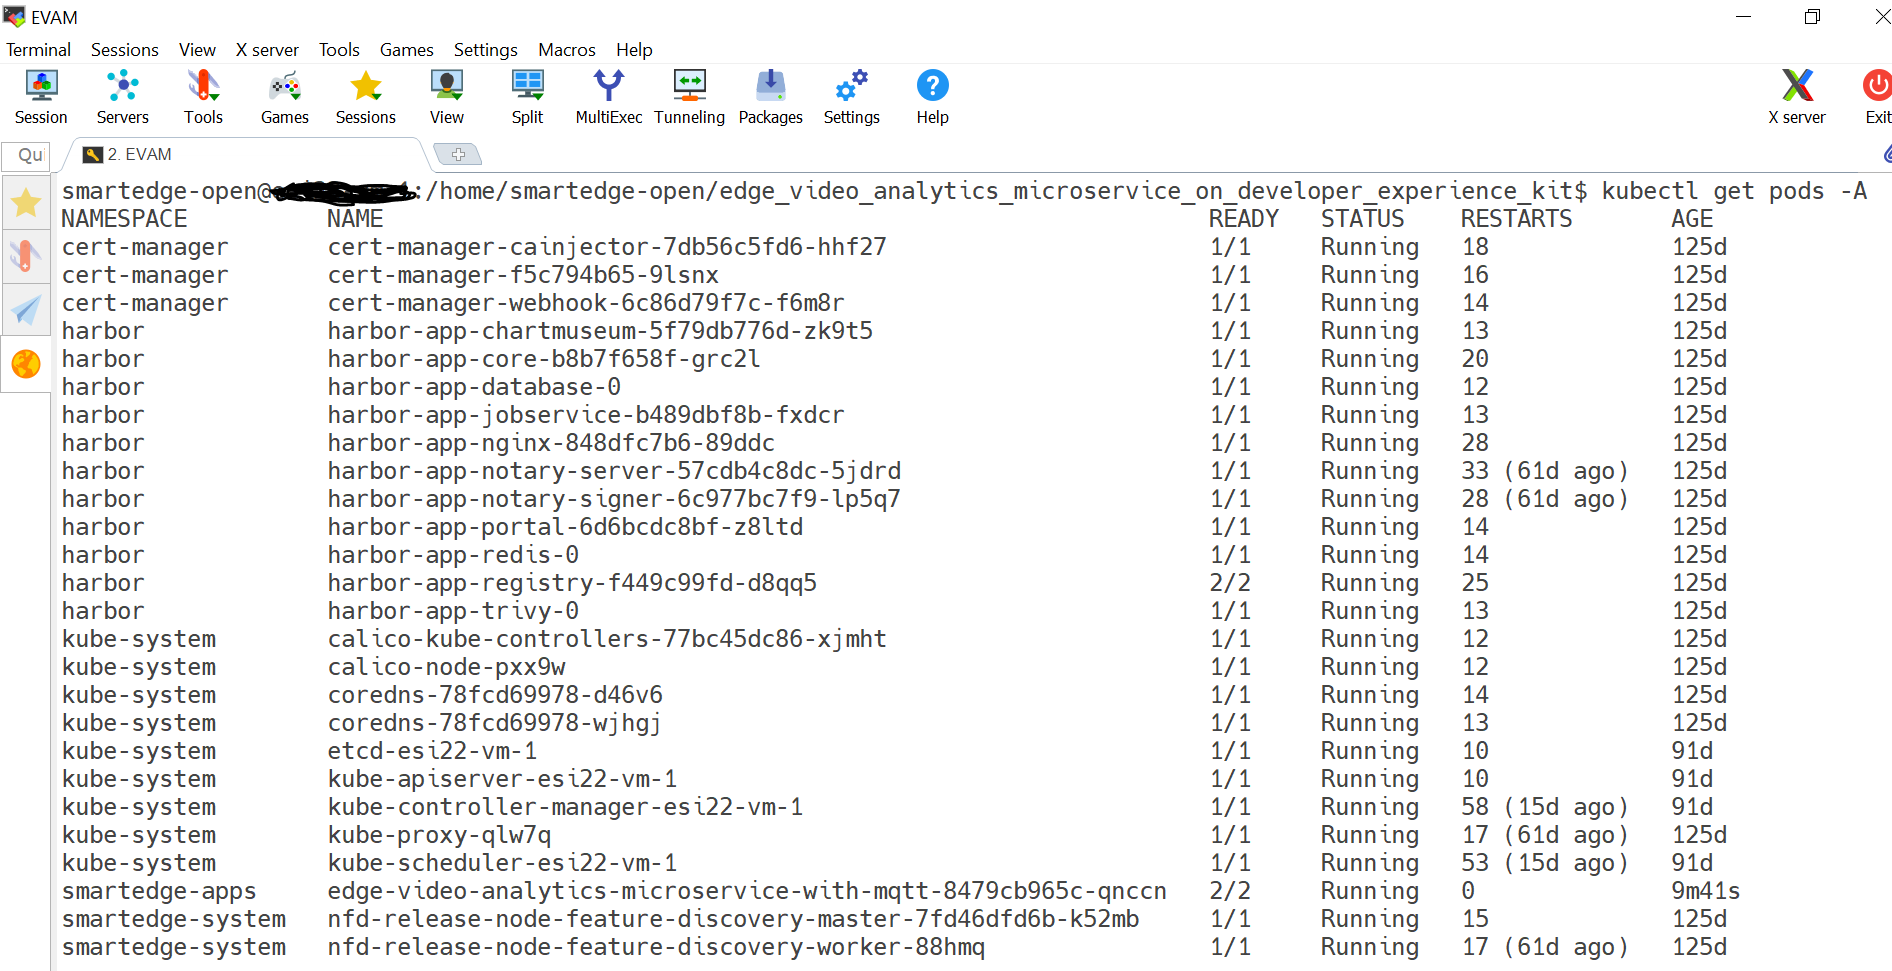
Figure 4: Pods Status
-
If EVAM is installed, running the following command should show output as follows:
smartedge-open@host:/home/smartedge-open/edge_video_analytics_microservice_on_developer_experience_kit$ kubectl get pods -n smartedge-apps

NAME                                                           READY   STATUS    RESTARTS   AGE
edge-video-analytics-microservice-with-mqtt-8479cb965c-vwq7n   2/2     Running   0          12m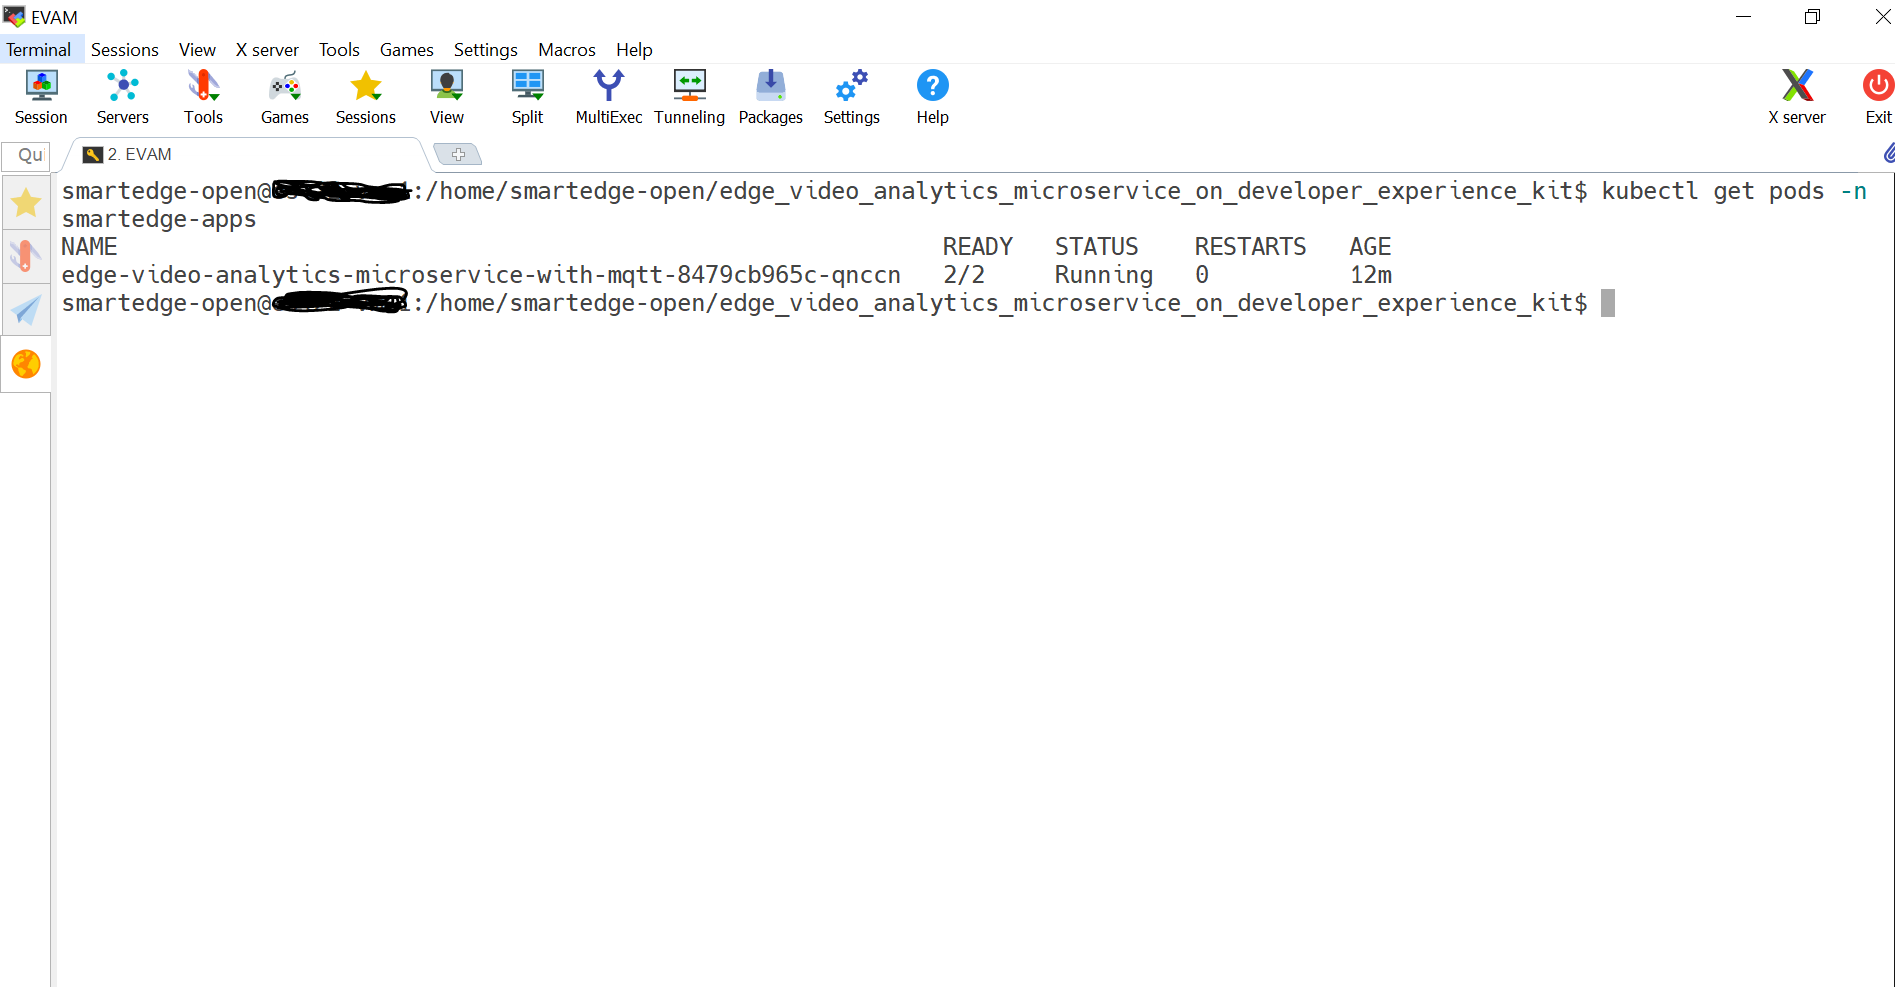
Figure 5: EVAM Pod Status
-
Run the command below to check the Docker* images and their details.
smartedge-open@host:/home/smartedge-open/edge_video_analytics_microservice_on_developer_experience_kit$ docker images intel/edge_video_analytics_microservice 0.7.2 8919ec246253 8 weeks ago 2.89GB eclipse-mosquitto 1.6 af43c2bdc1a9 4 months ago 11.5MB -
List the reference implementation deployed module using the following command:
./edgesoftware list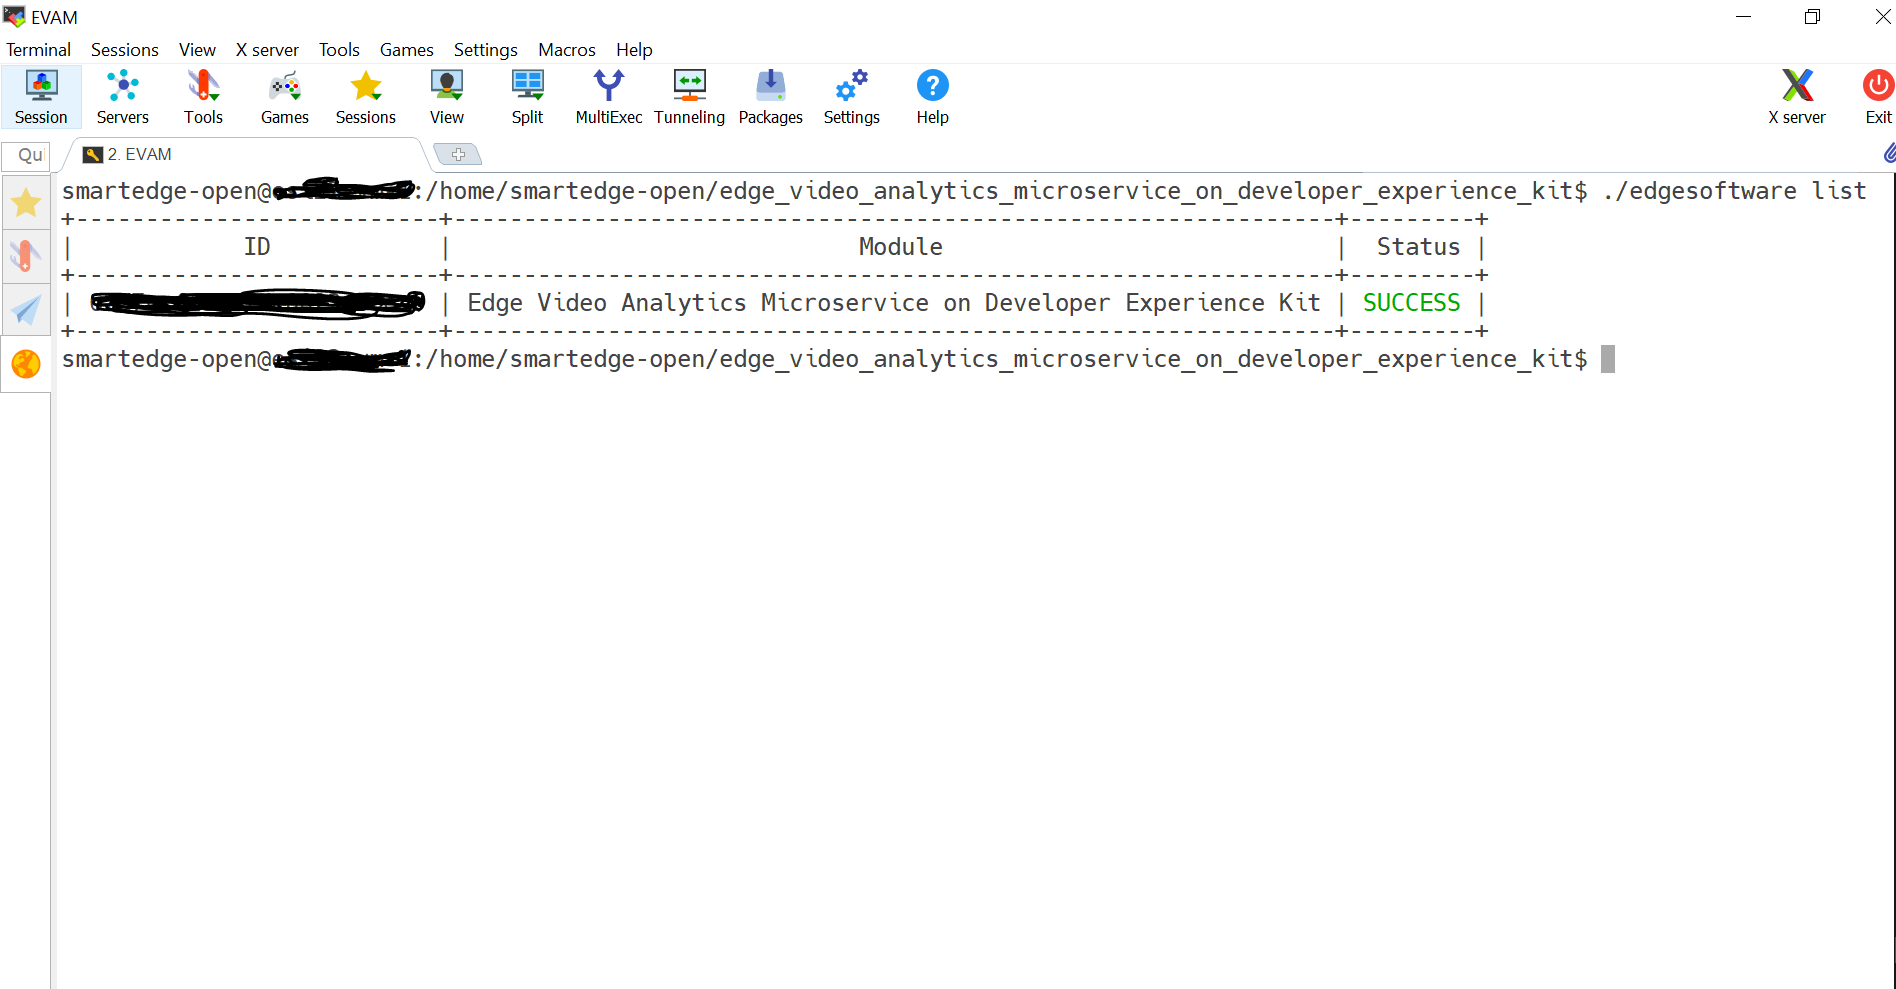
Figure 6: EVAM Module List
-
Uninstall the reference implementation module using the following command:
./edgesoftware uninstall <evam-module-id>
Figure 7: Uninstallation Successful
Node Feature Discovery (NFD)
Edge Video Analytics Microservice (EVAM) uses the Intel® Distribution of OpenVINO™ toolkit, which is optimized for Intel® processors that support special instructions like AVX512VNNI for optimized performance. The deployment of this application will require the node with this feature supported on the node along with Ubuntu 20.04 OS. This NFD feature ensures to deploy the application on the node supported with these features.
NFD is installed by Intel® Smart Edge Open Developer Experience Kit and running as two pods on Intel® Smart Edge Open, as shown below.
$ kubectl get pods -A | grep smartedge-system

smartedge-system       nfd-release-node-feature-discovery-master-7b94765ccf-9ghjg   1/1     Running   5 (83d ago)    85d
smartedge-system       nfd-release-node-feature-discovery-worker-dq4x6              1/1     Running   5 (83d ago)    85d
Edge Video Analytics Microservice (EVAM) pod scheduled and running successfully on Intel® Smart Edge Open node based on hardware capabilities of Intel® Xeon® Scalable server.
$ kubectl get pods -A | grep smartedge-apps

smartedge-apps     edge-video-analytics-microservice-with-mqtt-8479cb965c-vwq7n     2/2     Running   0         54m
The following output shows a description of one EVAM pod, which shows that it is running successfully with the NFD feature.
$ kubectl describe pod edge-video-analytics-microservice-with-mqtt-8479cb965c-vwq7n -n smartedge-apps
...
...
...

Node-Selectors:         feature.node.kubernetes.io/cpu-cpuid.AVX512VNNI=true
                        feature.node.kubernetes.io/system-os_release.ID=ubuntu

Tolerations:      node.kubernetes.io/not-ready:NoExecute op=Exists for 300s
                  node.kubernetes.io/unreachable:NoExecute op=Exists for 300s

Events:
Run Application with EVAM
To run an application using EVAM its respective deep learning models and pipelines are required.
EVAM provides the RESTful APIs as Video Analytics Serving to discover, start, stop, customize, monitor pipeline execution.
EVAM also include MQTT and Kafka message brokers for publishing the inference results. REST API definitions are available at RESTful Microservice interface.
Get the List of Available Models and Pipelines Using REST Request
- Run the following command to get the list of models available in the EVAM:
curl --location -X GET 'http://<Node-IP-address>:30409/models'
Example Output:
   [
   {
      "description": "object_classification",
      "name": "object_classification",
      "networks": {
         "labels": null,
         "model-proc": "/home/pipeline-server/models/object_classification/vehicle_attributes/vehicle-attributes-recognition-barrier-0039.json",
         "networks": {
               "FP16": "/home/pipeline-server/models/object_classification/vehicle_attributes/FP16/vehicle-attributes-recognition-barrier-0039.xml",
               "FP32": "/home/pipeline-server/models/object_classification/vehicle_attributes/FP32/vehicle-attributes-recognition-barrier-0039.xml"
         }
      },
      "type": "IntelDLDT",
      "version": "vehicle_attributes"
   }
   ]
- Run the following command to get the list of pipelines available in the microservice:
curl --location -X GET 'http://<Node-IP-address:30409/pipelines'
Example Output:
   [
   {
      "description": "Person Vehicle Bike Detection based on person-vehicle-bike-detection-crossroad-0078",
      "name": "object_detection",
      "parameters": {
         "properties": {
               "detection-device": {
               "element": {
                  "name": "detection",
                  "property": "device"
                  },
                  "type": "string"
               },
               "detection-model-instance-id": {
                  "element": {
                  "name": "detection",
                  "property": "model-instance-id"
                  },
                  "type": "string"
               },
               "inference-interval": {
                  "element": "detection",
                  "type": "integer"
               },
               "threshold": {
                  "element": "detection",
                  "type": "number"
               }
         },
         "type": "object"
      },
      "type": "GStreamer",
      "version": "person_vehicle_bike"
   },
   {
      "description": "Decode Pipeline",
      "name": "video_decode",
      "type": "GStreamer",
      "version": "app_dst"
   }
   ]
Create Pipeline by Sending REST Request
The following references provide the example json syntax pipeline creation using RESTful APIs.
curl --location -X POST '<http://localhost:30409/pipelines/<pipeline_name>/<model_name>>' \
--header 'Content-Type: application/json' \
--data-raw '{
  "source": {
      "uri": "<the uri of video source that needs to be analyzed>",
      "type": "uri"
   },
  "destination": {
      "metadata": {
        "type": "mqtt",
        "host": "localhost:1883",
        "topic": "vaserving"
      },
    "frame": {
      "type": "rtsp",
      "path": "vasserving1"
    }
  }
}'
To run the Object (Person, Vehicle, Bike) Detection use case with EVAM on Intel® Smart Edge Open Developer Experience Kit, a sample pipeline request is created for reference. A pipeline_create.sh script is created under samplerequests directory, go to samplerequests directory and execute it using ./pipeline_create.sh.

Figure 8: Run Pipeline Script
Check Pipeline Status
After execution of REST request it will return a pipeline instance ID, which can be used to query the state of the pipeline.
Check the state of the pipeline using the following command:
curl --location -X GET 'http://<Node-IP-address>:30409/pipelines/<Pipeline_name>/<Model_name>/<Instance_ID>/status'

Figure 9: Pipeline Status
NOTE: The pipeline should be in the "RUNNING" state to view the output video. If the pipeline has already ended, then the state will be shown as "COMPLETED". Start it again with the curl command and then view the video output.
Stop Running Pipeline
After execution of REST request it will return a pipeline instance ID, which can be used to query the state of the pipeline.
Stop a running pipeline using the following command:
curl --location -X DELETE 'http://<Node-IP-address>:30409/pipelines/<Pipeline_name>/<Model_name>/<Instance_ID>'
After the pipeline is stopped, you can check the state of the pipeline using this command:
curl --location -X GET 'http://<Node-IP-address>:30409/pipelines/<Pipeline_name>/<Model_name>/<Instance_ID>/status'
You will see output similar to the following:

Figure 10: Pipeline Status after Delete Command
NOTE: If the pipeline has been stopped in between its execution, then the state will be shown as "ABORTED". Start it again with the curl command and then view the video output.
Visualize Output
The output can be verified through the rtsp stream being published by the GStreamer pipeline for the specific topic.
The output can be verified with GUI and the VLC media player can be used for live streaming of the processed video.
To visualize the output after the pipeline is started using the curl/Json command.
-
Start the VLC Media Player as shown below.
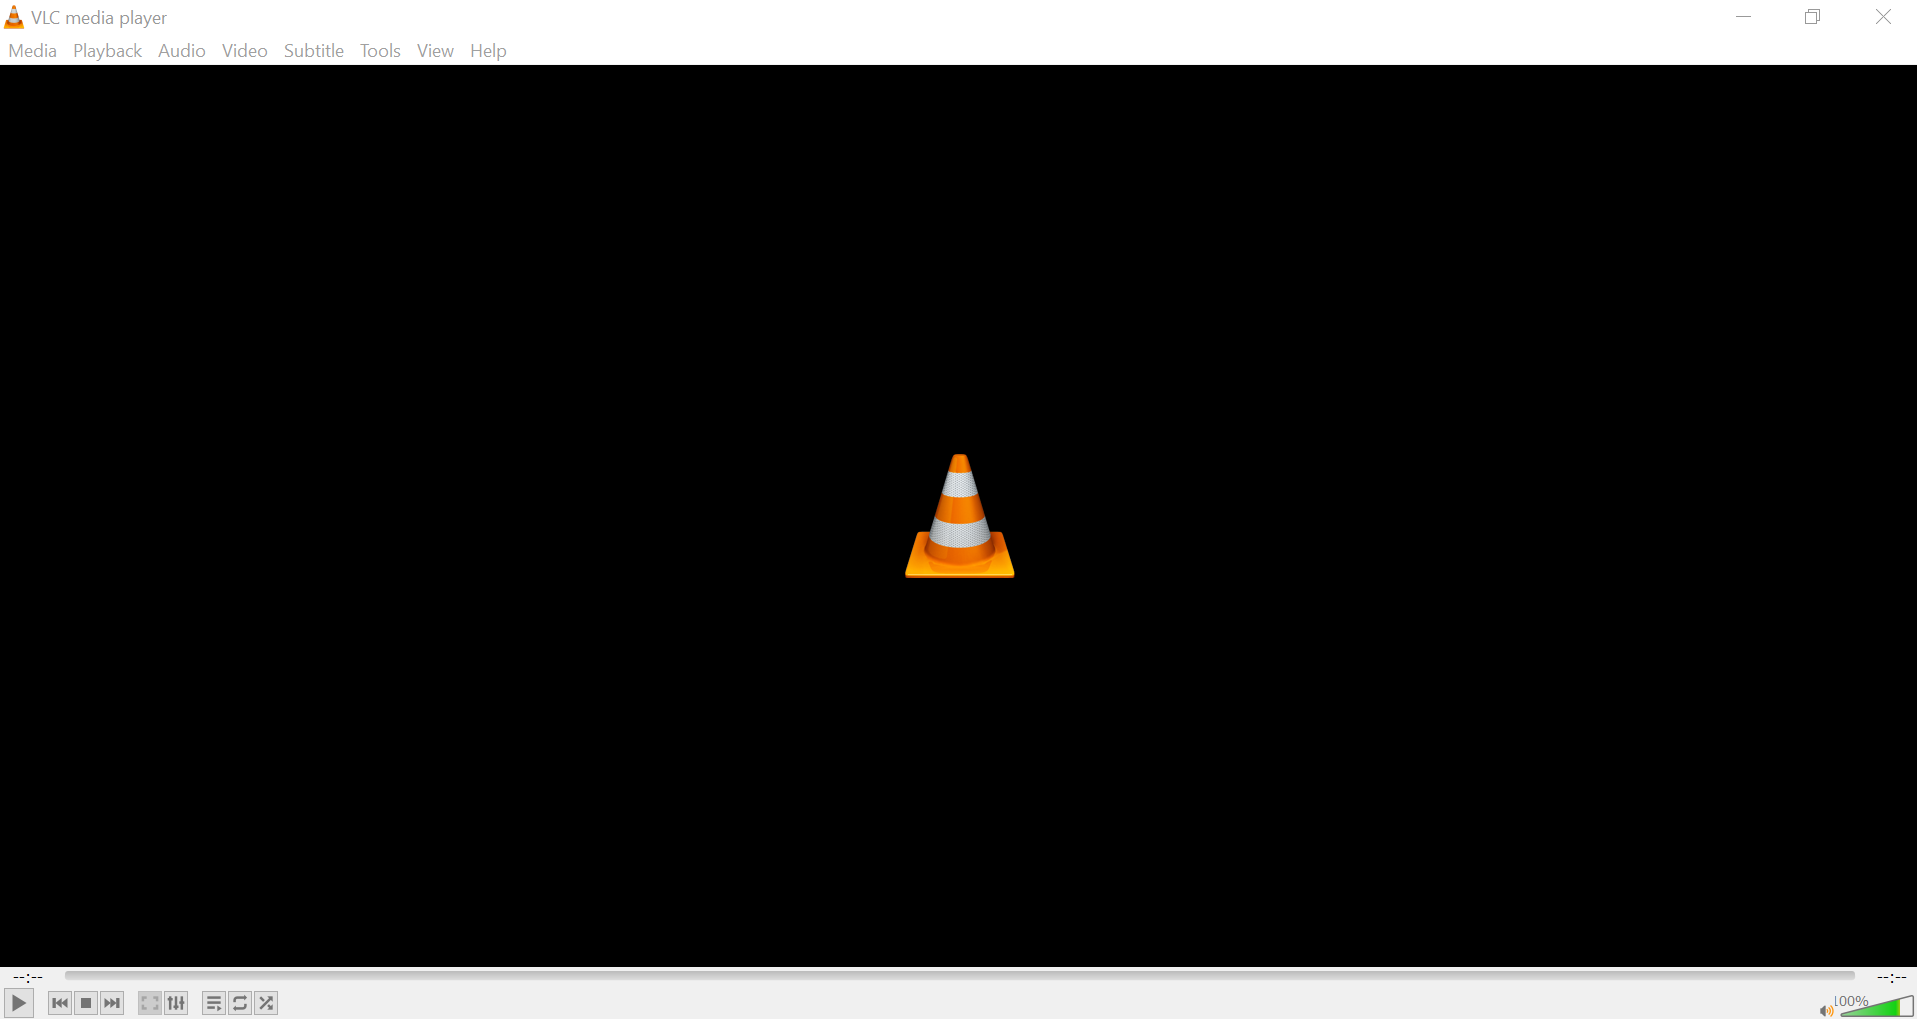
Figure 11: VLC Media Player
-
Select Media > Open Network Stream from the menu bar as shown below.
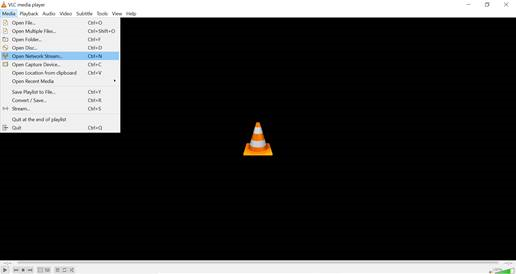
Figure 12: VLC Media Player Menu
-
In the Network Protocol field, enter this URL:
rtsp://<Node IP>:30410/vasserving1Click Play to run.
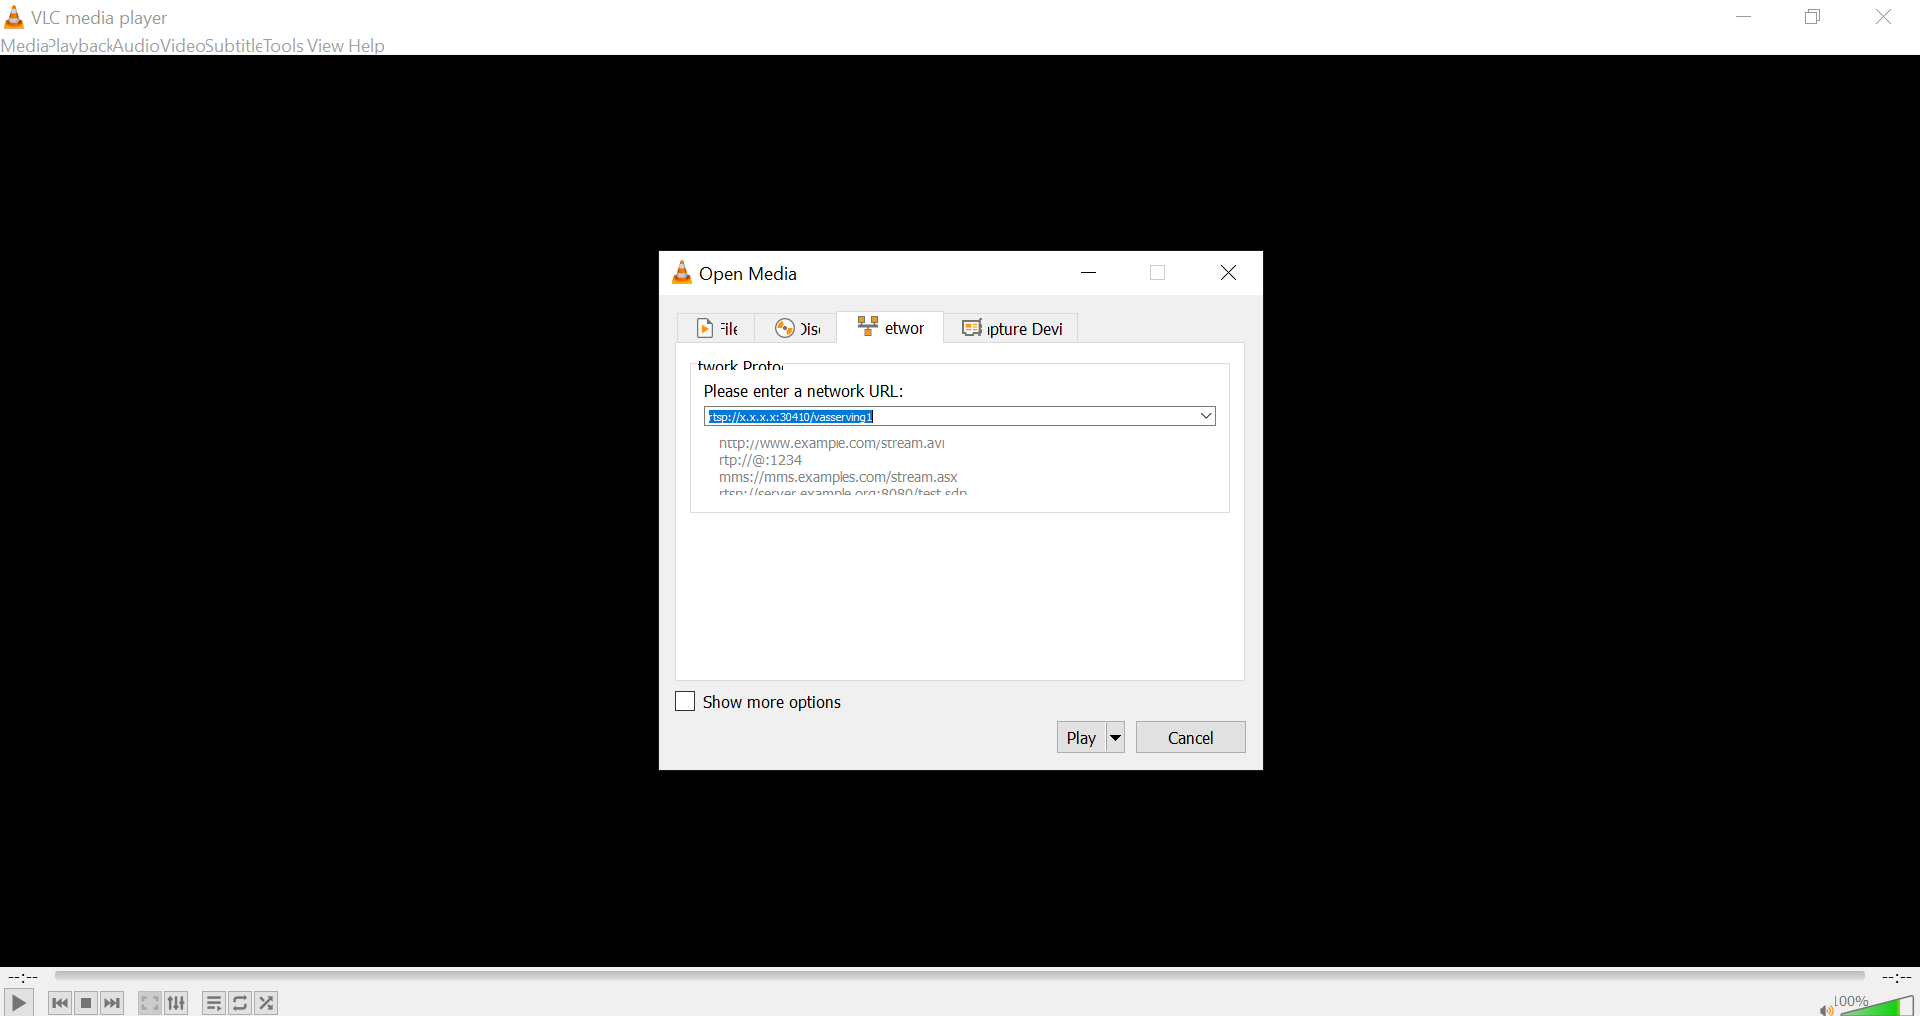
Figure 13: RTSP Stream in VLC Media Player
-
You will see output similar to the following image.

Figure 14: Streaming Output Visualization
Run Multiple Simultaneous Use Cases with EVAM
Multiple simultaneous pipelines can also created by invoking similar RESTful APIs as described above. When output frame passes through mqtt-broker, it is available for visualization at a mentioned path in "frame" section. While invoking multiple pipelines in parallel make sure each pipeline request has different path for visualization.
Create Pipeline 1: Object Detection Use Case
curl --location -X POST '<http://localhost:30409/pipelines/<Pipeline_name_1>/<Model_name_1>>' \
--header 'Content-Type: application/json' \
--data-raw '{
  "source": {
      "uri": "<the uri of video source that needs to be analyzed>",
      "type": "uri"
   },
  "destination": {
      "metadata": {
        "type": "mqtt",
        "host": "localhost:1883",
        "topic": "vaserving"
      },
    "frame": {
      "type": "rtsp",
      "path": "vasserving1"
    }
  }
}'
Create Pipeline 2: Object Classification Use Case
curl --location -X POST '<http://localhost:30409/pipelines/<Pipeline_name_2>/<Model_name_2>>' \
--header 'Content-Type: application/json' \
--data-raw '{
  "source": {
      "uri": "<the uri of video source that needs to be analyzed>",
      "type": "uri"
   },
  "destination": {
      "metadata": {
        "type": "mqtt",
        "host": "localhost:1883",
        "topic": "vaserving"
      },
    "frame": {
      "type": "rtsp",
      "path": "vasserving2"
    }
  }
}'
Here two different pipelines are created simultaneously. Let's say that one pipleline is objectdetection/personvehiclebike and the other is objectclassification/vehicle_attributes. Both pipelines use different video file sources as per their use cases.
NOTE: Both pipelines have different paths in the "frame" section for visualization. One pipeline uses
vasserving1path and the other pipeline usesvasserving2path.

Figure 15: Run Multiple Pipelines Simultaneously
If there are two parallel pipelines created with their path in "frame" section are vasserving1 and vasserving2 respectively, their output streaming URLs will be:
rtsp://<Node-IP-address>:30410/vasserving1
rtsp://<Node-IP-address>:30410/vasserving2
Summary and Next Steps
Edge Video Analytics Microservice (EVAM), when deployed on Intel® Smart Edge Open Developer Experience Kit created an impactful edge computing use-case that provides an ability to user to perform video processing, inference, and analytics operations by utilizing the capabilities of Intel® Smart Edge Open Developer Experience Kit.
Learn More
To continue learning, see the following guides:
- Intel® Smart Edge Open Developer Experience Kit Architecture
- Edge Video Analytics Microservice
- Customizing Video Analytics Pipeline Requests
- Defining Media Analytics Pipelines
Troubleshooting
If any issue is faced during installation, ensure that installation prerequisites are configured properly.
Pods Status Check
Verify that the pods are Ready as well as in Running state using the following command:
kubectl get pods -A
Pods are in “ImagePullBackOff” state for a long time
Describe the pods using the command:
kubectl describe pod -n smartedge-apps <pod name>
Fetch the image name with the tag and do a manual docker pull using the below commands:
docker login
docker pull <image-name:tag>
Pod status shows “ContainerCreating” for a long time
If Pod status shows ContainerCreating or Error or CrashLoopBackOff for 5 minutes or more, run uninstall command and install it again.
./edgesoftware uninstall -a
./edgesoftware install
Pod Status shows "pending" for a long time
If EVAM pod status is pending for 5 minutes or more, run the following command:
kubectl describe pods -n smartedge-apps
In EVAM pod, if you see the following event due to FailedScheduling, it may be possible that AVX-512VNNI instruction set is not available in system CPU as mentioned in the Node Feature Discovery section.
Events:
Type Reason Age From Message
---- ------ ---- ---- -------
Warning FailedScheduling 43s (x9 over 7m58s) default-scheduler 0/1 nodes are available: 1 node(s) didn't match Pod's node affinity/selector.
Uninstallation Failure
If uninstall command (./edgesoftware uninstall < module id >) fails, manually uninstall EVAM deployment, which are specific to EVAM pod.
helm -n smartedge-apps uninstall evam
sudo rm -rf /var/lib/smartedge/evam/
Installation and Debug Log Info File Path
Installation log info of Intel® Smart Edge Open Developer Experience Kit will be available at:
/var/log/esb-cli/Smart_Edge_Open_Developer_Experience_Kits_<version>/Smart_Edge_Open_Developer_Experience_Kits/install.log
Installation log info of Edge Video Analytics Microservice on Intel® Smart Edge Open Developer Experience kit module will be available at:
/var/log/esb-cli/Edge_Video_Analytics_Microservice_on_Developer_Experience_kit_<version>/Edge_Video_Analytics_Microservice_on_Developer_Experience_kit/install.log
Where <version> is the package version downloaded.
Support Forum
If you're unable to resolve your issues, contact the Support Forum.
Execute the command below to consolidate a list of the log files in tar.gz compressed format, e.g., Edge_Video_Analytics_Microservice_on_Developer_Experience_kit.tar.gz
tar -czvf Edge_Video_Analytics_Microservice_on_Developer_Experience_kit.tar.gz
/var/log/esb-cli/Edge_Video_Analytics_Microservice_on_Developer_Experience_kit_1.0.0/Edge_Video_Analytics_Microservice_on_Developer_Experience_kit/
/var/log/esb-cli/Smart_Edge_Open_Developer_Experience_Kits_3.0.0/Smart_Edge_Open_Developer_Experience_Kits/