Intel® Optimization for TensorFlow* is a ready-to-run optimized solution that uses oneAPI Deep Neural Network Library (oneDNN) primitives. This solution works with Intel® Advanced Vector Extensions instructions on 3rd generation Intel® Xeon® Scalable processors (formerly code named Ice Lake) for performance improvement.
This quick start guide provides instructions for deploying Intel Optimization for TensorFlow to Docker* containers. The containers are packaged by Bitnami on AWS* for the Intel® processors.
What's Included
Intel Optimization for TensorFlow includes the following precompiled binaries:
|
Intel®-Optimized Library |
Minimum Version |
|---|---|
| oneDNN | 2.5 |
Prerequisites
- An AWS account with Amazon EC2*. For more information, see Get Started with AWS EC2.
- 3rd generation Intel Xeon Scalable processor (formerly code named Ice Lake)
- oneDNN (included in this package)
Deploy Intel Optimization for TensorFlow
- Sign into the AWS console.
- To launch an Amazon* Machine Image (AMI) instance:
a) Go to your EC2 Dashboard, and then select Launch Instances.
b) In the search box, enter Ubuntu. The search results appear.
c) Select the appropriate Ubuntu* instance, and then select Next. The Step 2: Choose an Instance Type page appears.

- Select the region and any of the processors.
Note For the latest information on the Intel Xeon Scalable processor, see Amazon EC2 M6i Instances. - Select Next: Configure Instance Details. The Step 3: Configure Instance Details page appears.
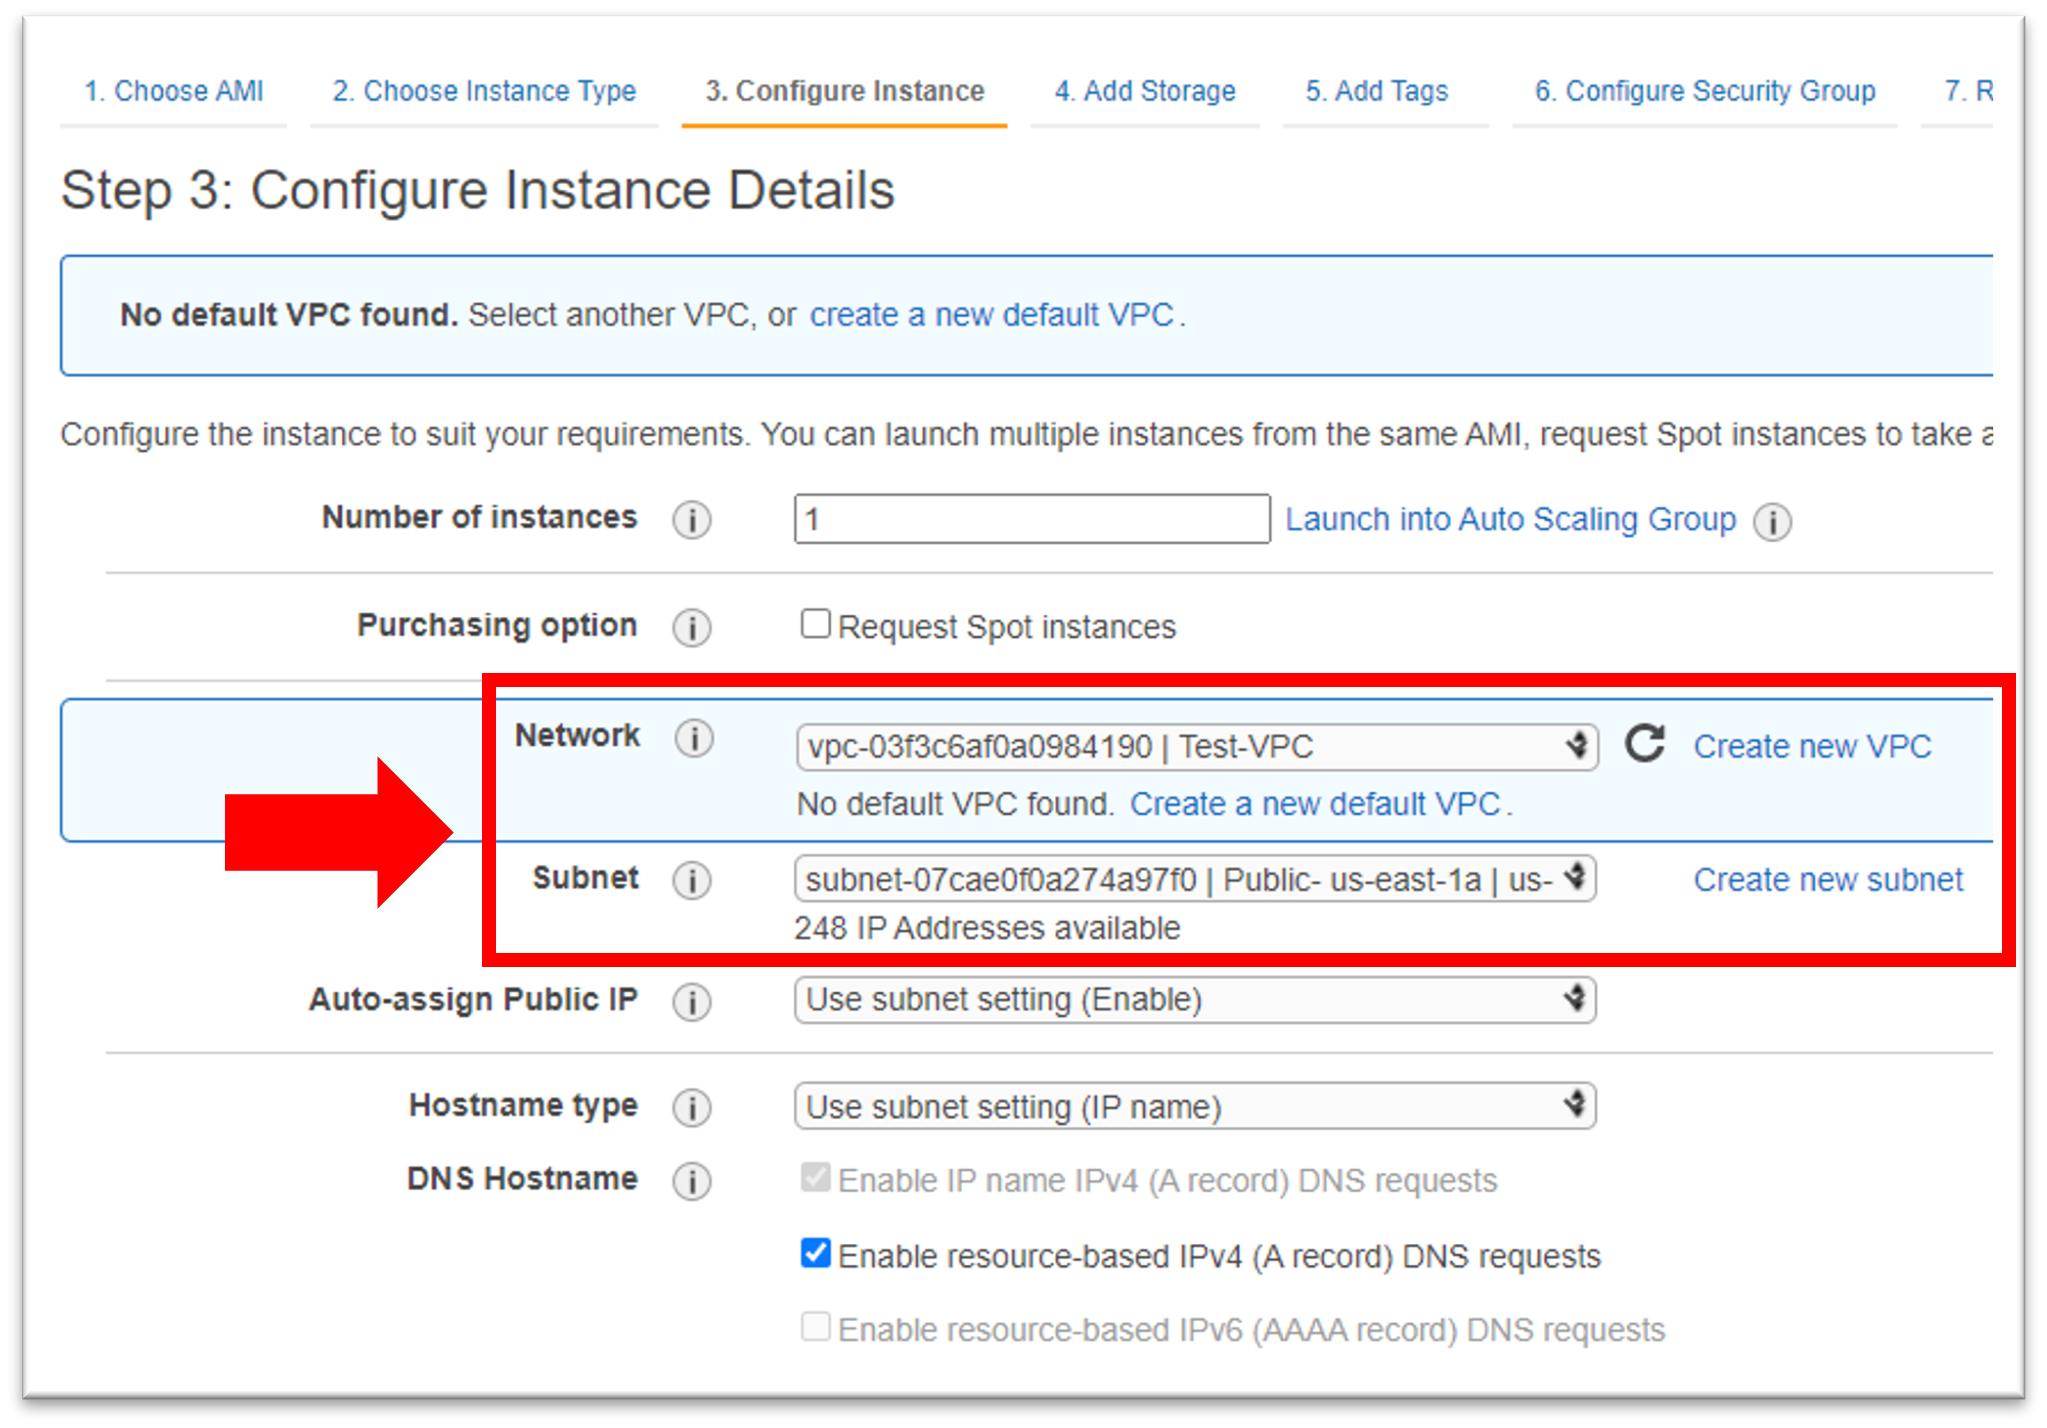
- To designate where your instance launches, do the following:
- Network: Select the VPN.
- Subnet: Select the IP address.

- Select Add Storage. The Step 4: Storage page appears.
- Adjust the storage size as needed, and then select Add a Tag. The Step 5: Add a Tag page appears.
- (Optional) To create a tag, select Adds a Tag, and then select Configure Security Group. The Step 6: Configure Security Group page appears.
- To create a security group:
- Select Create a new security group.
- In Security group name, enter the name.
- In Description, enter the security group description.
- In Port Range, enter 22.

- Select Review and Launch. The Review Instance Launch page appears.
- Review your entries. If you need to make edits, select the appropriate Edit link.
- When you're done, select Launch. The Select an existing key pair or create a new key pair page appears.

- Select the key pair that you created, and then select Launch Instances. The Instances page appears and shows the status of your launch.

- To launch your instance, in the left column, select the appropriate checkbox.
- In the upper-right corner, select Connect. The Connect to instance page appears.

- Select the SSH client tab, copy the command under Connect to your instance using its Public DNS.

- To connect to the instance, open a terminal window, and then enter the following:
- SSH command
- The path and file name of the private key (.pem)
- The username for your instance
- The public DNS name
After the SSH connects to the virtual machine, you can deploy Intel Optimization for TensorFlow to a Docker container.
- If needed, install Docker on Ubuntu.
- To use the latest Intel Optimization for TensorFlow image, open a terminal window, and then enter this command: docker pull bitnami/tensorflow-intel:latest
Note Intel recommends using the latest image. If needed, you can find all versions in the Docker Hub Registry. - To test Intel Optimization for TensorFlow, start the container with this command: docker run -it --name tensorflow-intel bitnami/tensorflow-intel
Note tensorflow-intel is the container name for the bitnami/tensorflow-intel image.
For more information on the docker run command (which starts a Python* session), see Docker Run.
The container is now running. -
Import Intel Optimization for TensorFlow into your program. The following image demonstrates commands you can use to import and use the TensorFlow API.

For more information about using TensorFlow and its API, see TensorFlow Introduction and TensorFlow API.
Connect
To ask product experts at Intel questions, go to the Intel Collective at Stack Overflow, and then post your question with the intel-cloud tag.
For queries about the Intel Optimization for TensorFlow image on Docker Hub, see the Bitnami Community.
To file a Docker issue, see the Issues section.